Tracking user interactions accurately is one of the most important parts of any analytics setup. While GTM provides built-in click and form triggers, real-world implementations often require more flexibility.
That’s where dataLayer.push() becomes essential.
In this guide, you will learn how to implement custom event tracking using dataLayer.push() and send the data to GA4 via GTM.
Why Use dataLayer.push() for Event Tracking?
Relying only on GTM click or form triggers can quickly become limited when:
- The element is dynamically generated
- You need to pass custom parameters (e.g. product type, page type)
- You want consistent tracking across multiple templates
- You’re working with e-commerce or SPA (Single Page Application) behavior
Using dataLayer.push() solves these issues by allowing developers to explicitly send structured data into GTM.
How dataLayer.push() Works
The process works like this: When a user interaction occurs (e.g., a click), a custom event is pushed into the data layer. GTM then listens for this event using a Custom Event Trigger, and finally sends the data to GA4 via a configured tag.
Use Case Example
Let’s assume we want to track clicks on this location:

We will modify this element to send a custom event when clicked.
Step 1: Implement dataLayer.push() in the Code
The source code for tracking location is:
<a>dataLayer.push demo test</a>
DE needs to add dataLayer.push as:
dataLayer.push = ({
    'event': 'test',
    'pageType': 'product'
});
Add an onclick handler to the element:
<a onclick="dataLayer.push({'event': 'test','pageType': 'product'});">dataLayer.push demo test</a>

Once clicked, this event will be pushed into the data layer.
- event: ‘test’ → defines the custom event name for GTM
- pageType: ‘product’ → sends additional contextual data
Step 2: Create a Data Layer Variable in GTM
To capture the pageType value,in GTM, click「 Variables」——「New」——「Choose a variable type to begin setup…」——「Data Layer Variable」, name it “dlv-Page Type”, and then set as follows:

Step 3: Create a Custom Event Trigger
Now we need GTM to listen for the event.
In GTM , click「Triggers」——「New」——「Choose a trigger type to begin setup…」——「Custom Event」,Name it “dataLayer.push demo”, and make the following settings:
Whatever the value of the event in dataLayer.push is, fill in the event name.
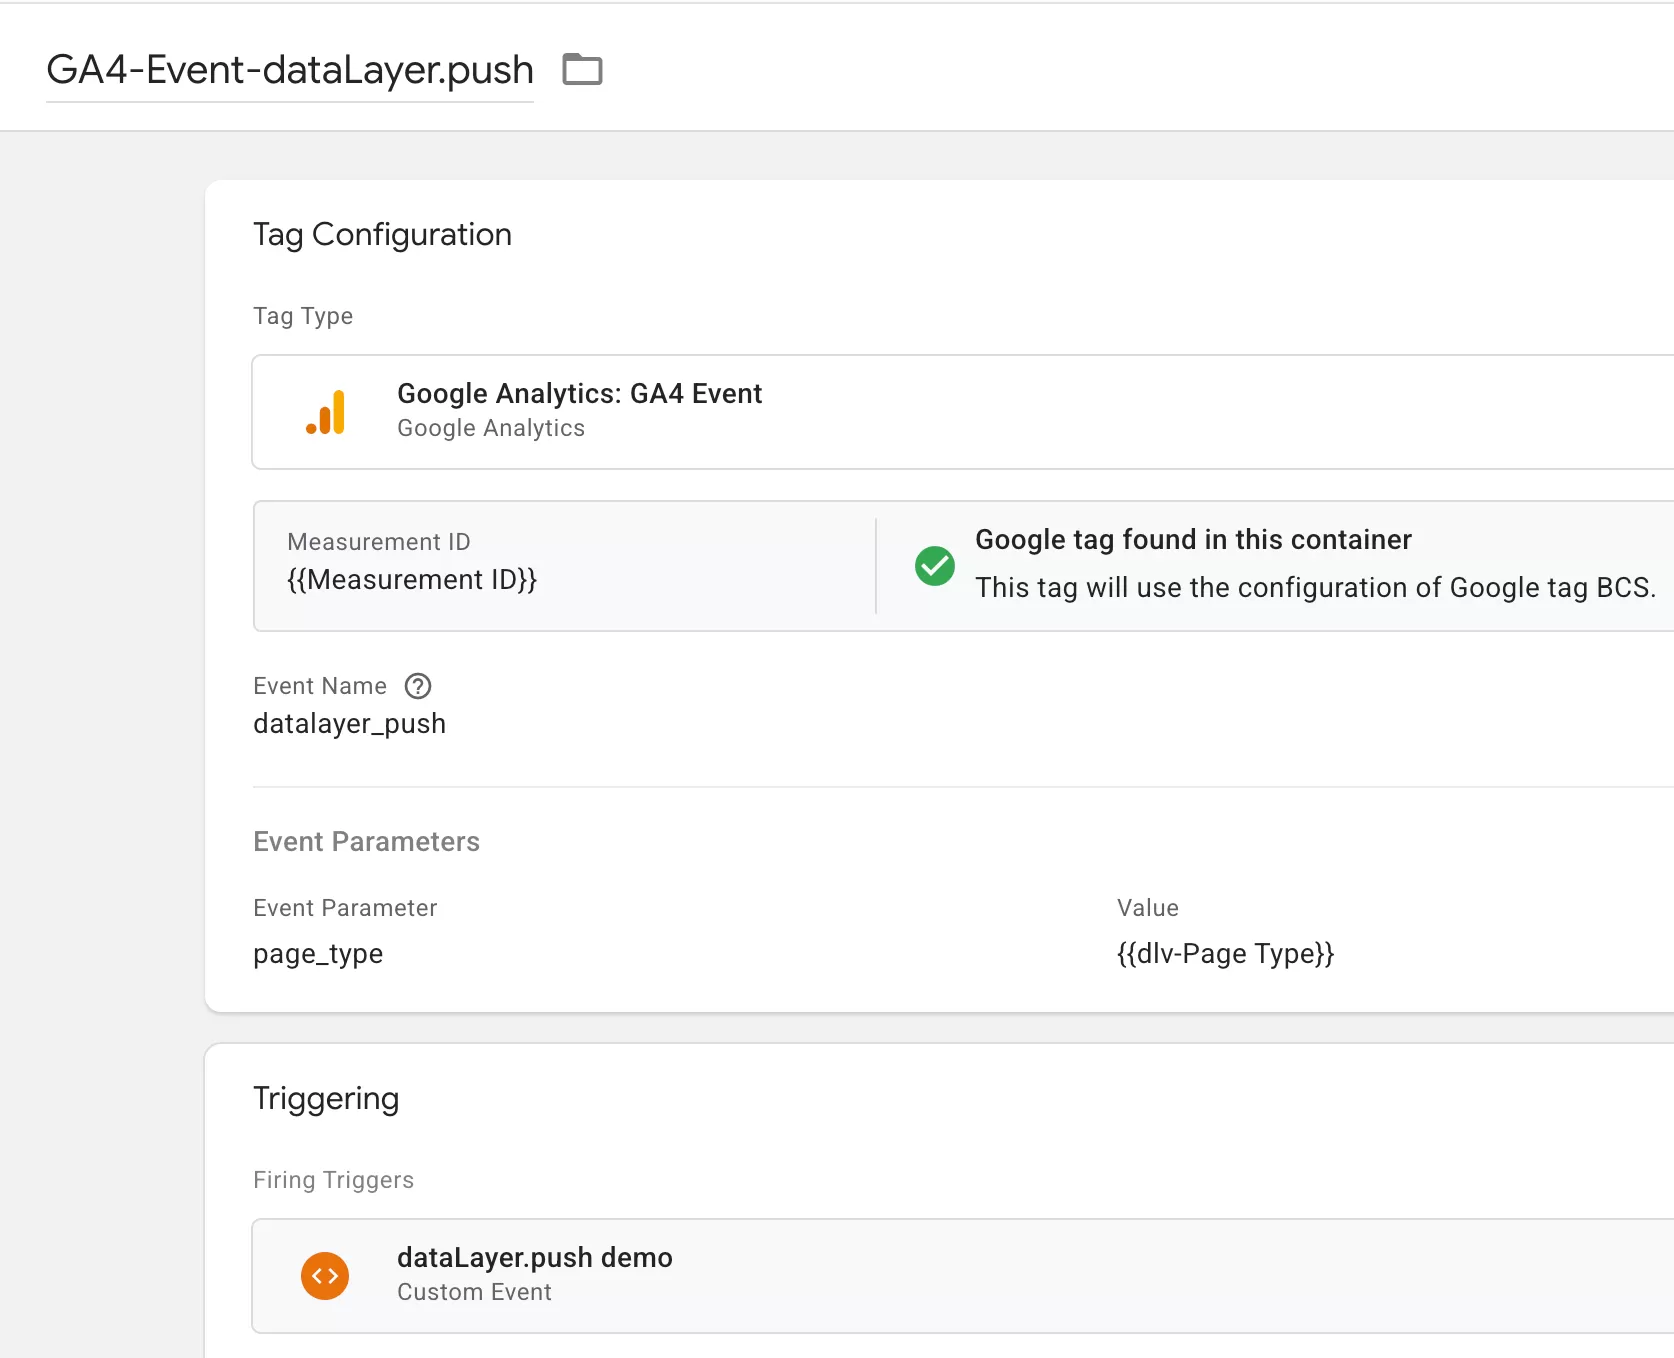
Step 4: Create a GA4 Event Tag
In GTM , click「Tags」——「New」——「Choose a tags type to begin setup…」——「Google Analytics: GA4 Event」,Name it “GA4-Event-dataLayer.push”, and make the following settings:
Step 5: Debug and Validate in GTM Preview Mode
Next is the Preview test:

Tags is triggered, click it to open and check whether the value of the event parameter page_type is accurate:

The event parameters are accurate, and can be published.
Step 6: Register Custom Dimension in GA4
The next step is to register event parameters page_type, if you want to use it in GA4, you need to register it in the Custom definitions of GA4.
In GA4,click「Admin」——「Custom definitions」——「Create custom dimension」, then do the following configuration:

Step 7: Verify Data in GA4 Reports
Generally, after 24 hours, You can validate it in GA4, such as:
Frequently Asked Questions