Updated: December 19, 2025
Important: GA4 does not allow sending personally identifiable information (PII). If you implement this approach, you must encrypt the IP address before sending it to GA4. This article is for demonstration purposes only. This blog does not collect user IP.
If you’ve looked for an IP address field in GA4, you already know — it’s not there. No IP dimension, no way to filter by it, nothing.
But sometimes you need it. Debugging regional traffic, analyzing VPN patterns, cross-referencing with CRM data. GA4 doesn’t make this easy, but it’s possible.
I’ve seen people send raw IPs straight to Google and hope for the best. Don’t do that — it violates GA4’s terms. The responsible way is to encrypt the IP, store it in a first-party cookie, and pass it as an encrypted user-scoped custom dimension.
Let me show you how.
How This Works (The Big Picture)
Before we get into the nitty-gritty, here’s the flow at a high level:
- On every page load, a Custom HTML tag calls a third-party API to get the user’s IP address.
- The IP gets encrypted using JavaScript (so no raw IP ever touches GA4).
- The encrypted value gets stored in a first-party cookie.
- GTM reads the cookie and passes the value to GA4 as a User Property.
- GA4 stores it as a user-scoped custom dimension.
The key here is encryption. GA4’s terms prohibit sending PII, and a raw IP address counts as PII. By encrypting it, you’re sending an opaque string that GA4 can store but can’t reverse-engineer into an IP. If you need to map it back later, you do that on your own systems — not in GA4.
Step 1: Create the Custom HTML Tag
First, we need a tag that runs on every page to fetch the IP and encrypt it.
In GTM, click 「Tags」——「New」—— 「Choose a tag type to begin setup…」 ——「Custom HTML」 and then configure the tag as follows: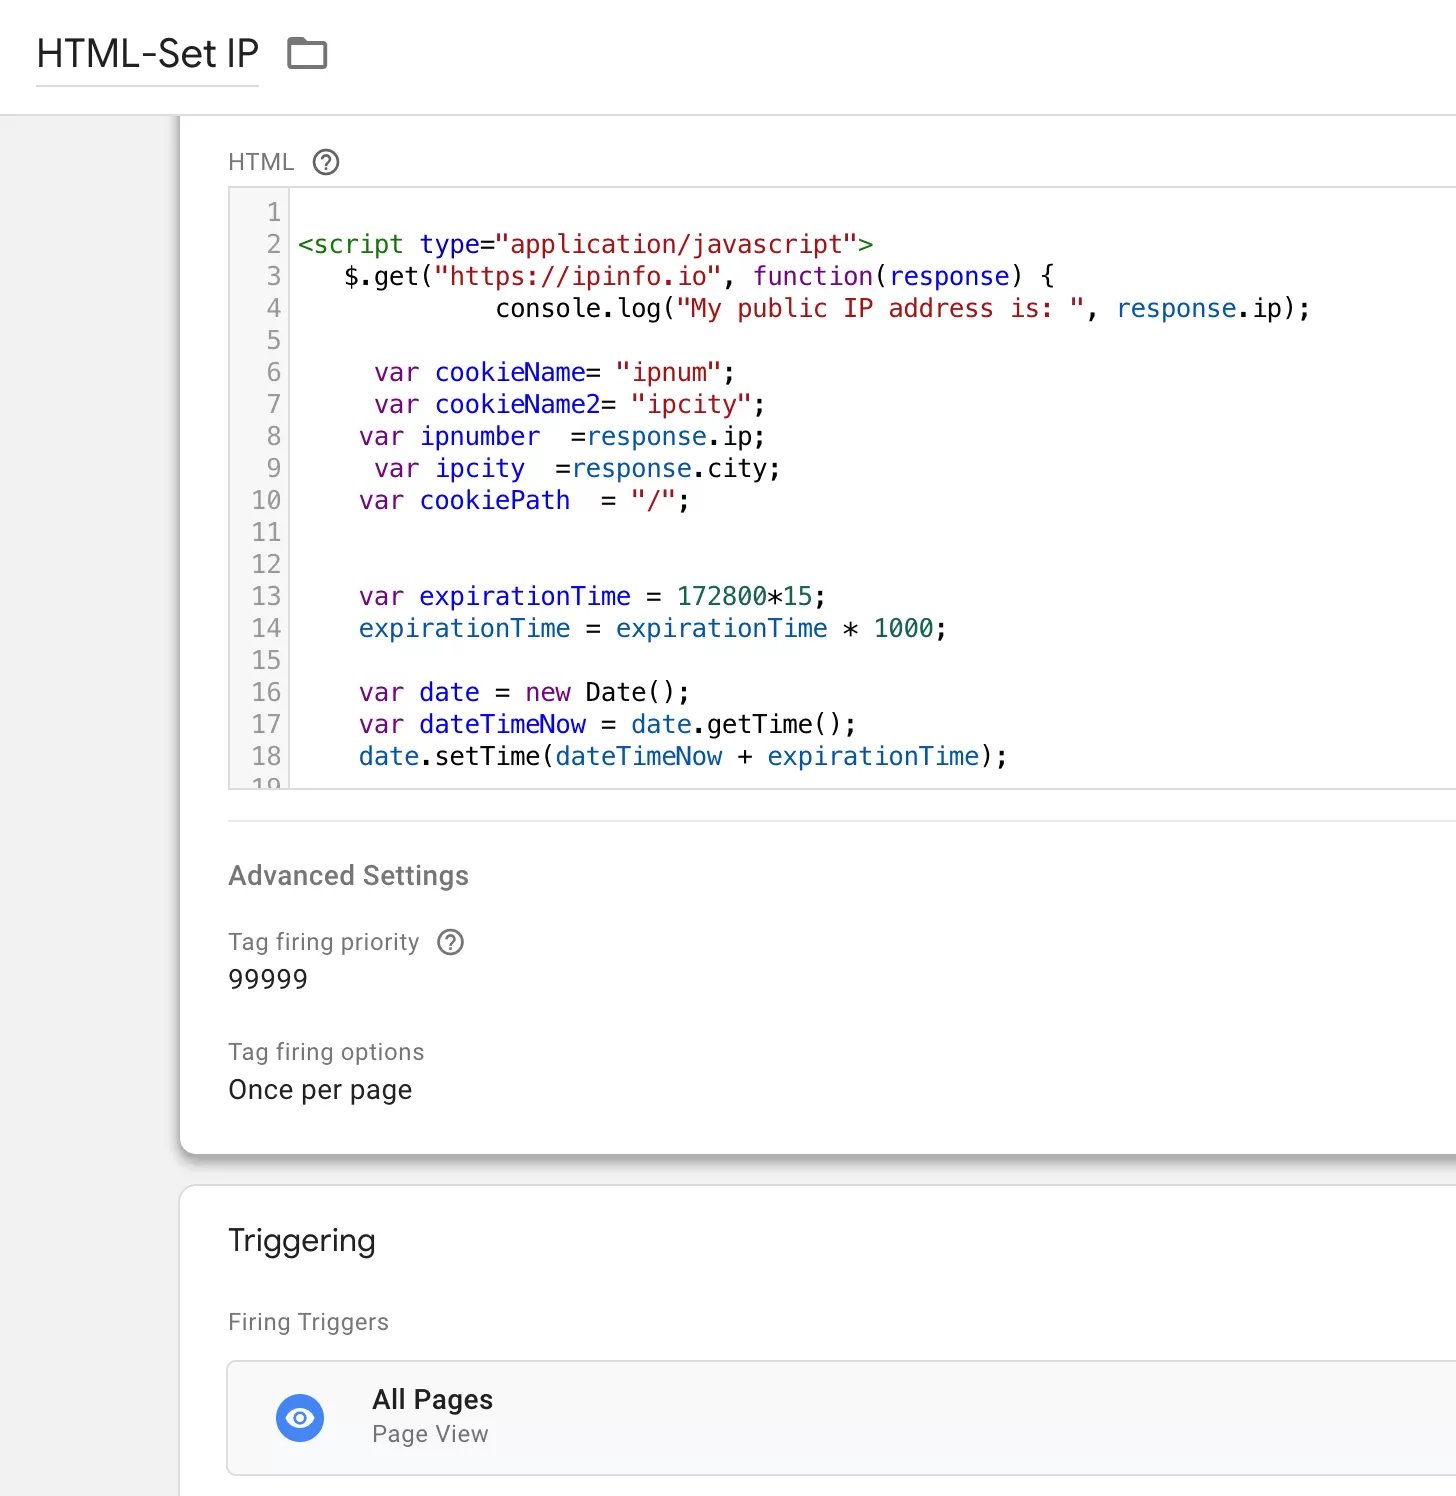
Here’s the catch with timing: this tag needs to fire before your GA4 configuration tag. Otherwise, GA4 will send the pageview before the IP value is available.
I set the tag firing priority to 9999 (higher priority = fires earlier) to make sure it runs first. Then I add the GA4 config tag to fire after it, using GTM’s tag sequencing feature.
Code:
Step 2: Read the Cookie in GTM
Once the encrypted IP is stored in a first-party cookie, reading it in GTM is straightforward.
In GTM, click 「Variable」——「New」—— 「Choose a variable type to begin setup…」 ——「1st Party Cookie」 and then make the following configuration:
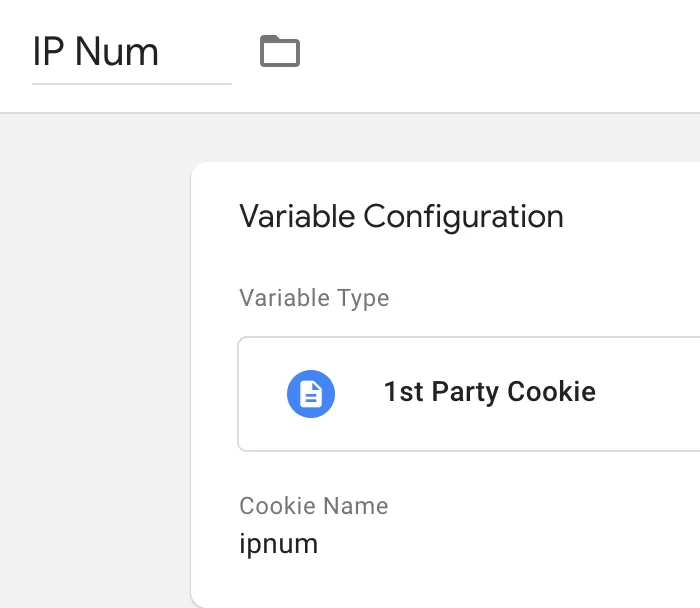
If you’re also capturing the user’s city (from the same IP API), repeat the same process for that value. I usually create two variables — Encrypted IP and Encrypted City — so I have both available if needed.
Step 3: Set Up User Properties in GA4
Now we need to send these values to GA4. The cleanest way is through a Google Tag: Event Settings variable.
In GTM, click 「Variable」——「New」—— 「Choose a variable type to begin setup…」 ——「Google Tag: Event Settings」 and then make the following configuration:
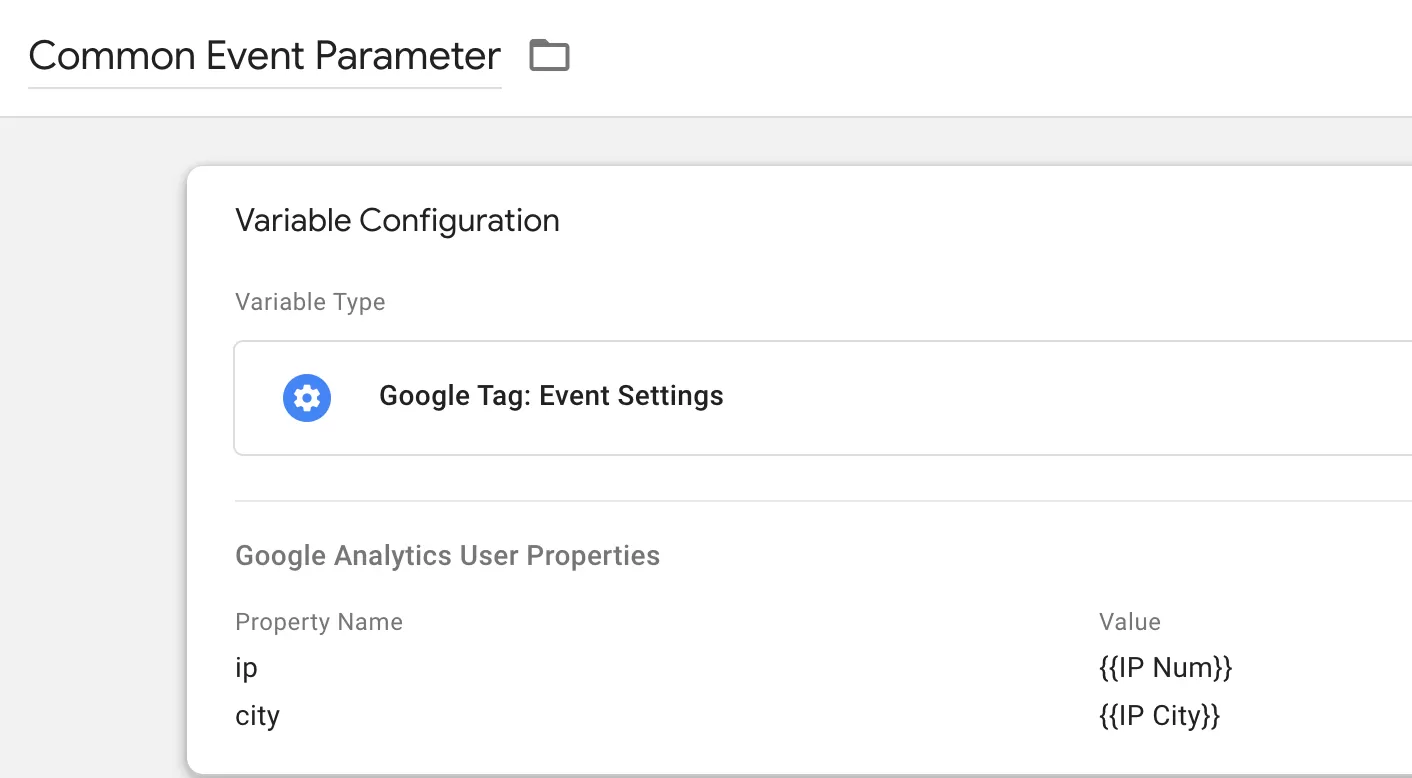
Now, attach this Event Settings variable to your GA4 configuration tag:
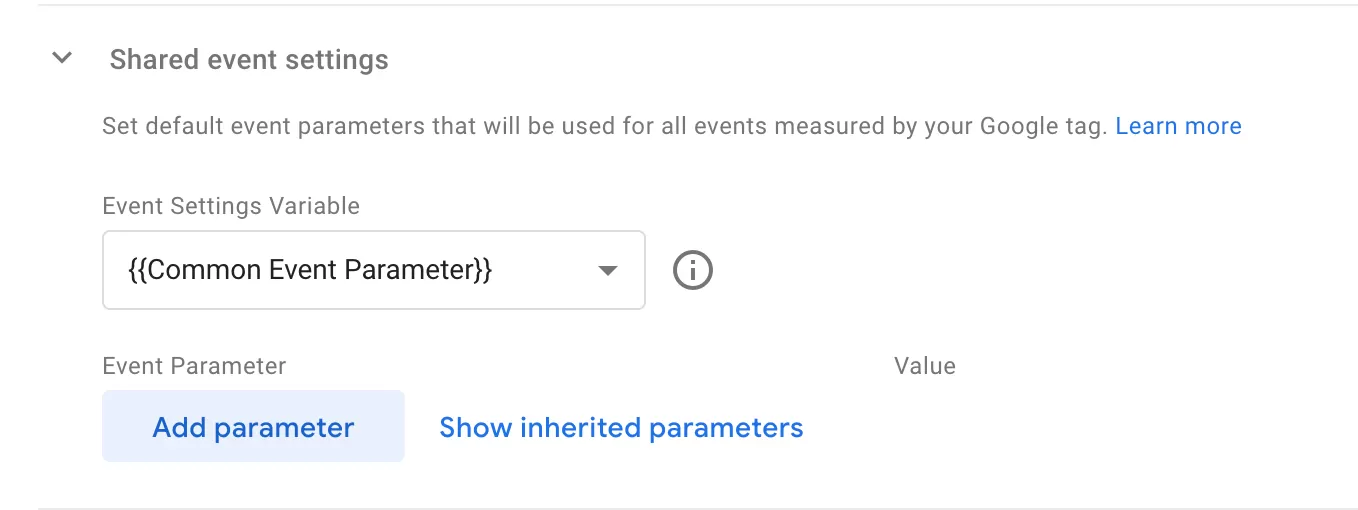
This ensures that every event sent from your site includes encrypted_ip as a User Property.
Step 4: Preview and Debug
Before publishing, test everything thoroughly.
Click 「Preview」 in GTM, enter debug mode:
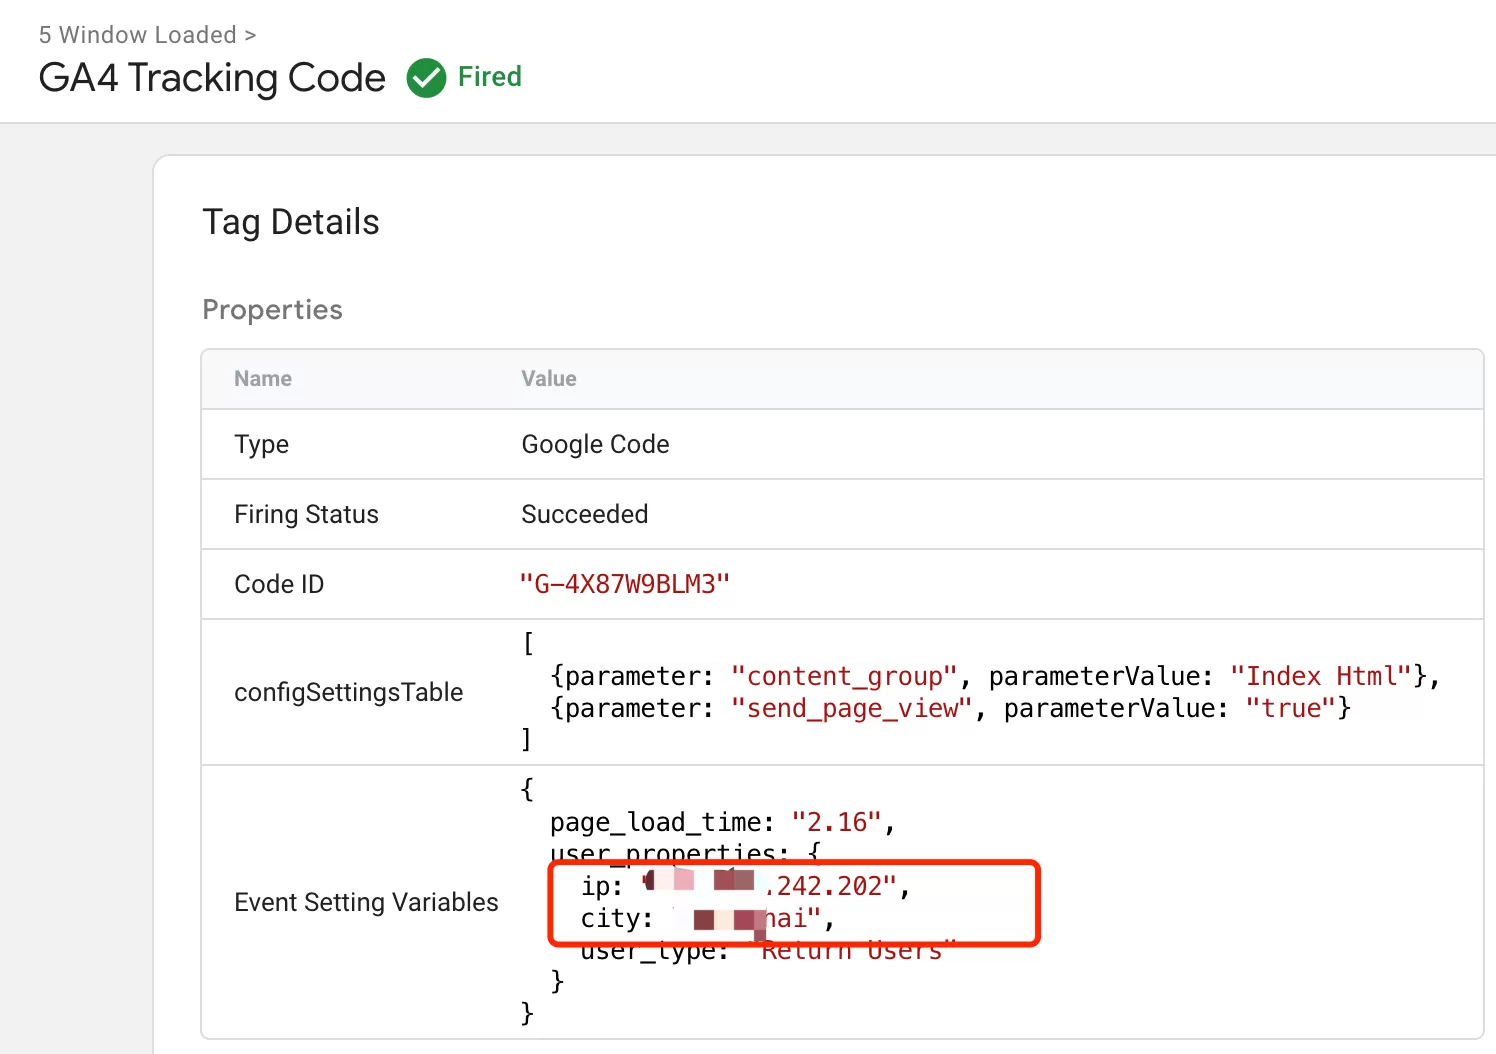
If you see encrypted_ip with a value (it should look like a scrambled string, not an IP address), you’re good.
Step 5: Register the Custom Dimension in GA4
This step is easy to forget. Even though you’re sending the data from GTM, GA4 won’t surface it in reports until you register it as a custom dimension.
In GA4,click「Admin」——「Custom definitions」——「Create custom dimension」, configure the dimension as follows::
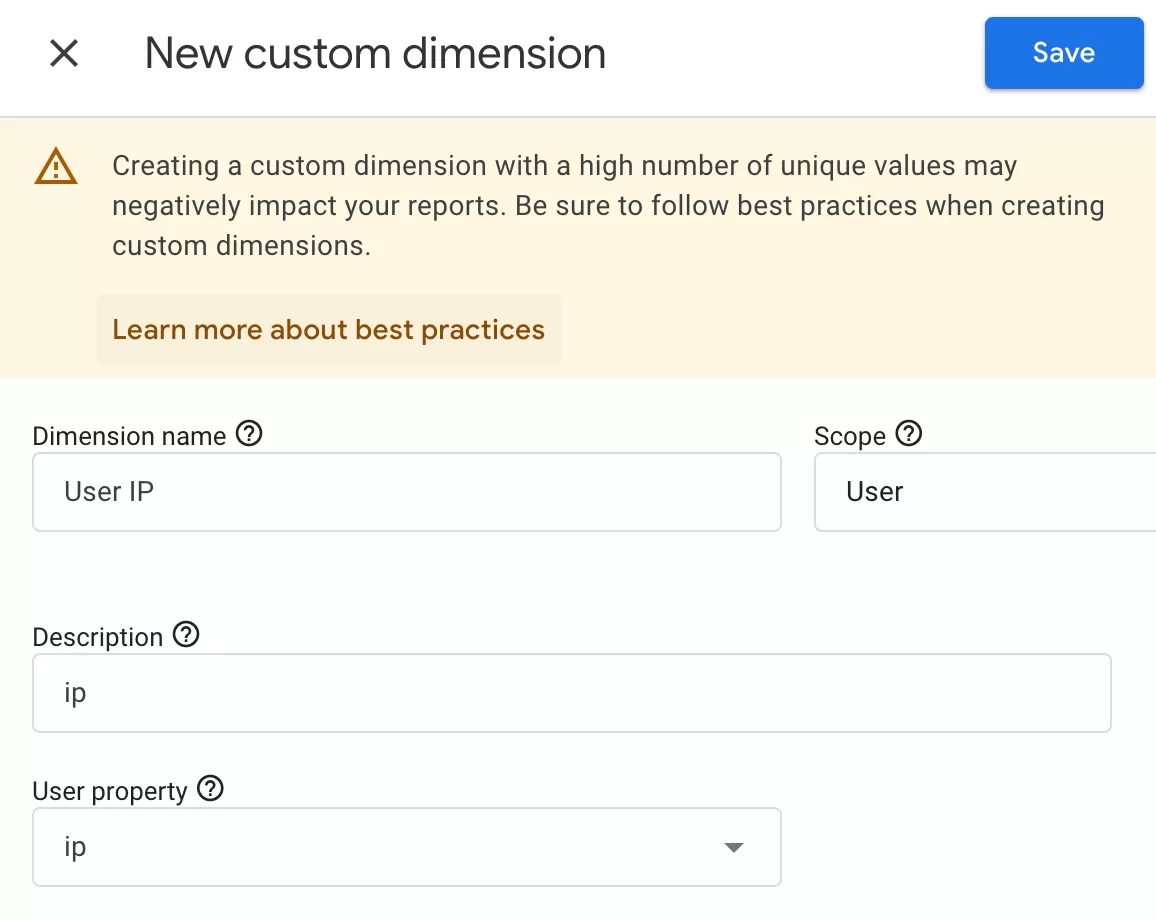
After this, GA4 will start collecting the dimension. A quick heads-up: it can take up to 24 hours for the dimension to appear in reports, and it won’t apply retroactively. Only new events after registration will carry the encrypted IP.
A Few Things to Keep in Mind
I’ve set this up on a handful of properties, and here are the gotchas I’ve run into:
- Third-party APIs can fail. If the IP lookup API is down or slow, your Custom HTML tag might not complete before the GA4 tag fires. I recommend adding a fallback — if the IP fetch fails, the cookie stays empty and GA4 just doesn’t get an IP for that session. Better to miss one than to break your tracking.
- Encryption alone may not satisfy all legal requirements. Check with your legal team about whether encrypting an IP addresses is sufficient under GDPR or other regulations. In some cases, you may need to obtain consent before collecting IP data at all.
- User-scoped dimensions have cardinality limits. GA4 limits the number of unique values for a single dimension. Since IPs (even encrypted) are highly unique, on high-traffic properties you might see (other) aggregations. This is expected — the data is still there in raw exports, just rolled up in the UI.
Final Words
Capturing IP address in GA4 is one of those things that’s technically possible but requires careful handling. The approach I’ve laid out here — fetch, encrypt, store in a cookie, pass as an encrypted User Property — gives you the data you need while keeping you on the right side of Google’s terms of service.
That said, I’ll be honest: this is not a setup I recommend for every property. If you don’t have a clear use case for IP data in GA4, it’s extra complexity you don’t need. But if you do need it, this is the cleanest way I’ve found to make it work.