Updated: March 16, 2026
Have you ever wondered what people actually do with the content on your site? Beyond pageviews and clicks, there’s one user action that reveals a surprising amount of intent: copying text.
When someone copies an email address, a phone number, a product description, or a key piece of information, they’re telling you they found something valuable. The question is — are you tracking it?
In this tutorial, I’ll show you how to use Google Tag Manager to detect copy events, push the copied text into the Data Layer, and send it all to GA4.
How Copy Tracking Works
The implementation follows a straightforward chain:
- A Custom HTML tag injects a JavaScript listener onto the page.
- When a user copies text (Ctrl+C / Cmd+C), the script captures the selection.
- The copied text and its length get pushed into the Data Layer.
- A GA4 Event Tag reads those values and sends them to Google Analytics.
Let’s walk through it step by step.
Step 1: Inject the JavaScript listener
In GTM , click「Tags」——「New」——「Choose a tags type to begin setup…」——「Custom HTML」,Name it “HTML-Copy”, then add the following JavaScript code: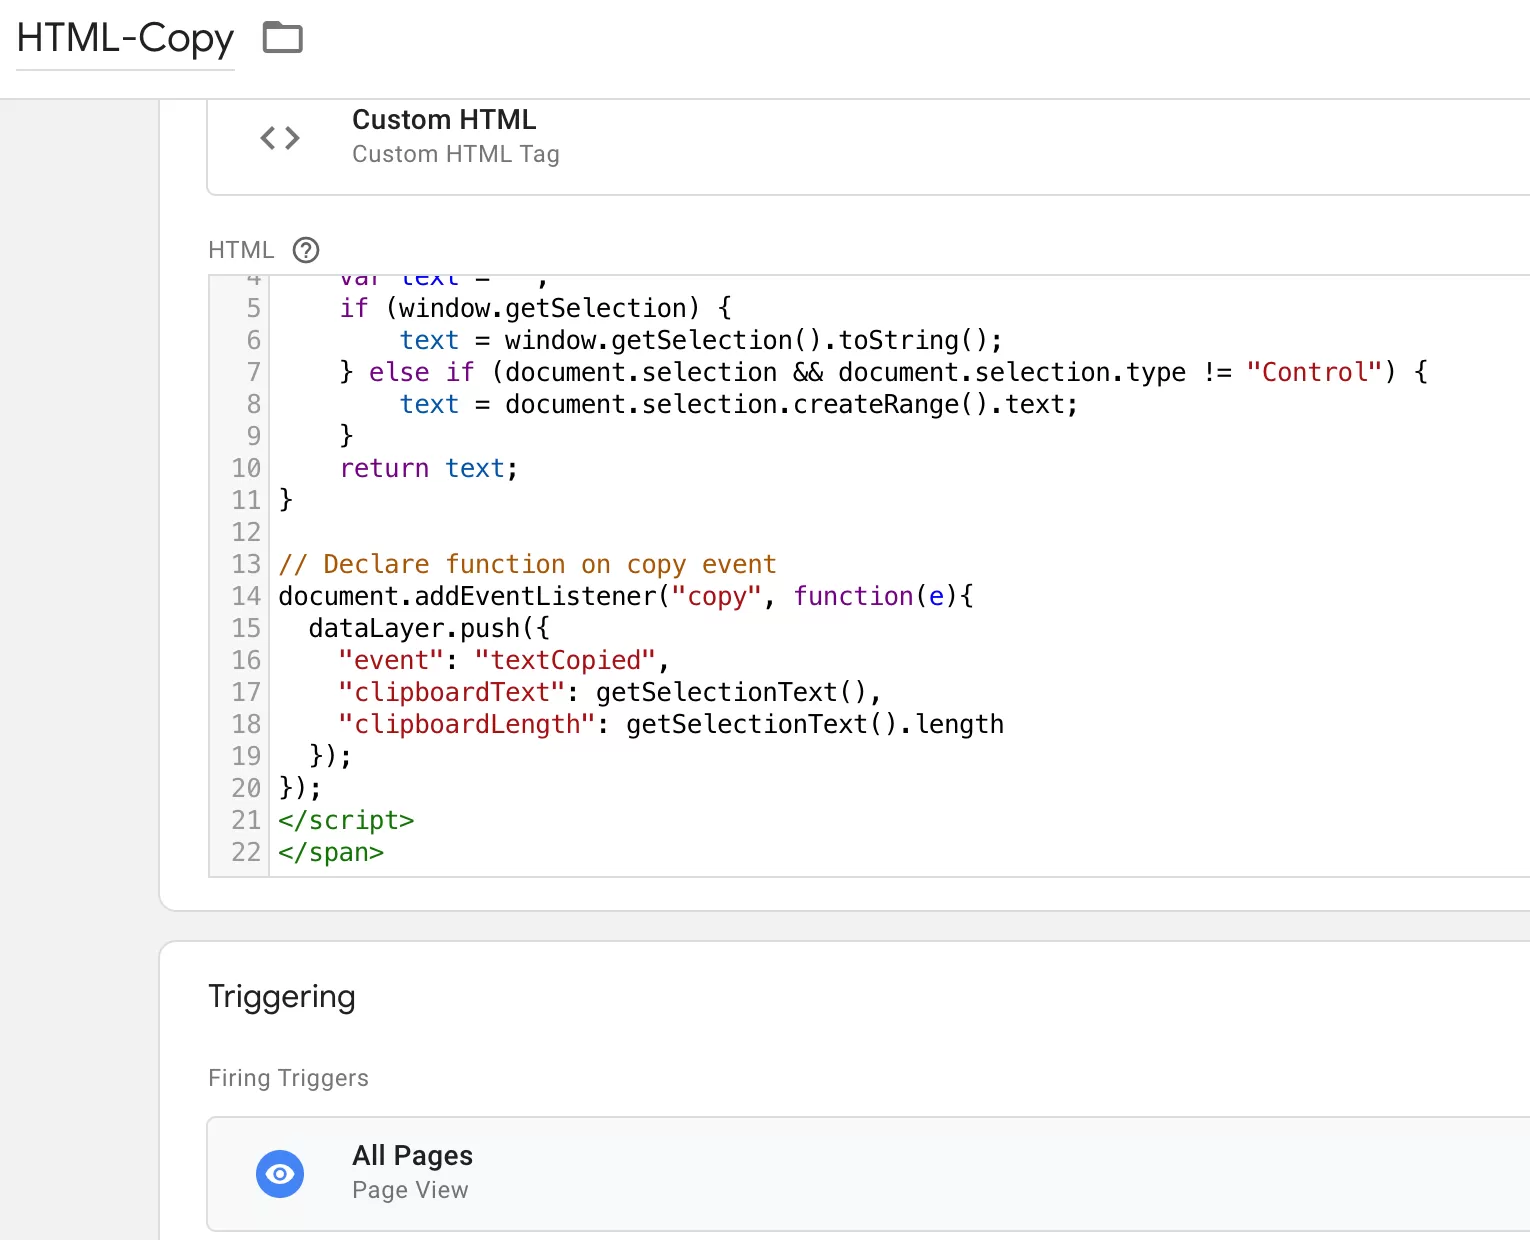
This script listens for any copy event on the page, grabs the selected text, and pushes it into the Data Layer along with its character length.
Tip: If you only want to track specific content — like email addresses or phone numbers — you can add a regex check inside the script so it only fires when the copied text matches a certain pattern.
Step 2: Set up the Custom Event Trigger
Now create a trigger that listens for our new event.
In GTM , click「Triggers」——「New」——「Choose a trigger type to begin setup…」——「Custom Event」,Name it “textCopied”, and make the following settings:
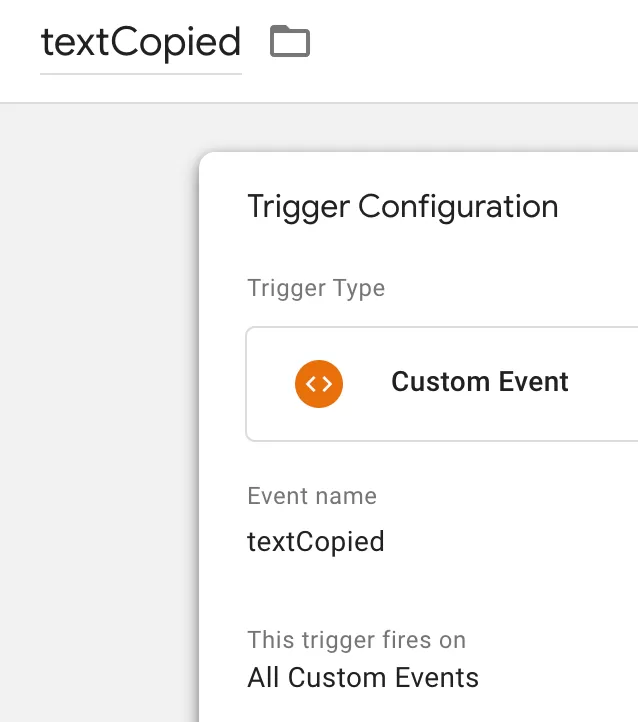
Step 3: Create Data Layer Variables
We pushed two values into the Data Layer: clipboardText and clipboardLength. We need variables to read those values.
In GTM , click「Variables」——「New」——「Choose a variables type to begin setup…」——「Data Layer Variable」,Name it “DL – Clipboard Text”, and make the following settings: 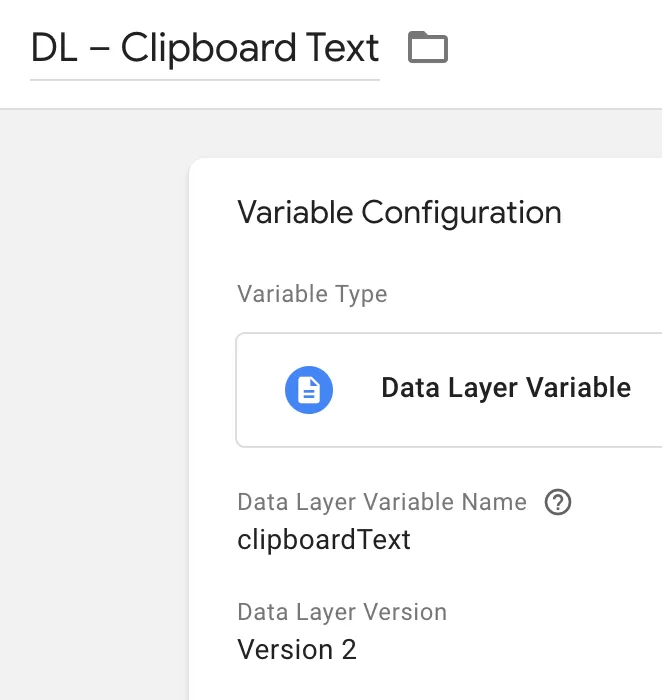
Similarly, set DL – Clipboard Length.
Step 4: Create the GA4 Event Tag
Now create a GA4 Event Tag to send the data to GA4.
In GTM , click「Tags」——「New」——「Choose a tags type to begin setup…」——「Google Analytics: GA4 Event」,Name it “GA4-Event-TextCopy”, and make the following settings: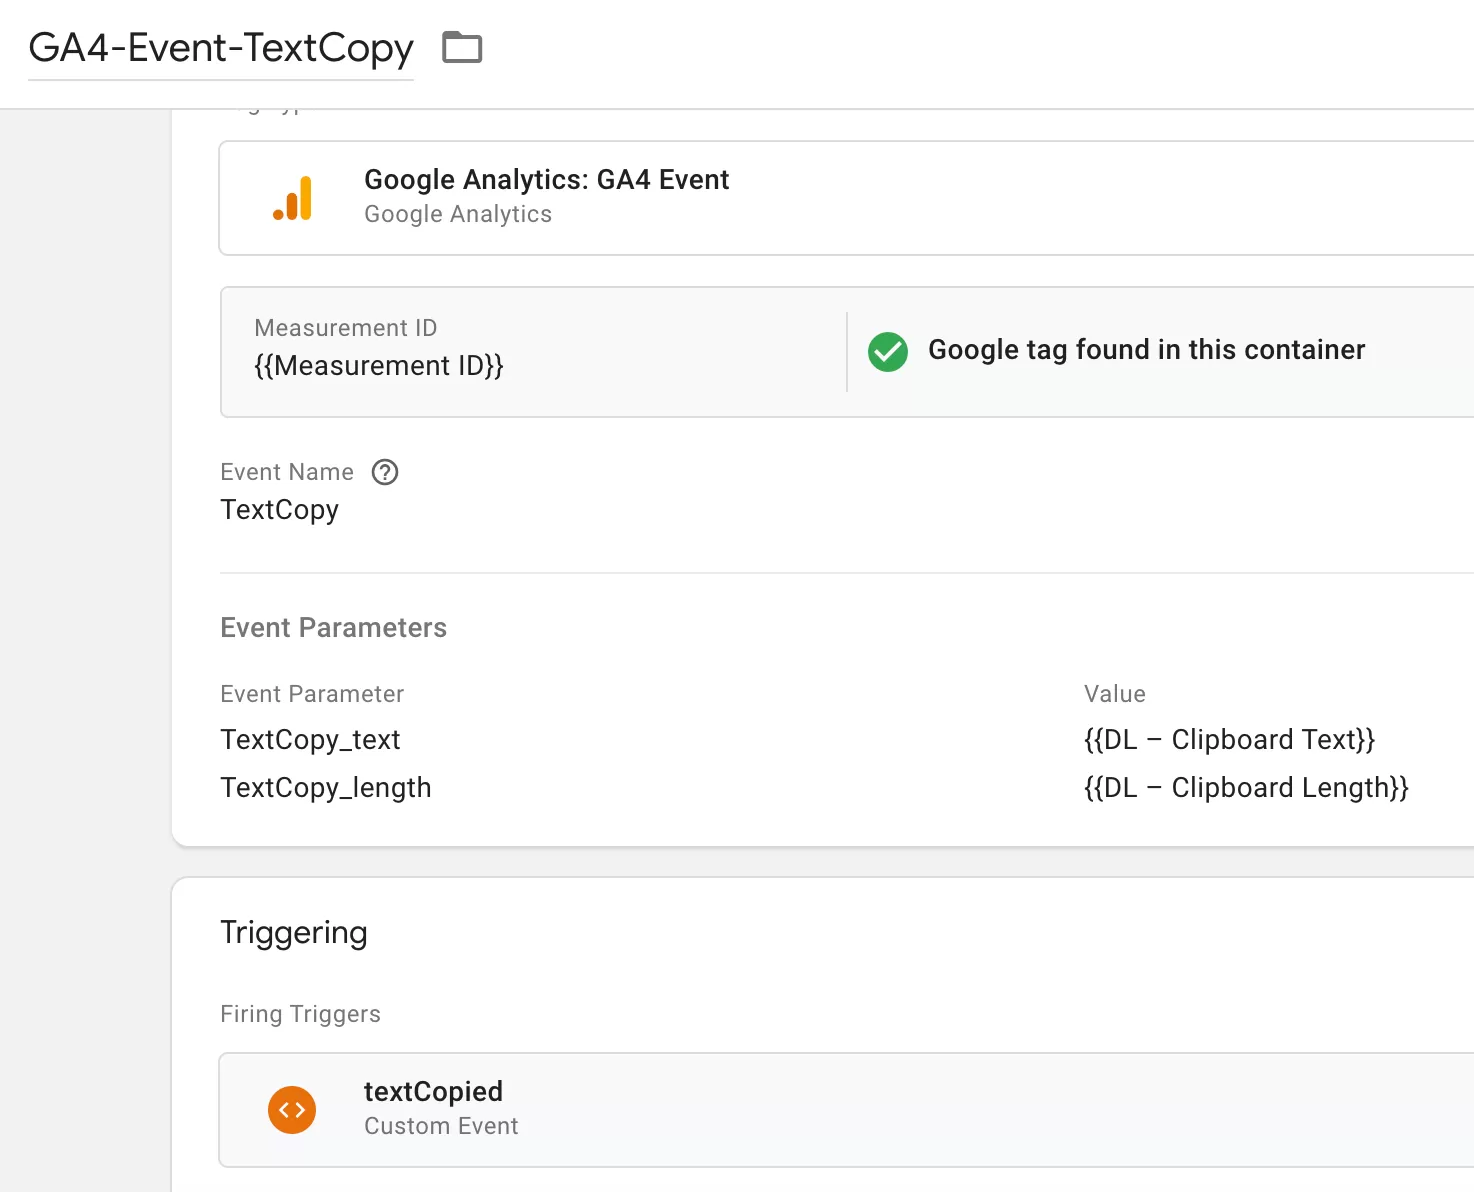
These parameters will pass the copied text and text length to GA4.
Step 5 : Preview and Publish
Before publishing, test it. Enable Preview Mode in GTM, open your site, and copy some text. Check the GTM debugger to confirm:
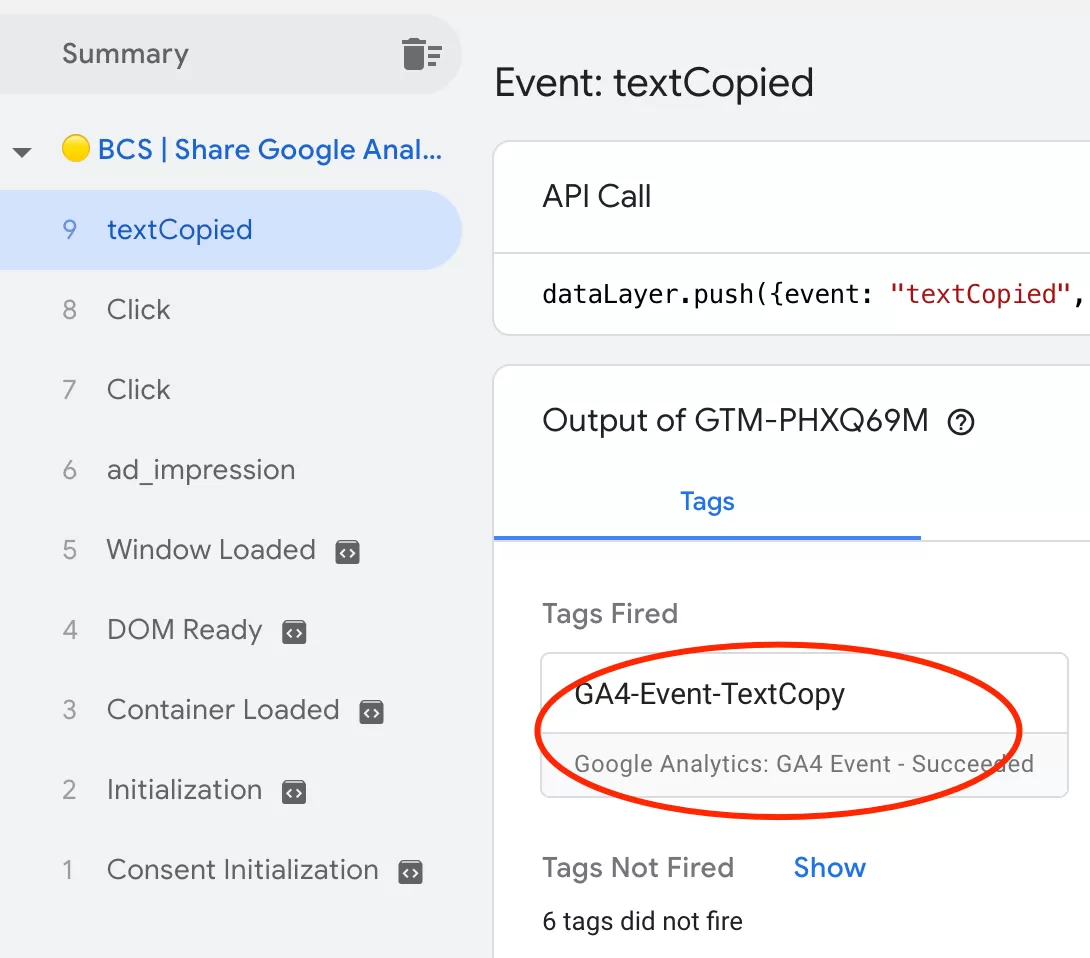
Copy any text on the page and check whether the tag fires in the GTM debugger.
You should also verify that the event parameters contain the correct values.

If everything works correctly, publish the container.
Step 6: Register Custom Definitions in GA4
We used two custom parameters — a dimension and a metric — so they need to be registered in GA4 before they’ll show up in reports.
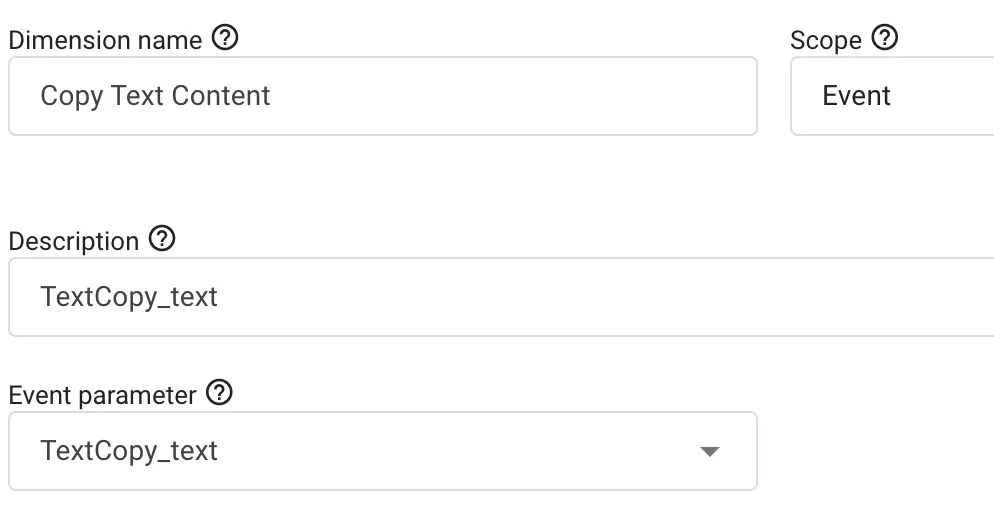
- TextCopy_text is event scope custom dimensions
- TextCopy_length is event scope custom metrics
In GA4,click「Admin」——「Custom definitions」——「Create custom dimension」, then do the following configuration:
In GA4,click「Admin」——「Custom definitions」——「Custom metrics」——「Create custom metrics」, then do the following configuration: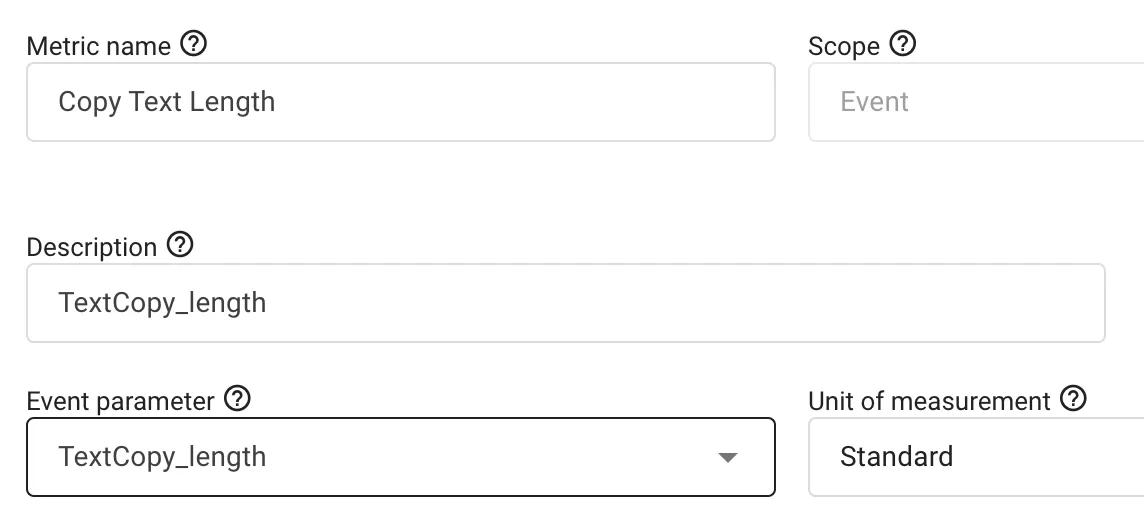
Step 7: Verify Data in GA4 Explore
Data usually appears within 24 hours. Once it’s there, go to Explore and build a Free Form report: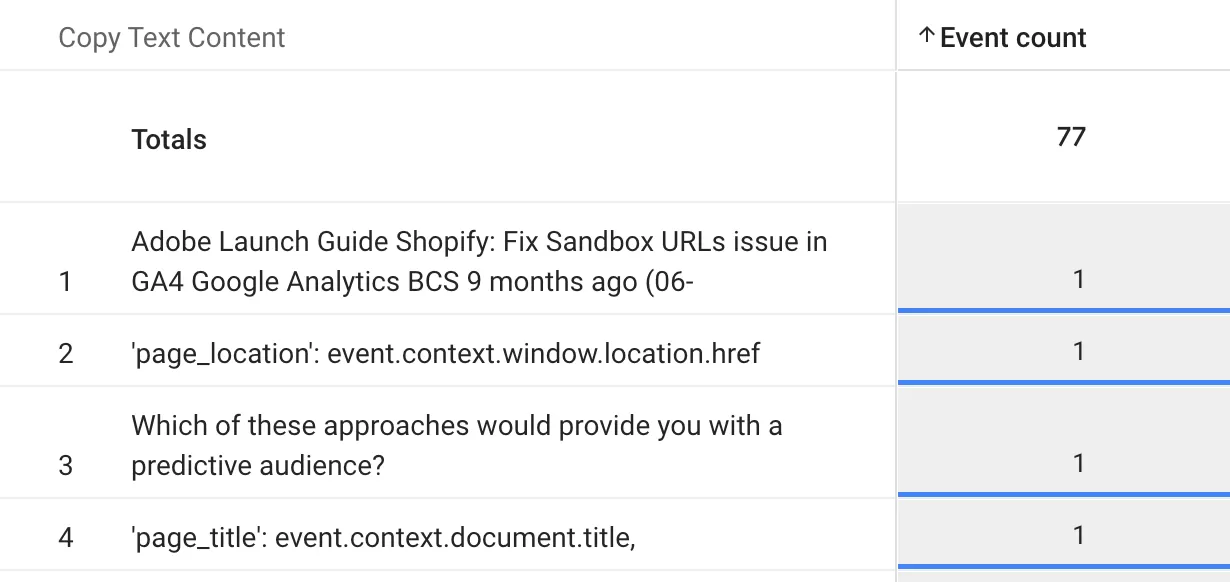
This will show you exactly what users are copying most frequently across your site.
Final Words
Copy tracking is one of those underused analytics techniques that can tell you a lot about user intent. Someone copying a product name might be comparing prices. Someone copying an email address is likely about to reach out. The data is there — you just need to capture it.

