Update time: January 12, 2025
If you need to track clicks across multiple elements on your site — a navigation link, a CTA button, a product card — the usual approach is to create separate triggers and tags for each one. That works, but it gets messy fast. Especially when you have ten, twenty, or more elements to track.
That’s where the ga-data attribute method comes in.
Instead of creating a separate tag for every element, you add a single custom attribute to your HTML elements, assign different values to different locations, and use one GTM tag to handle all of them. One setup, infinite scale.
In this guide, I’ll walk you through how to implement batch custom event tracking using ga-data attributes — step by step, from adding the attribute to verifying the data in GA4.
How the ga-data Attribute Method Works
Imagine you have three elements on your page that you want to track — maybe a logo, a search bar, and a call-to-action button. Without a batch method, you’d need three separate GTM triggers and three tags.
With the ga-data method, you:
- Add a ga-data attribute to each HTML element with a unique value
- Create a single Custom JavaScript variable in GTM that reads the attribute
- Use a Lookup Table to map each value to a meaningful event name
- Fire one GA4 Event tag for all clicks
One tag to rule them all. Let me show you how to set it up.
Use Case Example
Now we need to track events at these three locations, and see how to set them using the ga-data attribute:
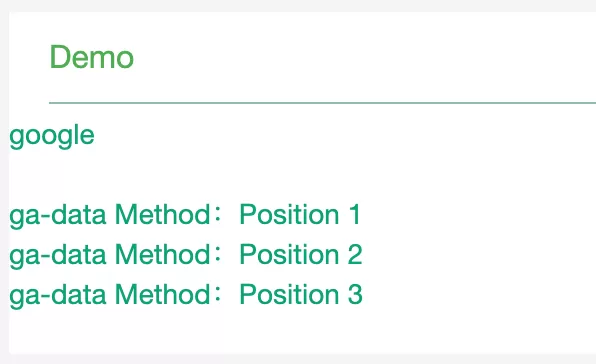
Step 1: Add ga-data Attributes to Your HTML
First, we need to add a ga-data attribute to the HTML elements we want to track. Each element gets a different value.
Before adding the attribute, your HTML might look like this: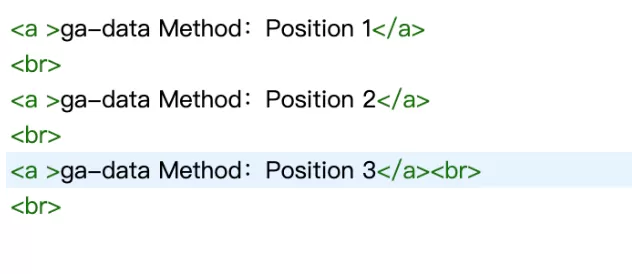
After adding the `ga-data` attribute:
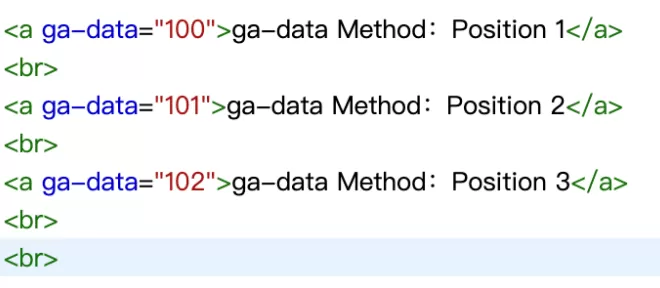
Note: If you don’t have development permission on the site, you’ll need to ask a developer to help with this step. It’s a quick change — just adding an attribute to existing elements.
Step 2: Get ga-data Values in GTM
Now we need to tell GTM how to read the ga-data attribute when an element is clicked.
First, create an Auto-Event Variable to capture the clicked element:click「Variables」——「New」——「Choose a variables type to begin setup…」——「Auto-Event Variable」,Name it “element”, and make the following settings:
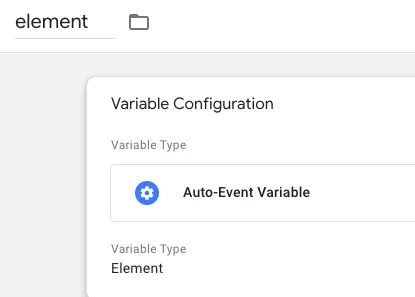
This variable will hold the DOM element that was clicked.
Next, create a Custom JavaScript Variable that reads the ga-data attribute from that element: click「Variables」——「New」——「Choose a variables type to begin setup…」——「Custom JavaScript」,Name it “Get ga-data”, and make the following settings:
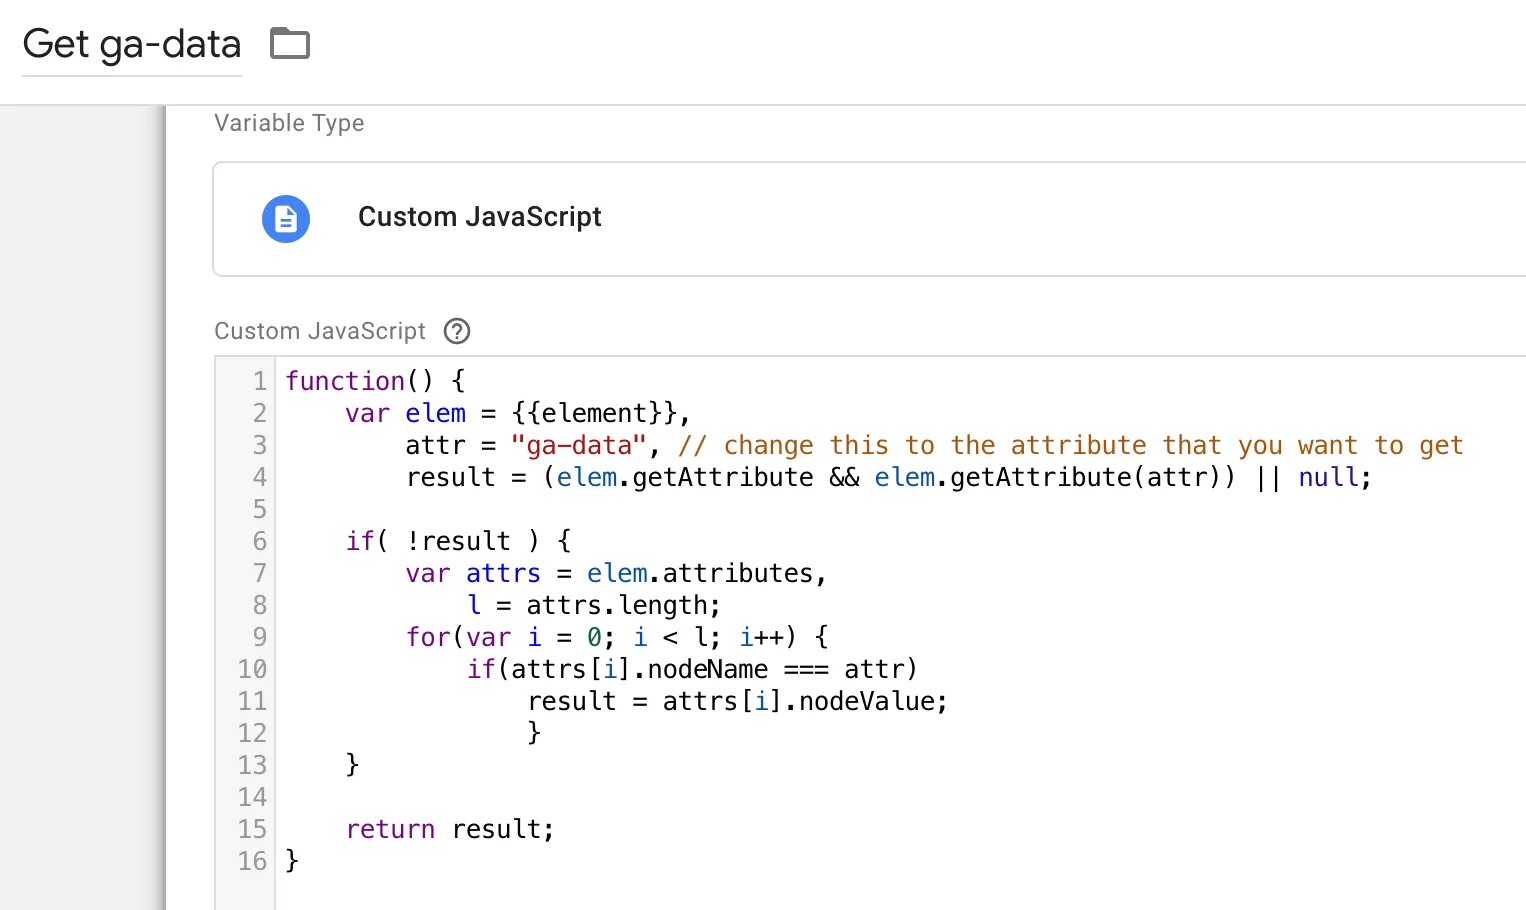
This variable looks at the clicked element, finds the ga-data attribute, and returns its value. If the attribute isn’t found directly (which can happen with some DOM structures), it falls back to scanning all attributes.
Step 3 : Set Up a Lookup Table Variable
Now we want to convert raw ga-data values into something more meaningful for our reports.
Let’s say your ga-data values are numeric (like `100`, `101`, `102`) and you want to map them to location names. A Lookup Table variable is perfect for this.
In GTM , click「Variables」——「New」——「Choose a variables type to begin setup…」——「Lookup Table」,Name it “Lookup Table ga-data”, and make the following settings:
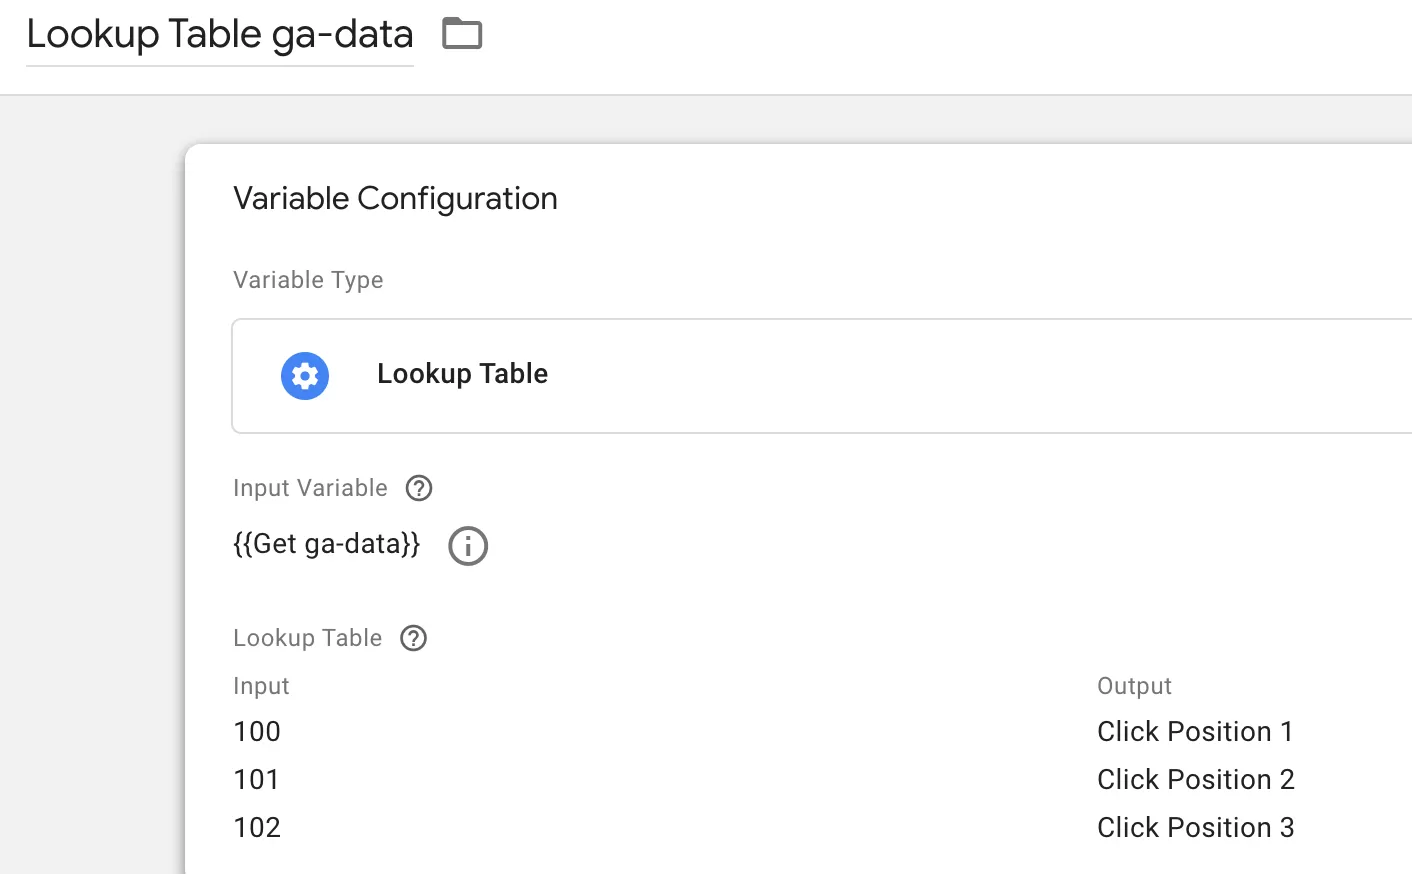
Now whenever a user clicks an element with `ga-data=”100″`, this variable returns `Logo`. Clean and readable.
You can build out the numeric range in sequence — it makes it much easier to decide on trigger conditions later.
Step 4 : Set Up the Trigger
We want the tag to fire only when an element with a ga-data attribute is clicked.
In GTM , click「Triggers」——「New」——「Choose a trigger type to begin setup…」——「Click – All Elements」,Name it “ga-data Trigger”, and make the following settings:
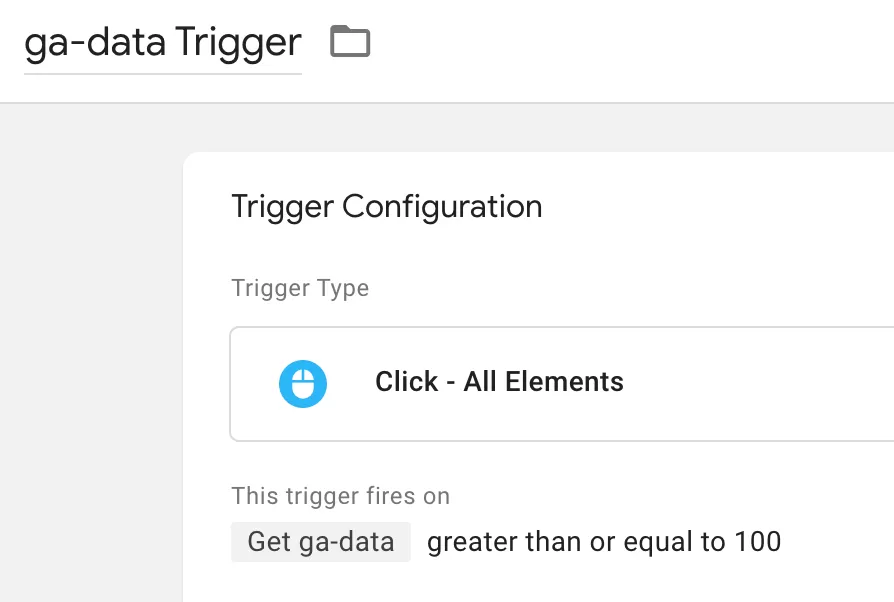
This ensures the trigger only fires when the clicked element has a ga-data value in our tracking range. Clicks on other elements are ignored.
Step 5 : Set Up the GA4 Event Tag
Time to connect everything to GA4.
In GTM , click「Tags」——「New」——「Choose a tags type to begin setup…」——「Google Analytics: GA4 Event」,Name it “GA4-Event-Click(ga-data)”, and make the following settings:
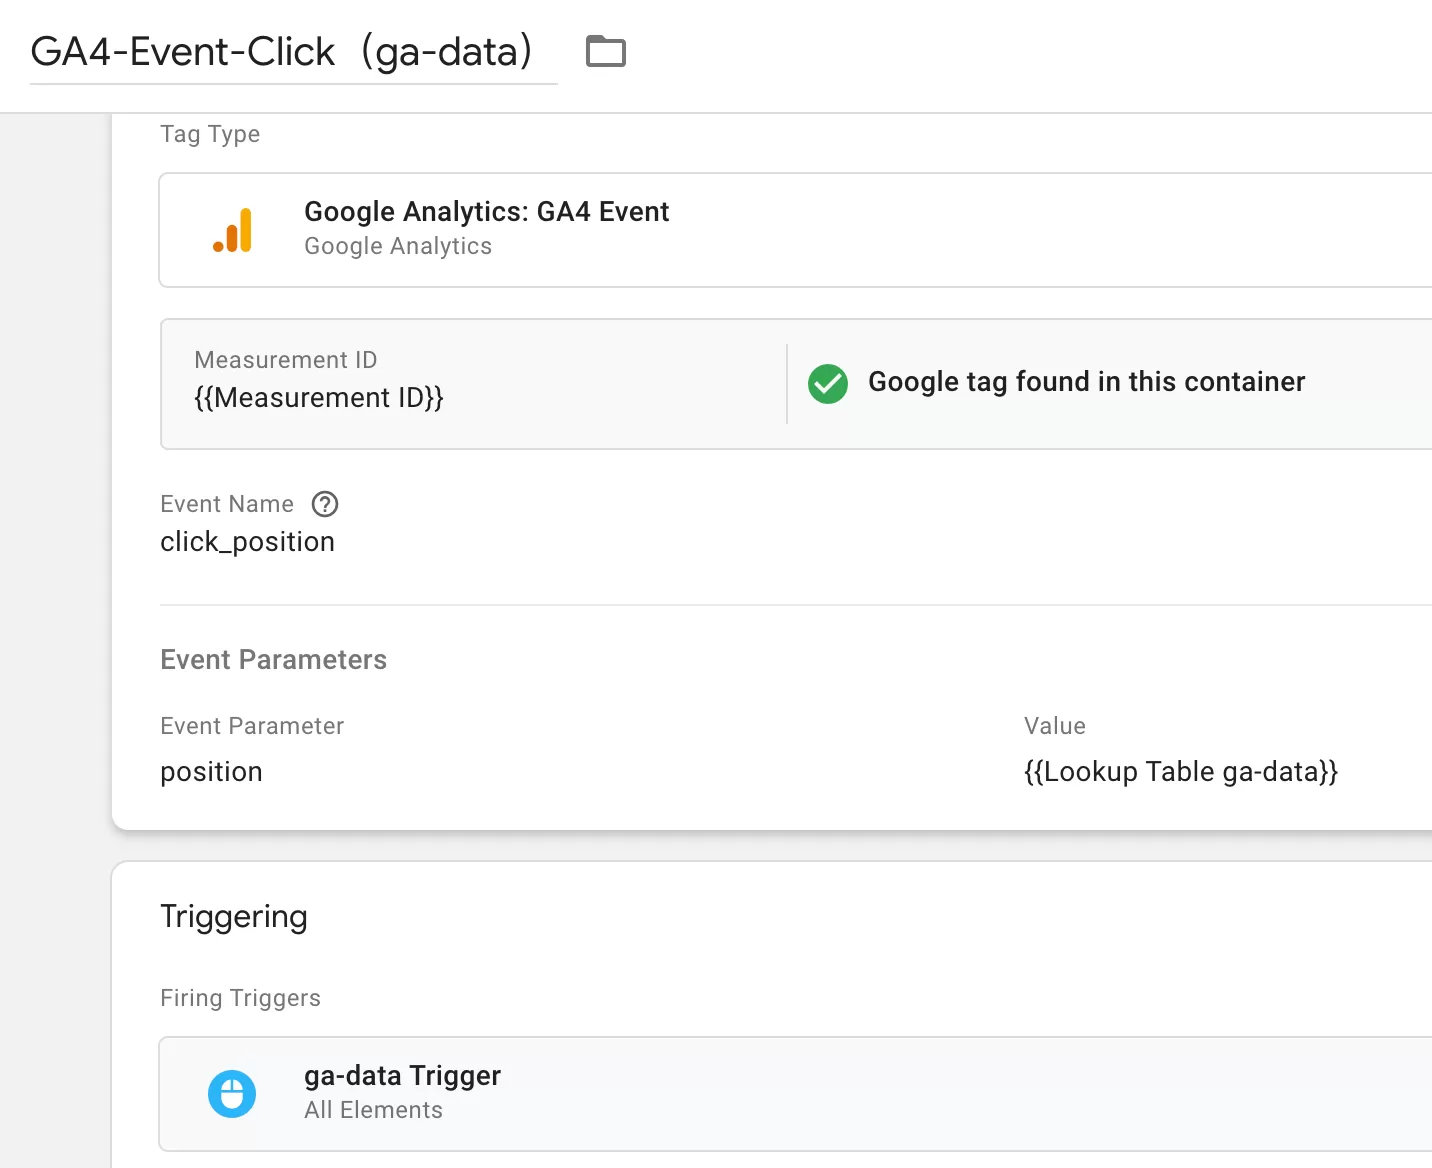
That’s it. One tag handles all tracked elements. Add a new element with a ga-data attribute tomorrow, and this tag will pick it up automatically — no new GTM configuration needed.
Step 6 : Preview and Publish
Before publishing, always test in Preview mode. 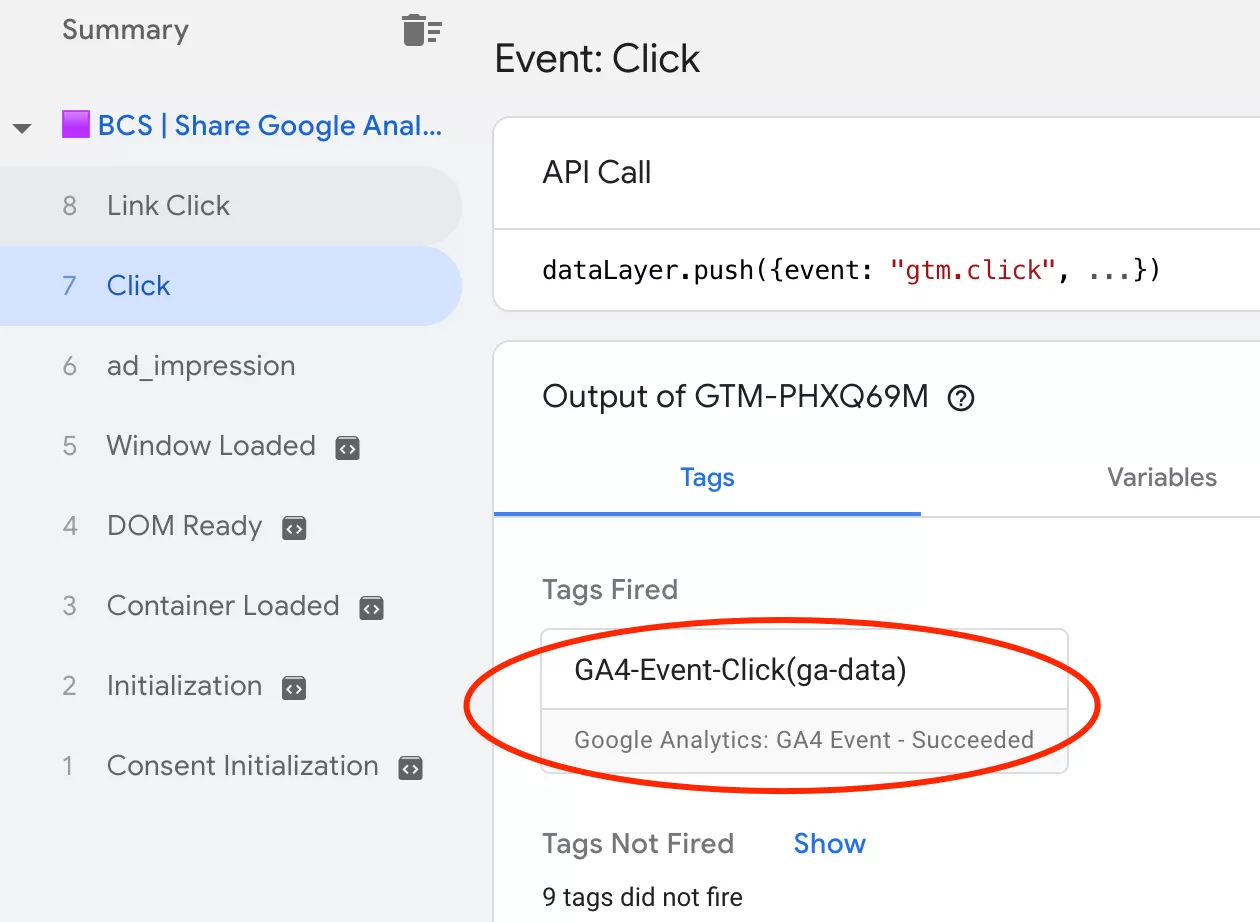
The event is triggered normally. Click Open to confirm whether the event parameter position is correct: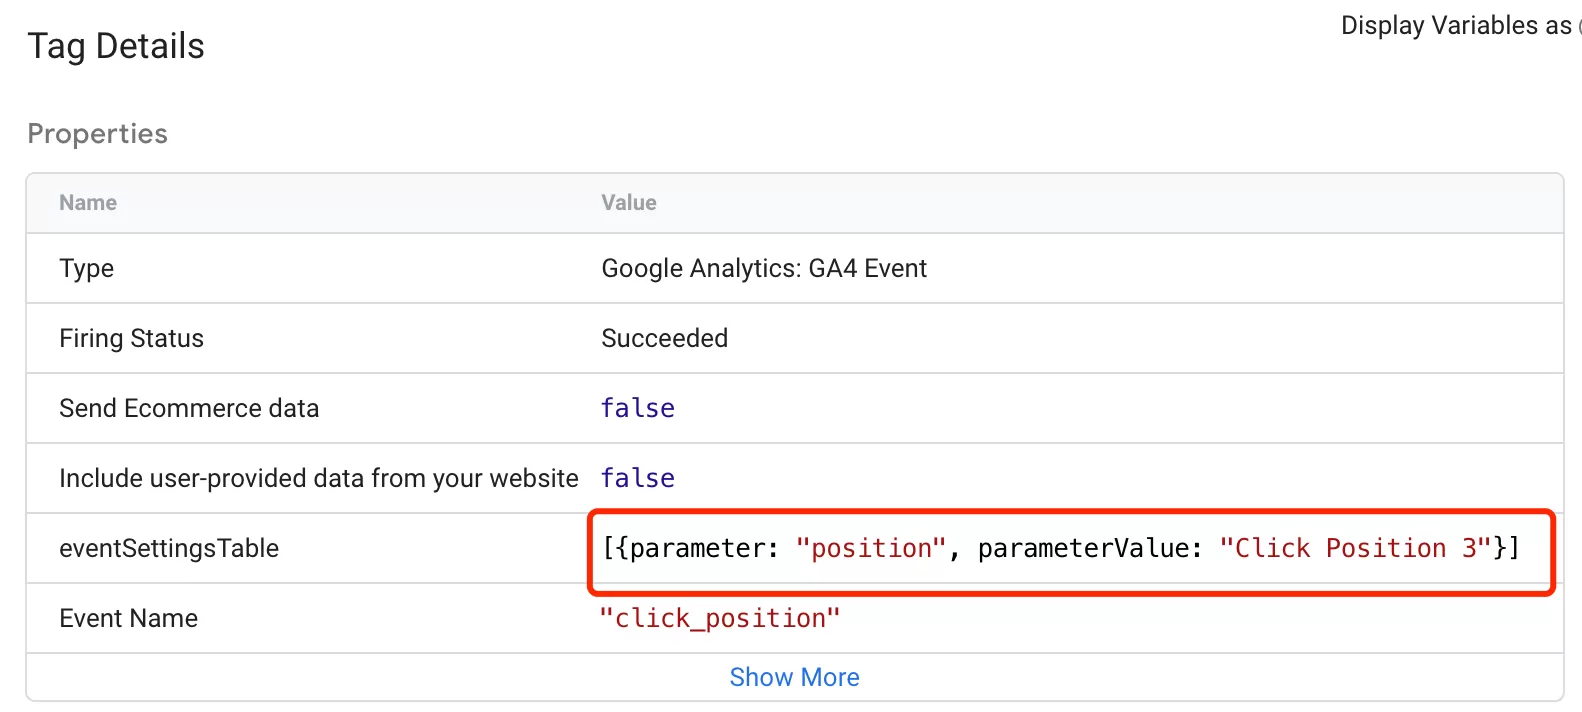
If everything looks good, go ahead and publish.
Step 7 : Register a Custom Dimension in GA4
If you want to use the position parameter in your GA4 reports, you need to register it as a custom dimension.
In GA4,click「Admin」——「Custom definitions」——「Create custom dimension」, then do the following configuration:
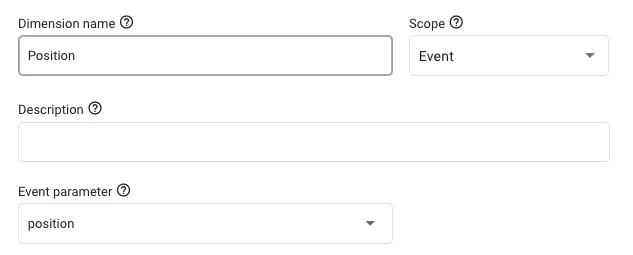
Step 8 : Verify Data in GA4 Reports
After registration, it takes up to 24 hours before the data appears in your GA4 reports. Once it does, you can verify it in Event Reports:
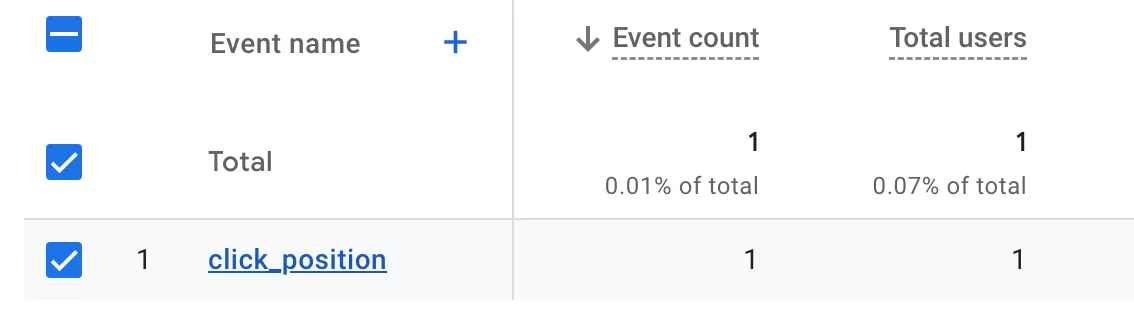
Final Words
The ga-data attribute method is one of those approaches that seems simple but saves you a ton of maintenance work over time. Instead of creating a new trigger and tag for every element you want to track, you add an attribute to the HTML and let one GTM tag handle everything.
Here’s a quick recap of the workflow:
- Add `ga-data` attributes to your HTML elements with unique values
- Create a Custom JavaScript variable in GTM to read the attribute
- Use a Lookup Table to map values to meaningful names
- Create one Click trigger that fires only for elements with `ga-data`
- Create one GA4 Event tag that sends the data
- Register the parameter as a custom dimension in GA4
- Verify data after 24 hours
I hope this guide helped you understand how to use ga-data attributes for batch event tracking. If you have questions or ran into issues during implementation, feel free to leave a comment and I’ll do my best to help.