Update time: January 14, 2025
If you’re using Klaviyo forms on your website — for email signups, newsletter subscriptions, or lead generation — you probably want to know how many people actually submit them. The problem? Klaviyo forms don’t trigger a page view or a standard form event. You need to listen for the custom klaviyoForms event instead.
In this guide, I’ll first explain how Klaviyo’s form event system works, and then I’ll walk through the full implementation on a live form.
How Klaviyo Form Events Work
Klaviyo forms are embedded on your site via JavaScript. When a visitor interacts with a Klaviyo form — viewing it, filling it out, submitting it, or closing it — Klaviyo fires a custom DOM event called klaviyoForms on the document.
<script>
window.dataLayer = window.dataLayer || [];
window.addEventListener("klaviyoForms", function(e) {
  if (e.detail.type == 'submit') {
	dataLayer.push({
		'event' : 'klaviyo',
		'formId' : e.detail.formId,
		'formTitle' : e.detail.metaData.$source
	});
  }
});
</script>
Here’s what’s happening under the hood:
- A visitor loads your page and a Klaviyo form appears
- The visitor fills out the form and clicks Submit
- Klaviyo sends the data to its servers via AJAX (no page reload)
- On success, the browser fires a klaviyoForms event on the document
- The event.detail object contains formId, formTitle, and a $event_type field
Walkthrough: Tracking the Demo Request Form
Now we need to track the form submission in https://www.klaviyo.com/demo-request
Next, let’s see how to implement form tracking:
Step 1: Create the Custom HTML Listener
Klaviyo fires a custom DOM event called klaviyoForms when a form is submitted. We need to listen for it and push the data to the data layer.
In GTM , click「Tags」——「New」——「Choose a tags type to begin setup…」——「Custom HTML」,Name it “HTML—Klaviyo Form listener”, and make the following settings: 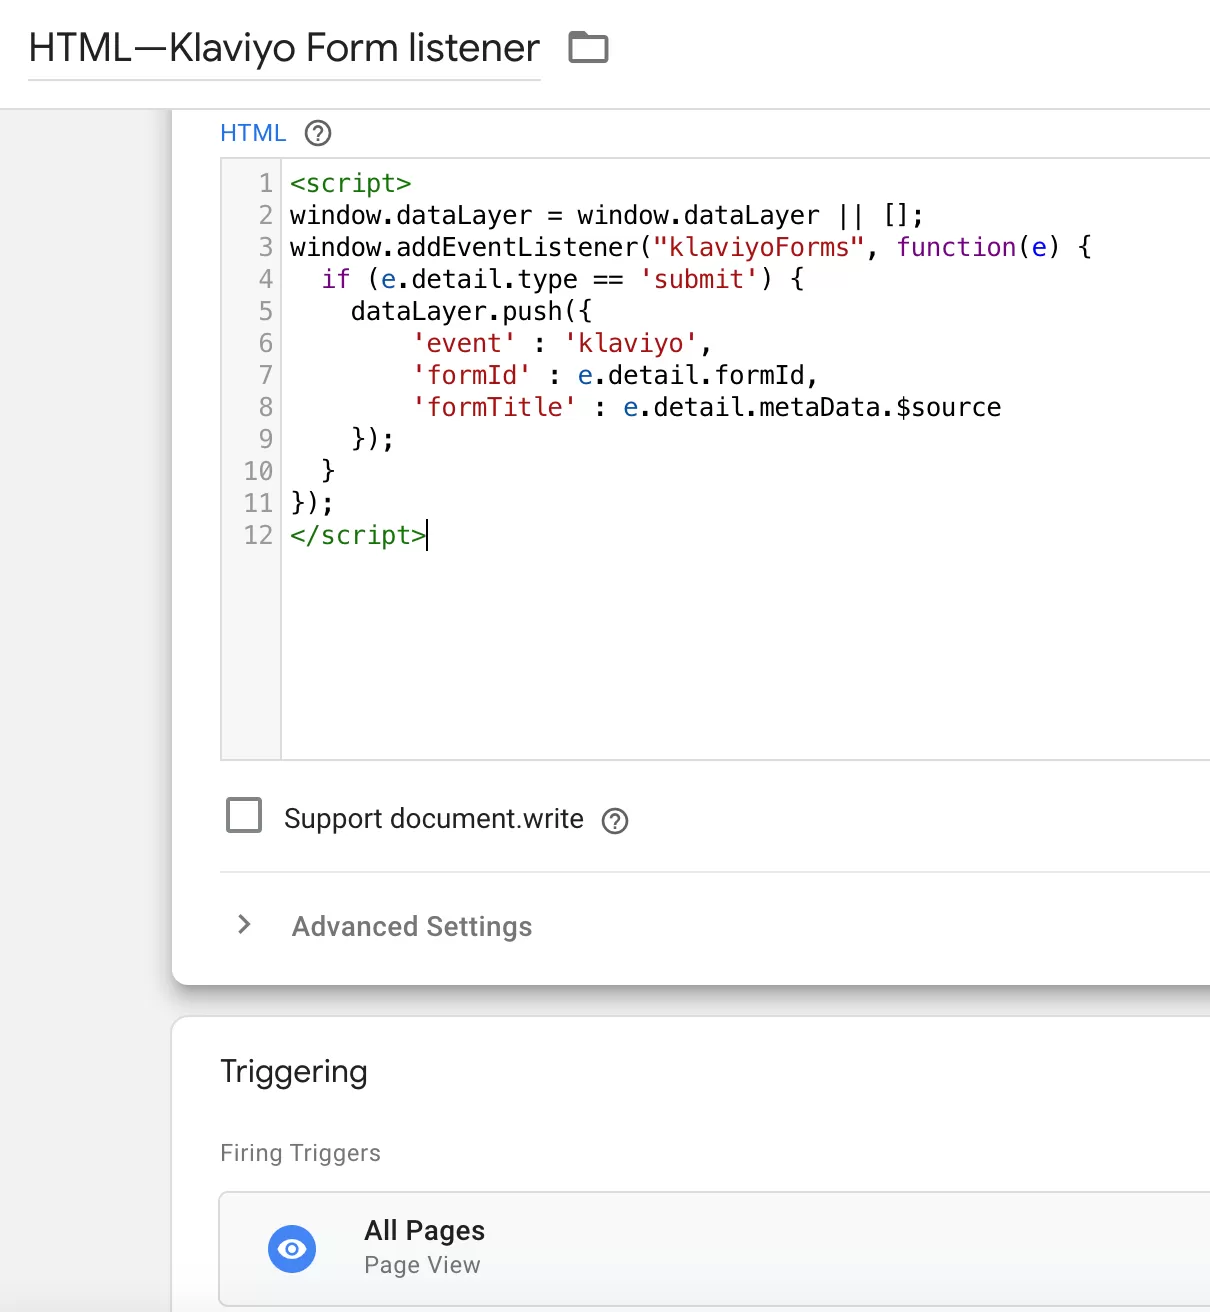
Step 2: Set Up Data Layer Variables
From the code, we can know that there are data layer variables formId and formTitle in the data layer, which need to be obtained using data layer variables in GTM.
In GTM, click「 Variables」——「New」——「Choose a variable type to begin setup…」——「Data Layer Variable」, name it “dlv-formid”, and then set as follows: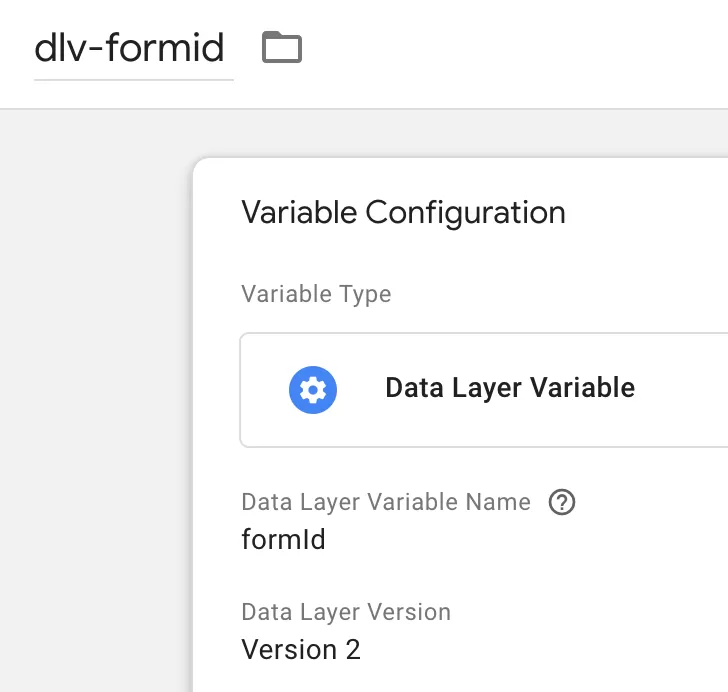
Set dlv-formtitle in the same way.
Step 3: Create the Custom Event Trigger
In GTM , click「Triggers」——「New」——「Choose a trigger type to begin setup…」——「Custom Event」,Name it “Custom Event- Klaviyo Forms Submit Form”, and make the following settings:
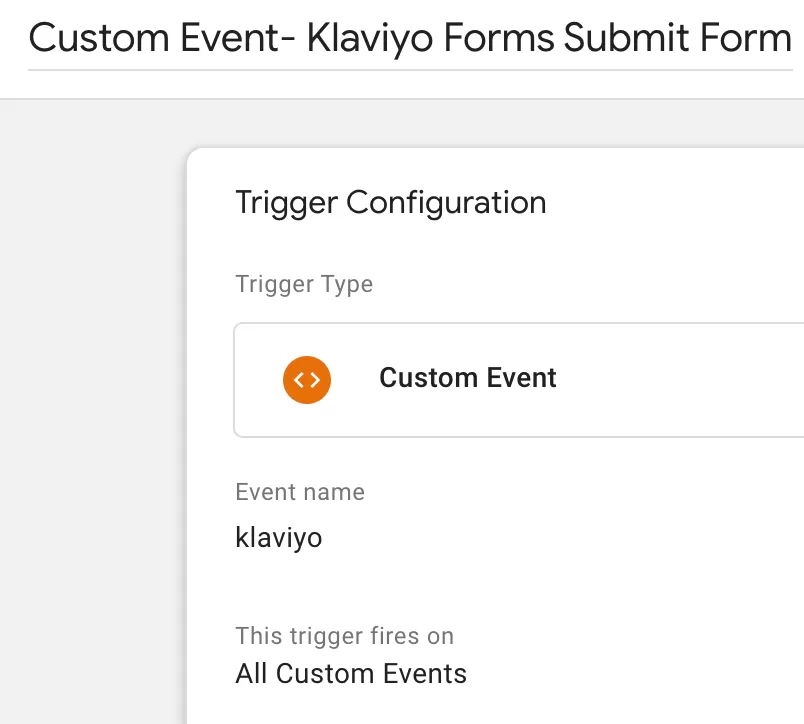
From the code, we can know that the event is klaviyo, so the event name is set to klaviyo
Step 4: Create the GA4 Event Tag
In GTM , click「Tags」——「New」——「Choose a tags type to begin setup…」——「Google Analytics: GA4 Event」,Name it “GA4-Event-Klaviyo Forms Submit Form”, and make the following settings: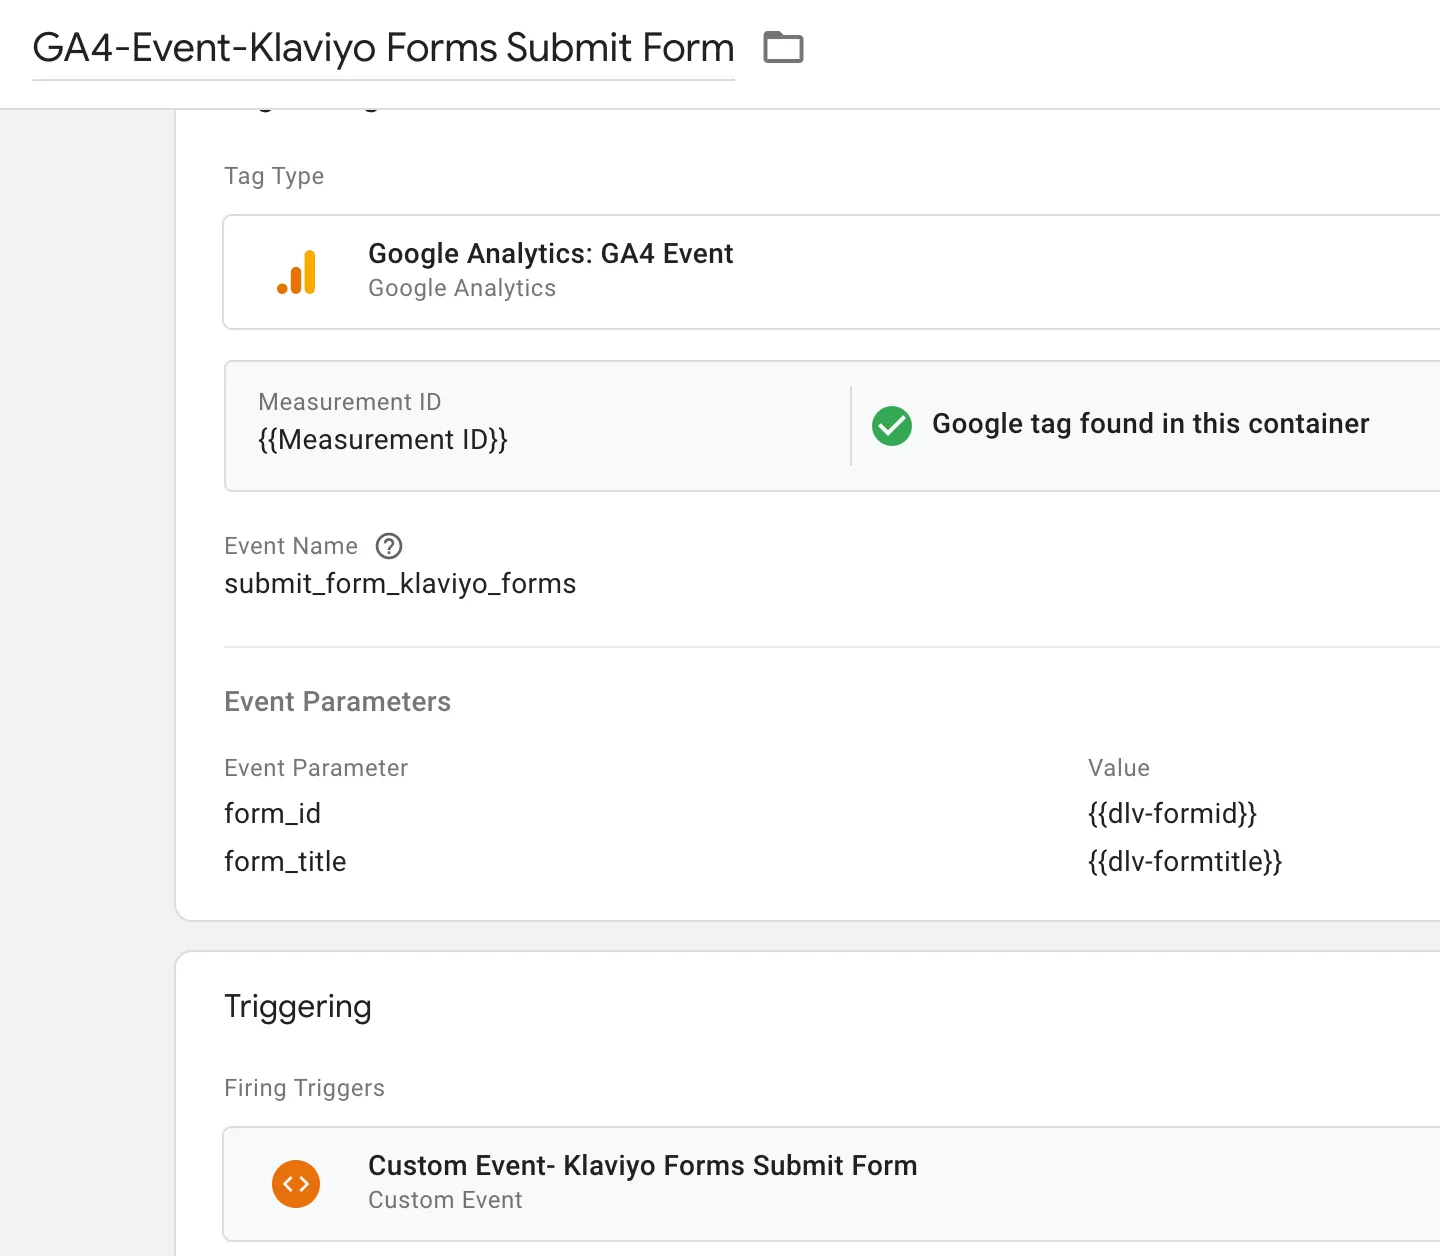
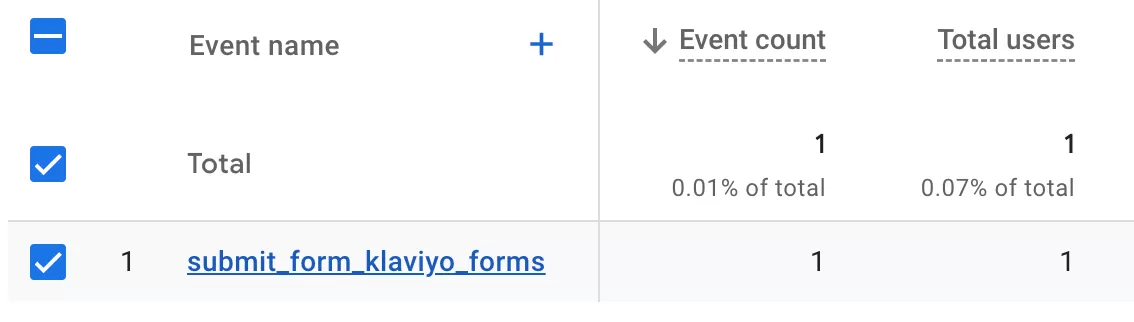
The event name is submit_form_klaviyo_forms
Step 5 : Preview and Publish
Click Preview in GTM, navigate to your form page, fill it out, and submit. In Tag Assistant, you should see:
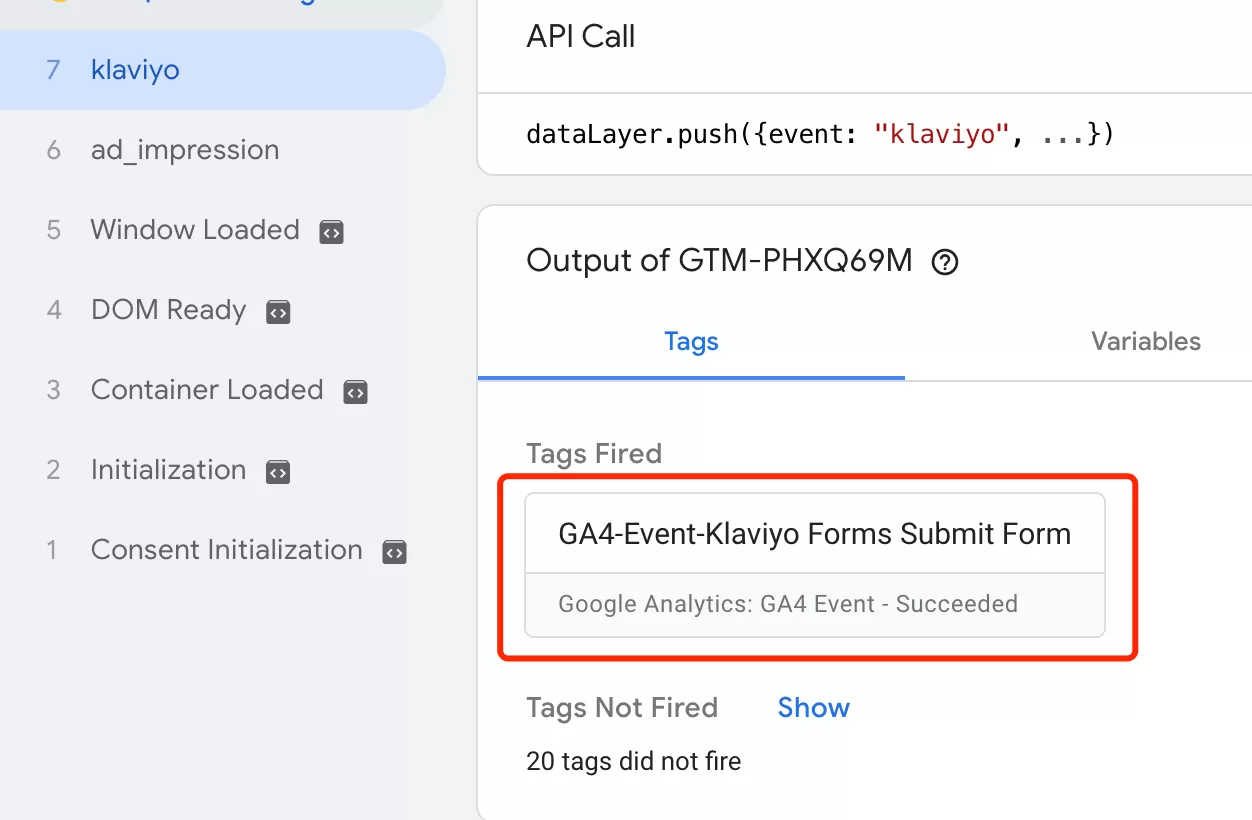
Once everything works, create a new version and publish.
Step 6: Register Custom Dimension in GA4
Now that the data is flowing into GA4, there’s one more step. If you want to use form_id and form_title in your GA4 reports and explorations, you need to register it as a custom dimension.
In GA4,click「Admin」——「Custom definitions」——「Create custom dimension」, then do the following configuration:
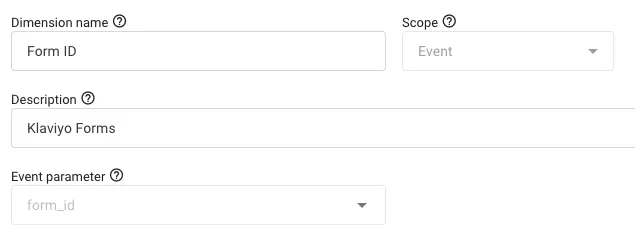
Set form_title in the same way
Step 7 : Verify Data in GA4 Reports
After publishing, give it about 24 hours — the typical delay before custom events appear in standard GA4 reports. Then find the subscription event in Event Reports:
Final Words
Tracking Klaviyo form submissions in GA4 is surprisingly straightforward once you know the klaviyoForms event exists. A simple addEventListener pushes the data, GTM picks it up, and GA4 records it with structured event parameters.
If you’ve run into any edge cases — Klaviyo forms loaded in popups, multi-step forms, or forms that redirect before the tag fires — I’d love to hear about them. Drop a comment and share your experience.