Update time: January 13, 2025
If you’ve been following this series, you’ve seen a few different approaches to custom event tracking in GA4 — dataLayer.push(), jQuery listeners, ga-data attributes. They all work, but if you ask me which one I recommend most for most situations, it’s the Attributes Method.
Why? Because it doesn’t require any code changes. No developer needed. No custom attributes to add. You just use what’s already on the page — the element’s existing classes, IDs, text, and URLs — and let GTM’s built-in variables do the work.
In this guide, I’ll show you how to use the Attributes Method to track clicks on any element using only GTM’s built-in click variables.
What Is the Attributes Method?
The Attributes Method is exactly what it sounds like: you use the existing HTML attributes of an element to identify and track it — things like `class`, `id`, link text, or URL.
The beauty of this approach is that you’re not adding anything new to the page. You’re working with what’s already there. The element already has a class. It already has text visible to the user. It already has a URL. You just tell GTM: “when an element with these specific attributes is clicked, fire this tag.”
The Golden Rule: Uniqueness
Here’s the most important thing to get right with this method: choose an attribute (or combination of attributes) that uniquely identifies the element you want to track.
Let me explain with an example. Say you have two buttons on a page, both with the class `btn-primary`. If you create a trigger that fires on `Click Classes` equals `btn-primary`, both buttons will trigger the tag. That’s probably not what you want.
Here’s the fix: add another condition. If the class isn’t unique by itself, combine it with another attribute — like `Click Text` or `Click URL` — to narrow it down.
- If the class is unique → use just the class
- If the class isn’t unique → use class + text, or class + URL, or whatever combination makes it unique
The goal is simple: your trigger should fire only when the right element is clicked, and never when something else is clicked by accident.
Use Case Example
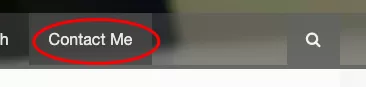
Let me show you how this works with a real example. Say I want to track clicks on a “Contact Me” link on my site.
Step 1 : Enable Built-In Variables
Before we can use any of these attributes in GTM, we need to make sure the right built-in variables are enabled.
In GTM , click「Variables」——「Configure」,Check these Built-In Variables of click:
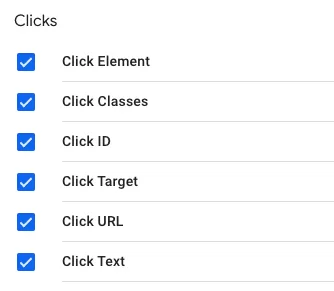
The positions of these Built-In Variables in the source code are as follows:
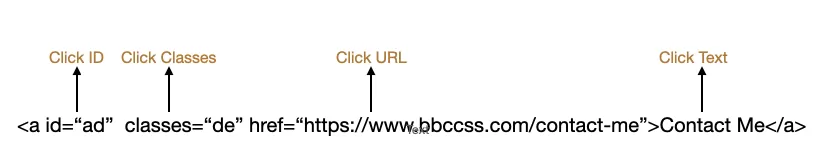
- Click ID is ad.
- Click Classes is de.
If you’ve already enabled these (maybe from a previous setup), you can skip this step.
Step 2 : Set Up the Trigger
Now let’s create a trigger that fires only when our “Contact Me” link is clicked.
Before creating the trigger, we need to identify which element attributes can be used to distinguish this link from other elements on the page.
Here’s the element’s HTML:

Looking at this element, I can already see two attributes I can use for tracking:
- Click URL: https://www.bbccss.com/contact-me
- Click Text: Contact Me
Either one by itself is probably unique enough on this page. But to be safe, I’ll use both — two conditions are better than one when it comes to trigger accuracy.
In GTM , click「Triggers」——「New」——「Choose a trigger type to begin setup…」——「Click – All Elements」,Name it “Contract Me”, and make the following settings:
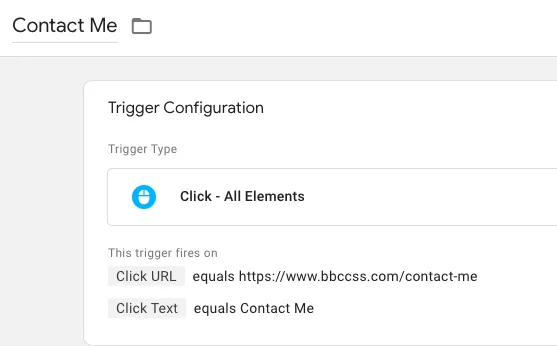
Note: If `{{Click URL}}` or `{{Click Text}}` is unique enough on its own, you can use just one condition. I’m demonstrating with two because it’s safer — two conditions guarantee uniqueness even if the page changes later.
Step 3 : Set Up the GA4 Event Tag
Time to create the tag that sends the event to GA4.
In GTM , click「Tags」——「New」——「Choose a tags type to begin setup…」——「Google Analytics: GA4 Event」,Name it “GA4-Event-Contract Me (Attributes Method)”, and make the following settings:
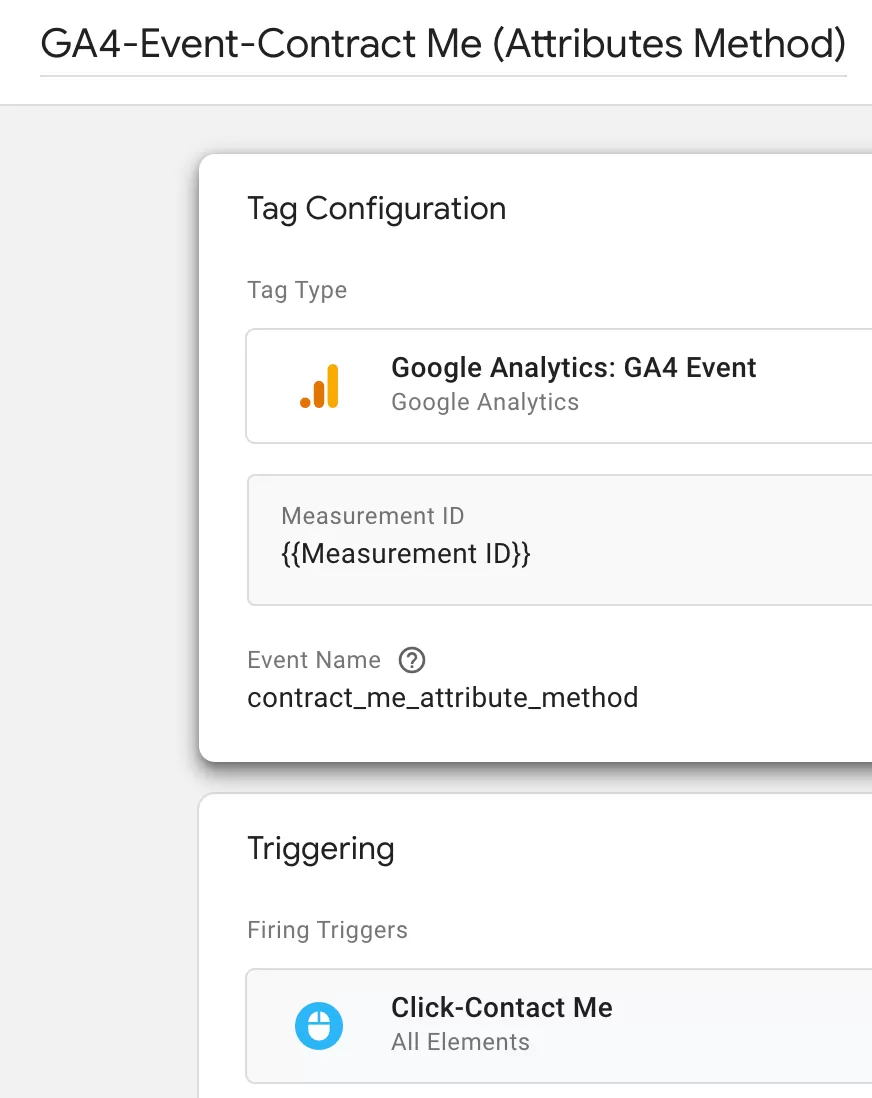
I didn’t add any event parameters for this example since the event name itself is descriptive enough. But if you do add event parameters, remember: you’ll also need to register them in GA4’s Custom definitions before they’ll show up in your reports.
Step 4 : Preview and Publish
Always test before publishing.
Next is the Preview test:
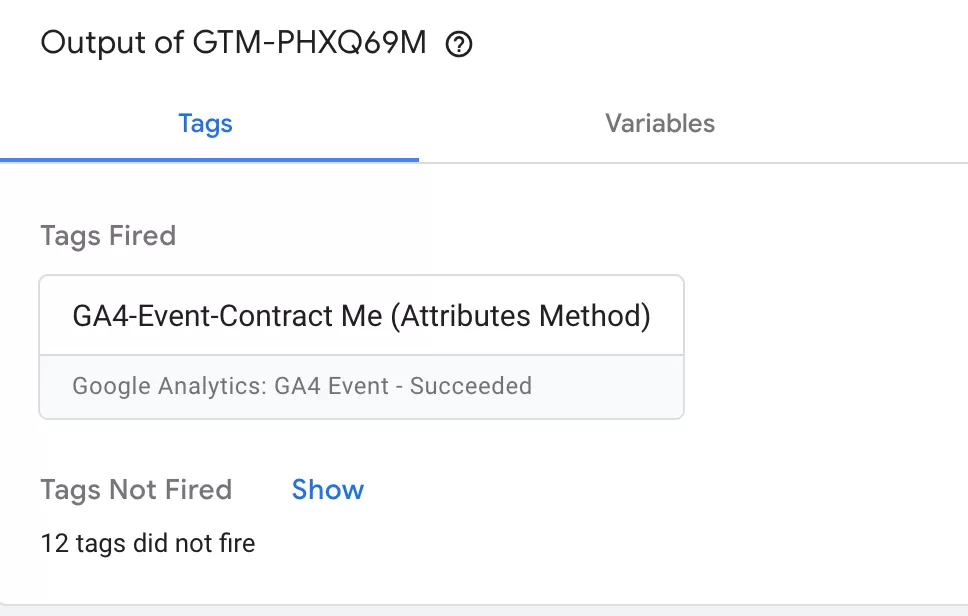
If everything works as expected, go ahead and publish.
Step 5 : Verify Data in GA4 Reports
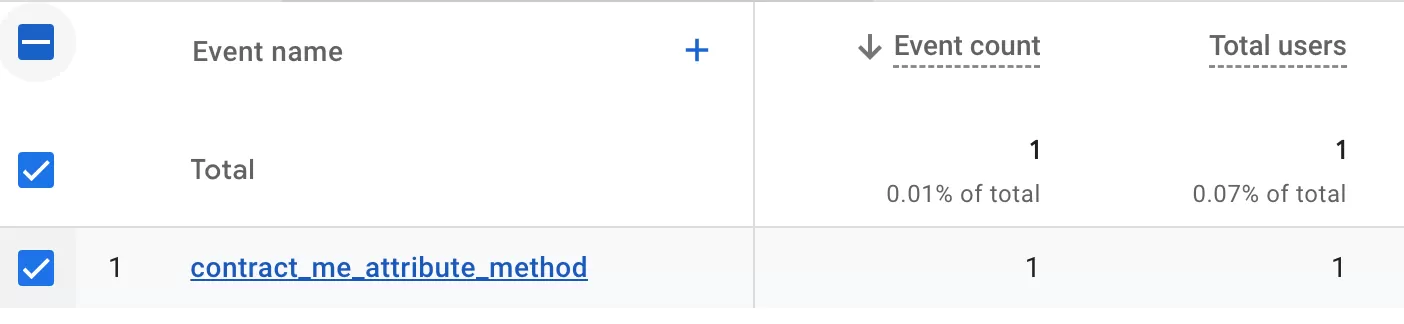
After publishing, it typically takes up to 24 hours before the event appears in your GA4 reports. Once it does, look for `contact_me_attribute_method` in your events list under Event Reports:
Final Words
The Attributes Method is my personal favorite for a reason: it’s the simplest approach that works for most tracking scenarios. No code changes, no developer dependency, no extra maintenance. You look at an element’s existing attributes, set up a trigger, and you’re done.
Here’s a quick recap of the workflow:
- Identify the element you want to track and find its unique attributes (class, text, URL, etc.)
- Enable the relevant built-in click variables in GTM
- Create a Click – All Elements trigger with conditions that uniquely identify the element
- Create a GA4 Event tag and attach the trigger
- Test in Preview mode before publishing
- Verify data in GA4 after 24 hours
I hope this guide helped you understand the Attributes Method and why I recommend it. If you have questions about tracking a specific element on your site, feel free to leave a comment and I’ll do my best to help.