Updated: March 23, 2026
The overall flow for sending Experience Events and Profile Data to AEP is as follows:
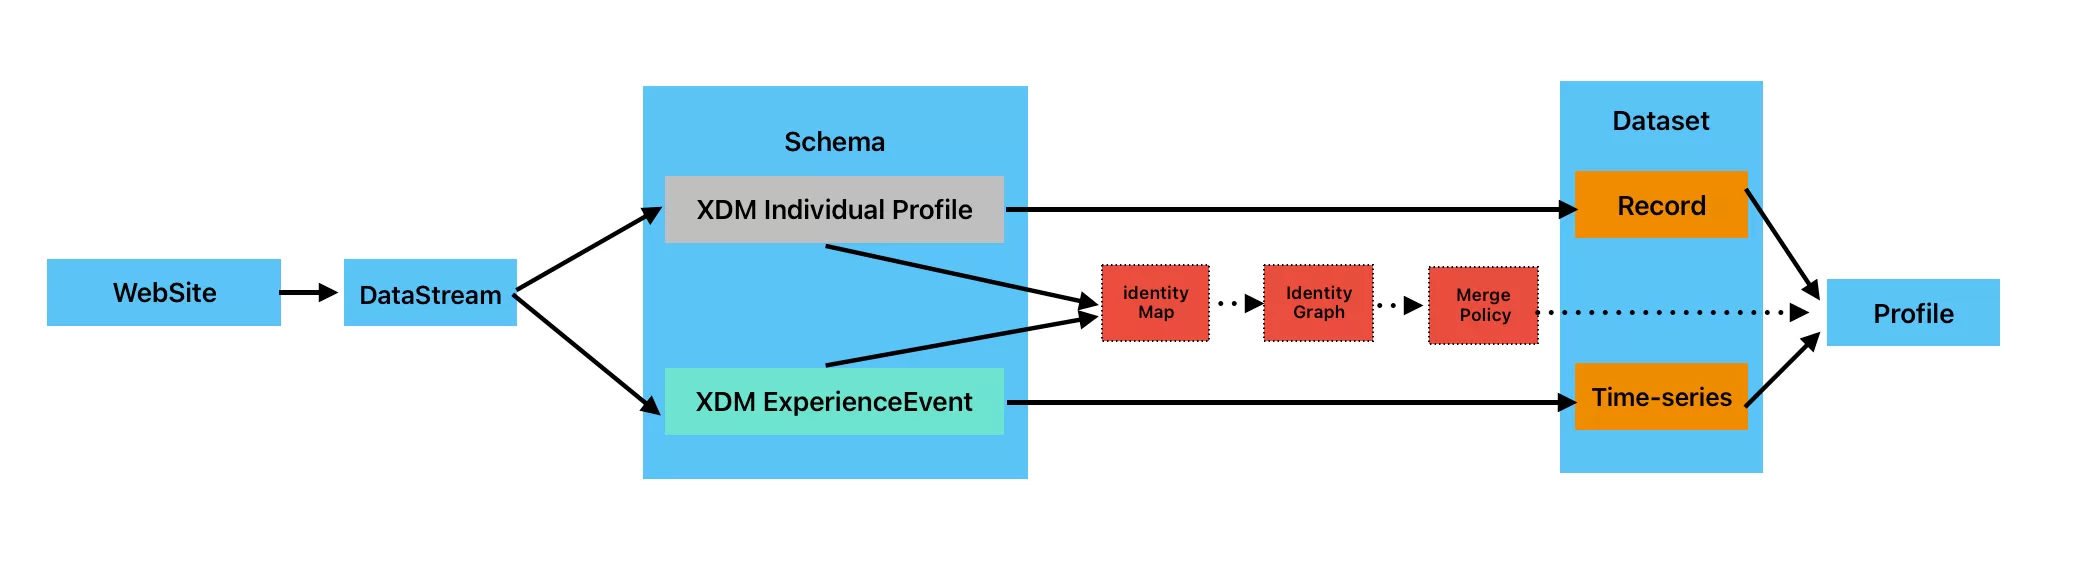
Experience Event VS Profile Data
| Dimension | Experience Event | Profile Data |
|---|---|---|
| Purpose | What the user does | Who the user is |
| Data Type(Datasets) | Time-series | Record |
| Examples | Page views, clicks, purchases | Name, email, loyalty status |
| Data Behavior | Append-only | Update (upsert) |
| Timestamp | Required | Not required |
| XDM Class(Schema) | XDM ExperienceEvent | XDM Individual Profile |
| Ingestion | Streaming (real-time) | Batch or streaming |
| Role in Profile | Contributes to profile | Builds/updates profile |
In short:
- Experience Events = behavioral data (user activity over time)
- Profile Data = attribute data (current customer state)
Send Experience Events to AEP
Step 1:Create an XDM Schema
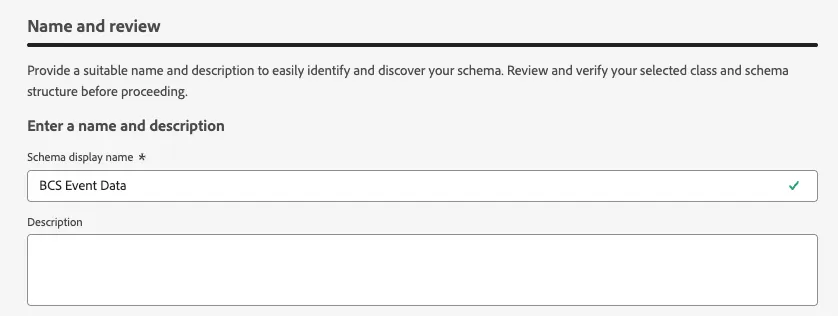
In Adobe Experience Platform, click 「Schemas」——「Create schema」——「Manual」——「Experience Event」, and name it “BCS Event Data.”
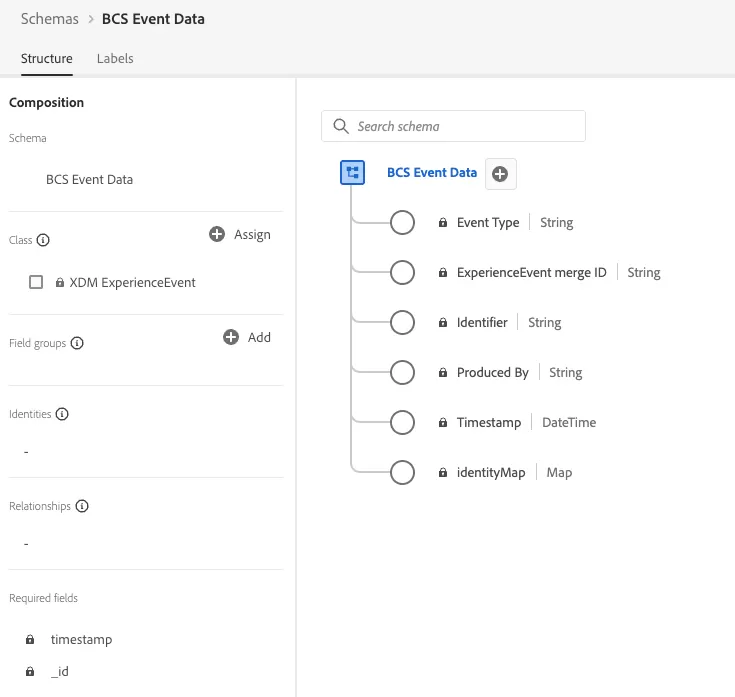
After creating the schema, open the schema configuration page and enable Profile so that event data can be included in Real-Time Customer Profiles:
Step 2:Create a Datasets
Click 「Datasets」——「Create dataset」——「Create dataset from schema」,and select “BSC Event Data”:
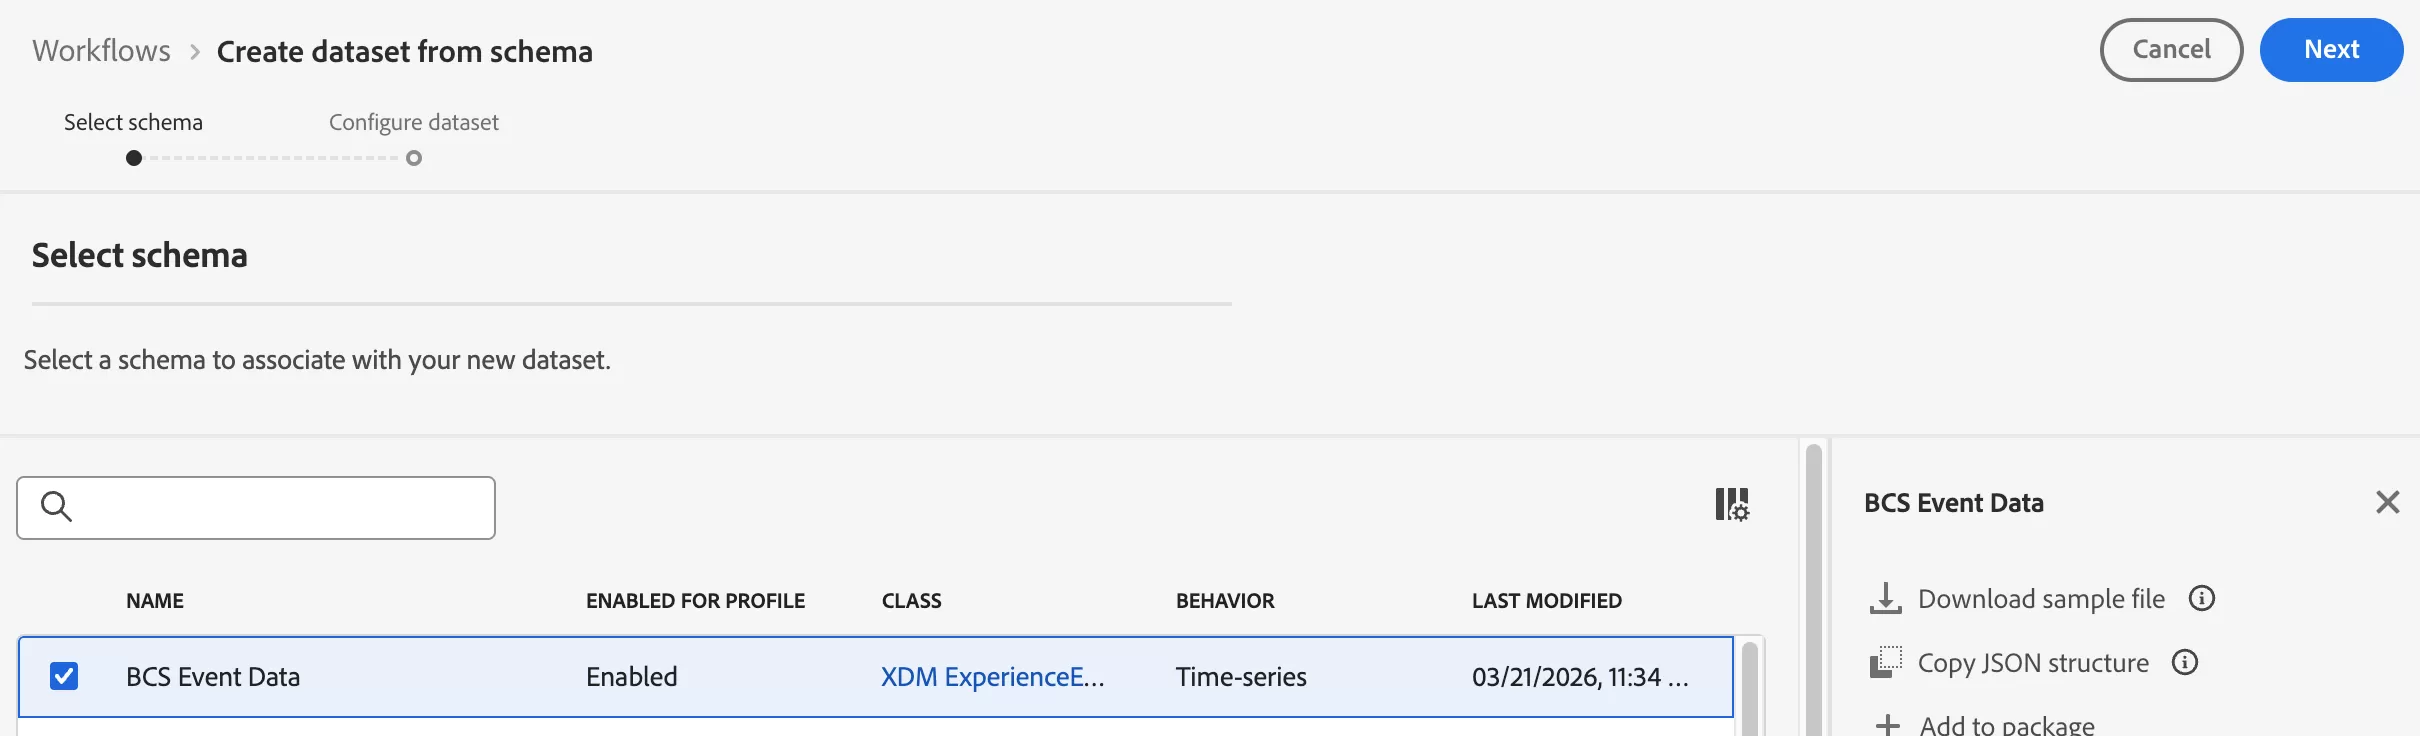
Name it “Dataset Event Data (BCS)” and complete the setup.
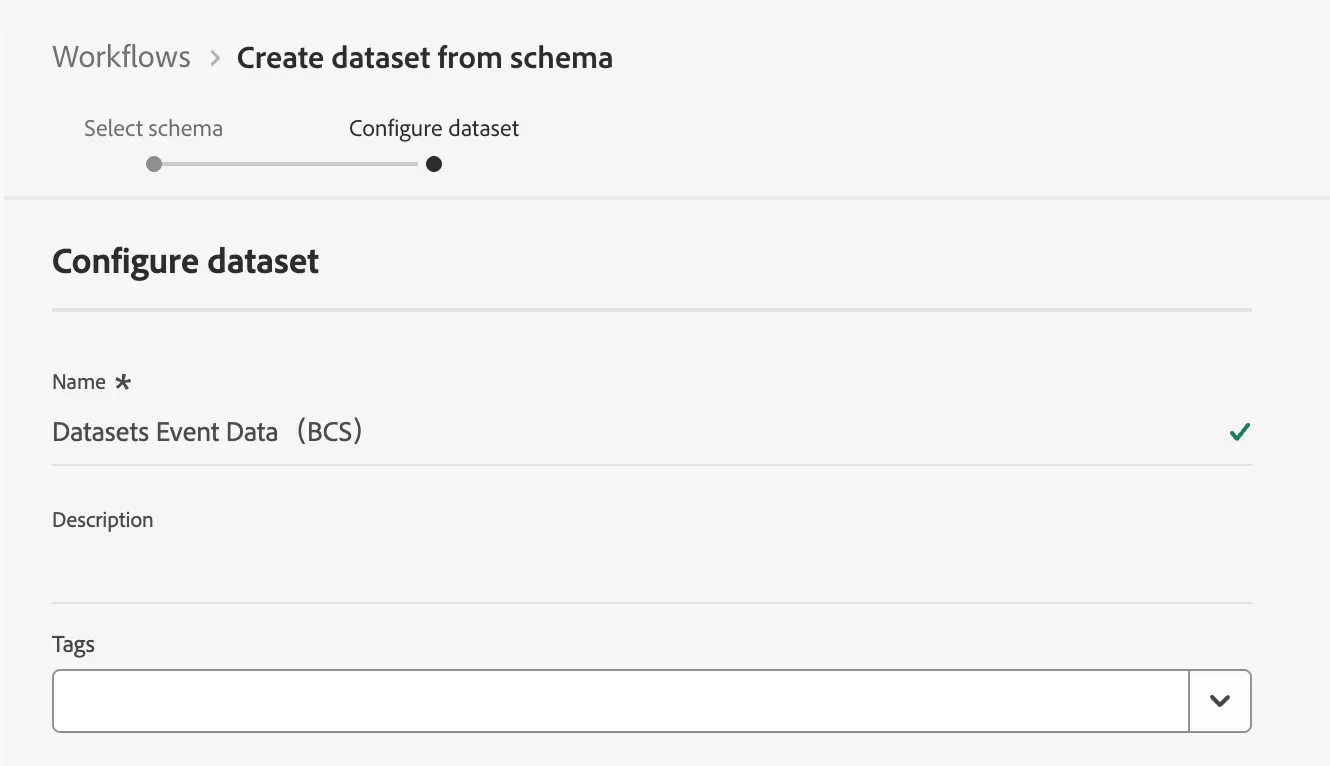
Once created,, enable Profile on the dataset so that ingested event data contributes to profiles.
Profile must be enabled at both the schema and dataset levels.
Step 3:Create a Datastreams
Click 「Datastreams」——「New Datastreams」:
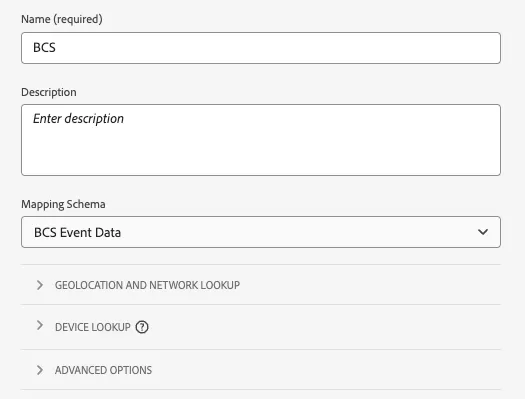
Configure it as follows:
- Name: BCS
- Event Schema: Select the XDM schema created earlier(BCS Event Data)
Click Save, click 「Add Service」:
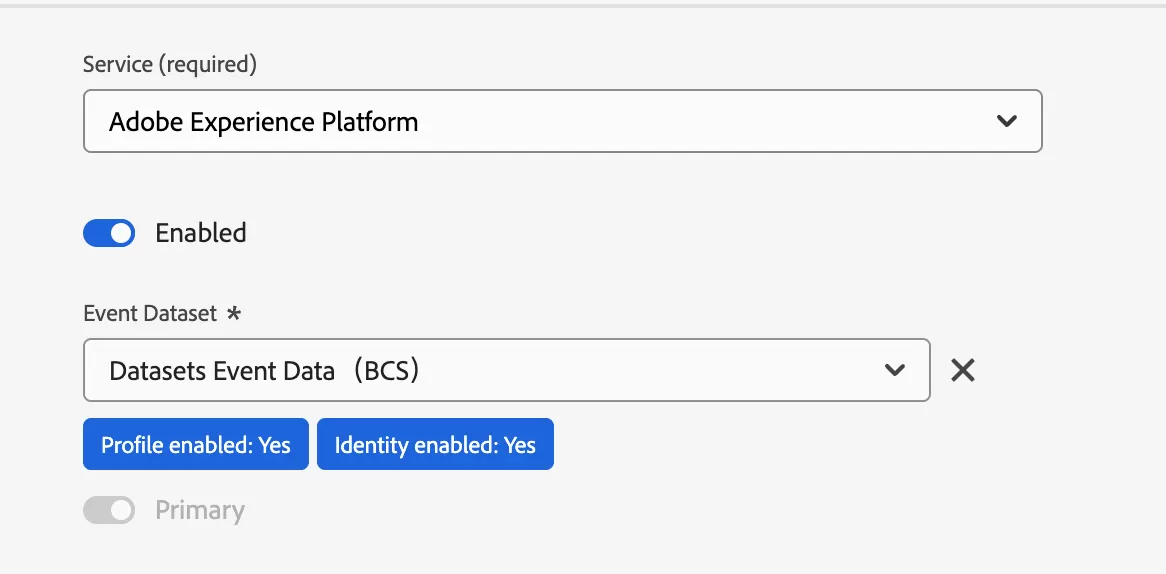
Configure:
- Service: Select the Adobe Experience Platform
- Event DataSet: Select the datasets created earlier(Datasets Event Data(BCS))
Save the configuration.
If Profile is not enabled on the dataset, it will not appear in the Event Dataset list.
Step 4:Install Web SDK
In Tag,click 「Tags」——「Extensions」——「Catalog」,Search for and install Adobe Experience Platform Web SDK.
Most settings can remain default. The key configuration is the Datastream, which determines where data is sent via the Edge Network.
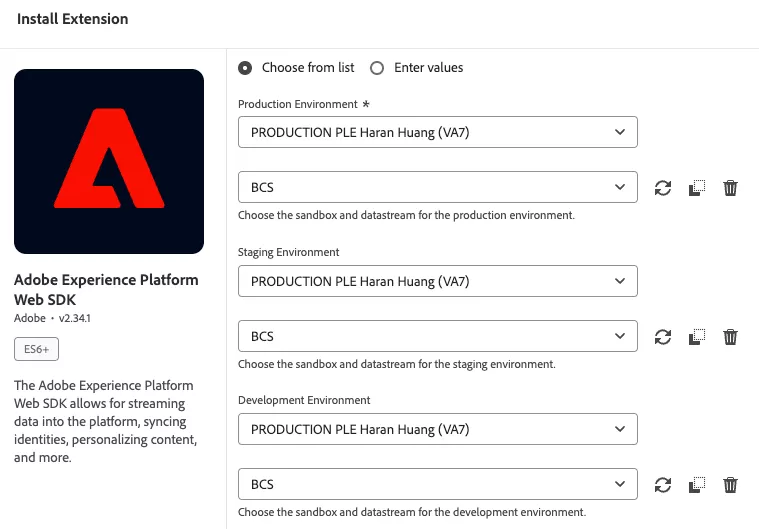
Best practice: use separate datastreams for dev, test, and production.
Step 5:Configure Data Elements
Click 「Data Elements」——「Add Data Elements」,name it “XDM Content”,then do the following configuration:
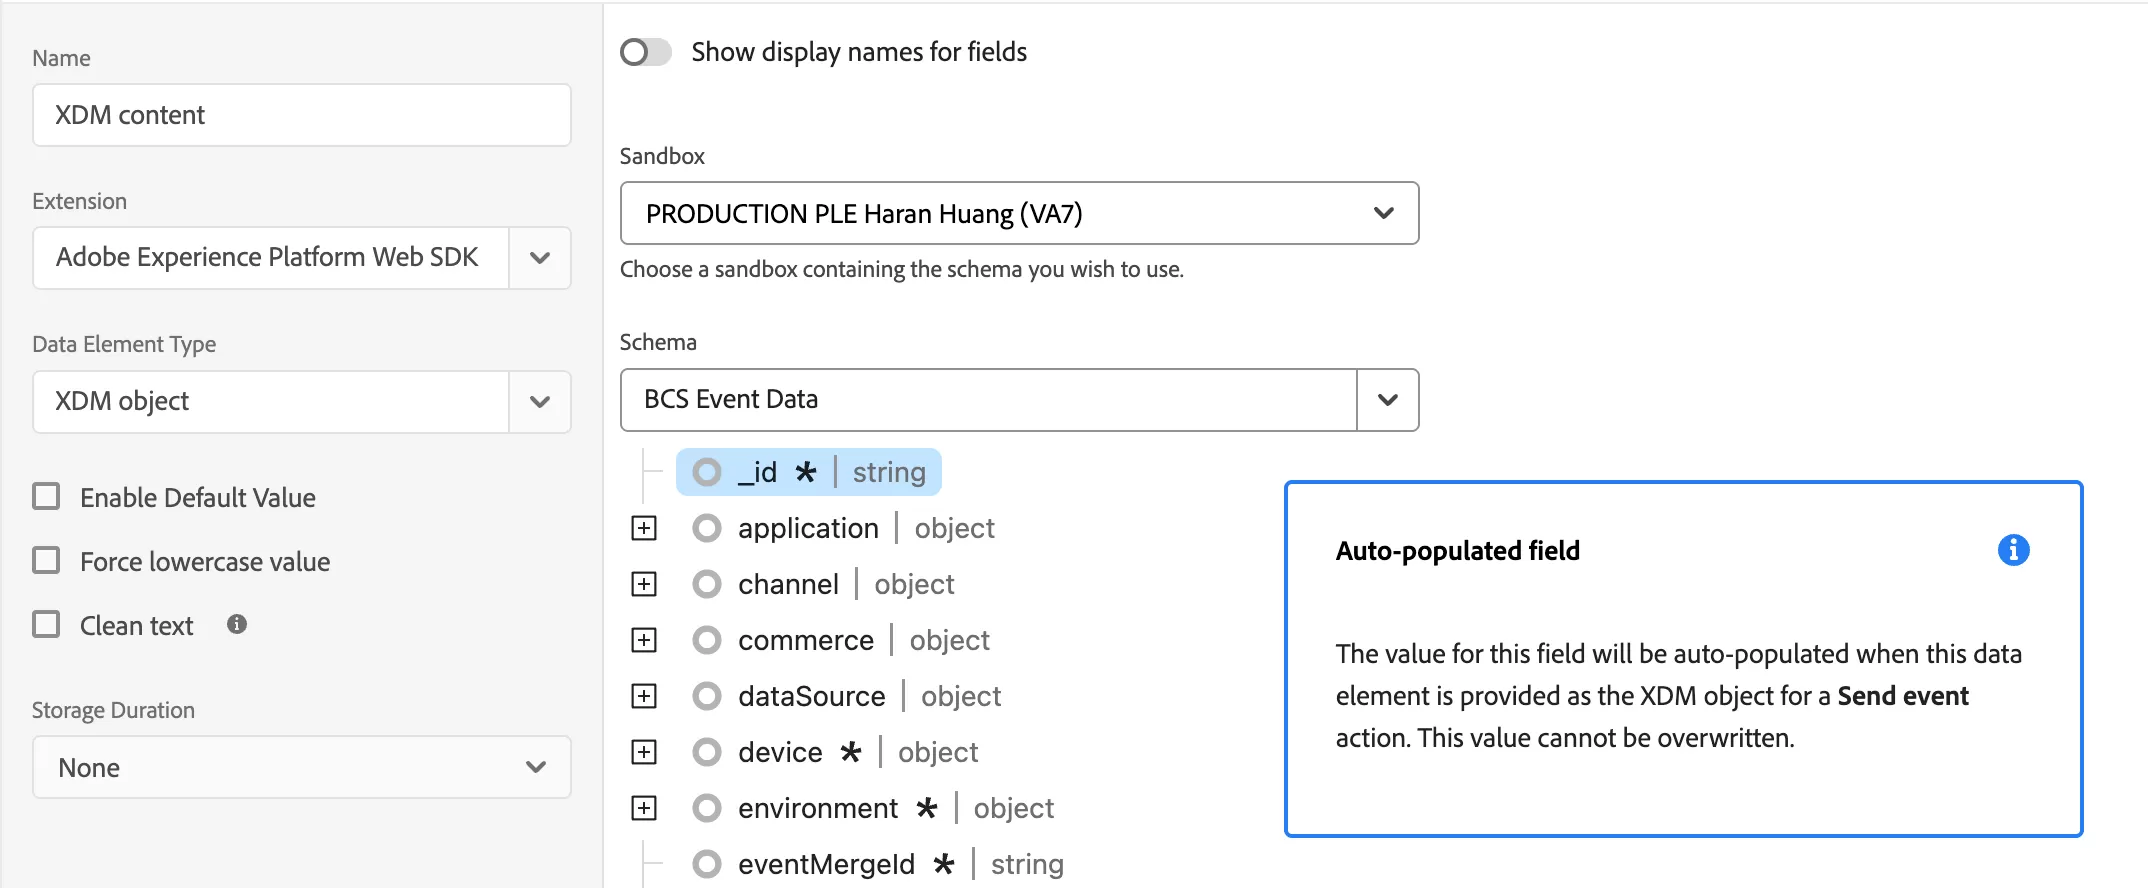
This is where you define the XDM structure and map outgoing data.
At this stage, mapping can remain dynamic (no hardcoded values required).、
Step 6:Configure Rules
Click 「Rules」——「Add Rule」,name it “Page Load ”.
EVENTS Configuration
Configure EVENTS as follows:
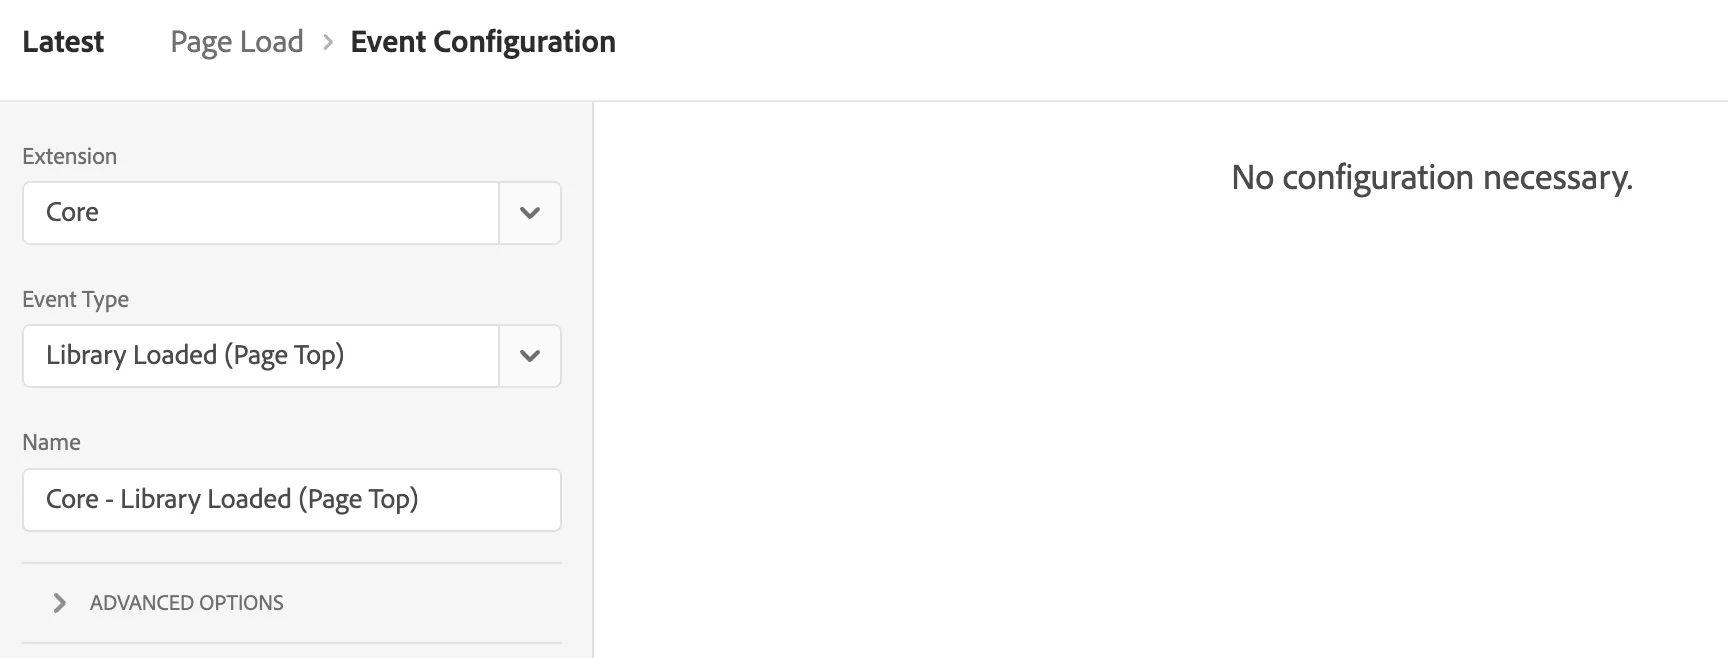
ACTION Configuration
The configuration in Action is:
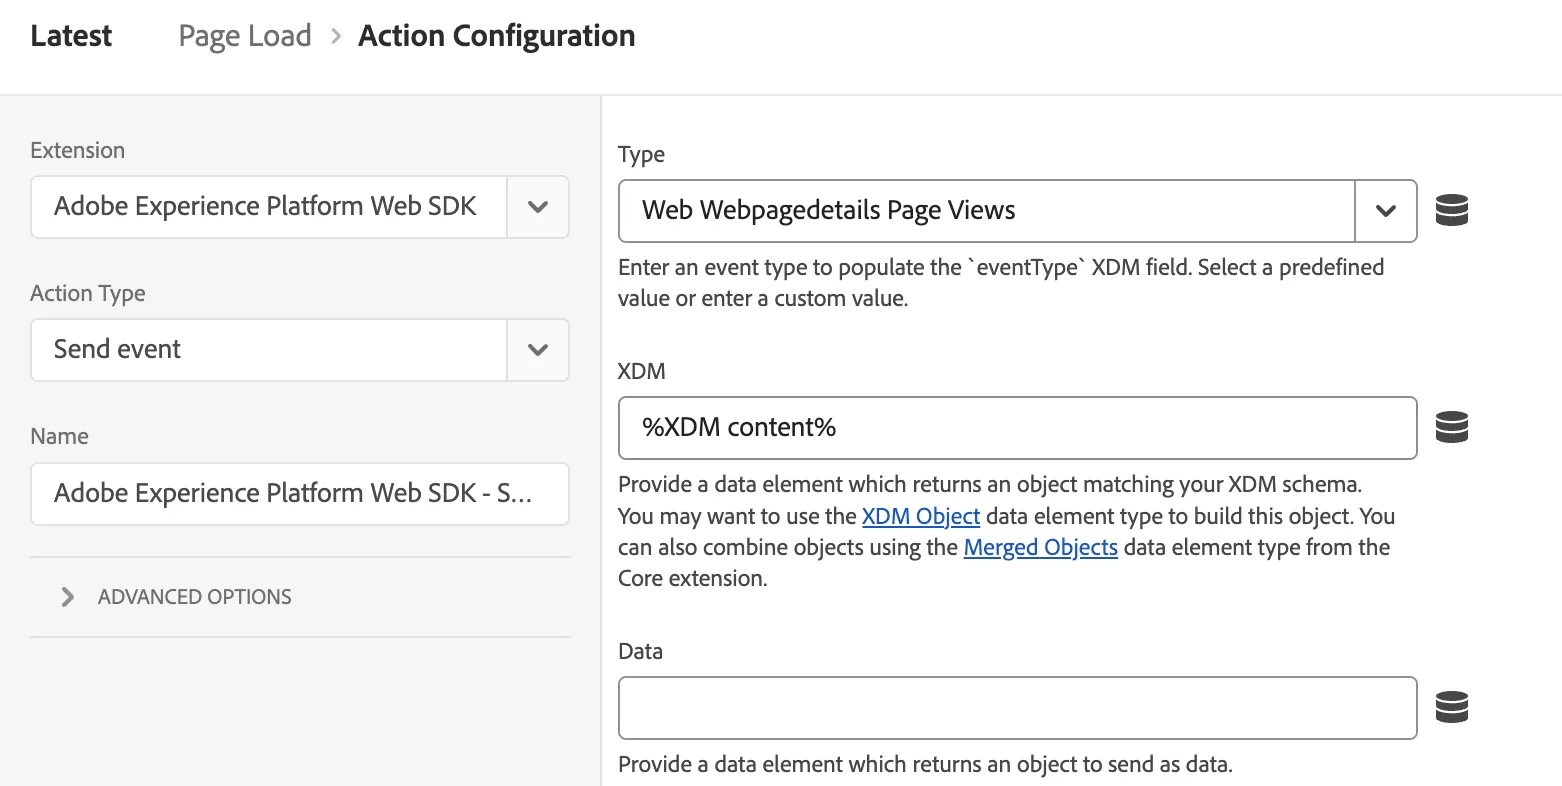
- Type:web.webpagedetails.pageViews (tracks page views)
- XDM:references the data element mapping
- Data:reserved for sending additional profile data later
Final result: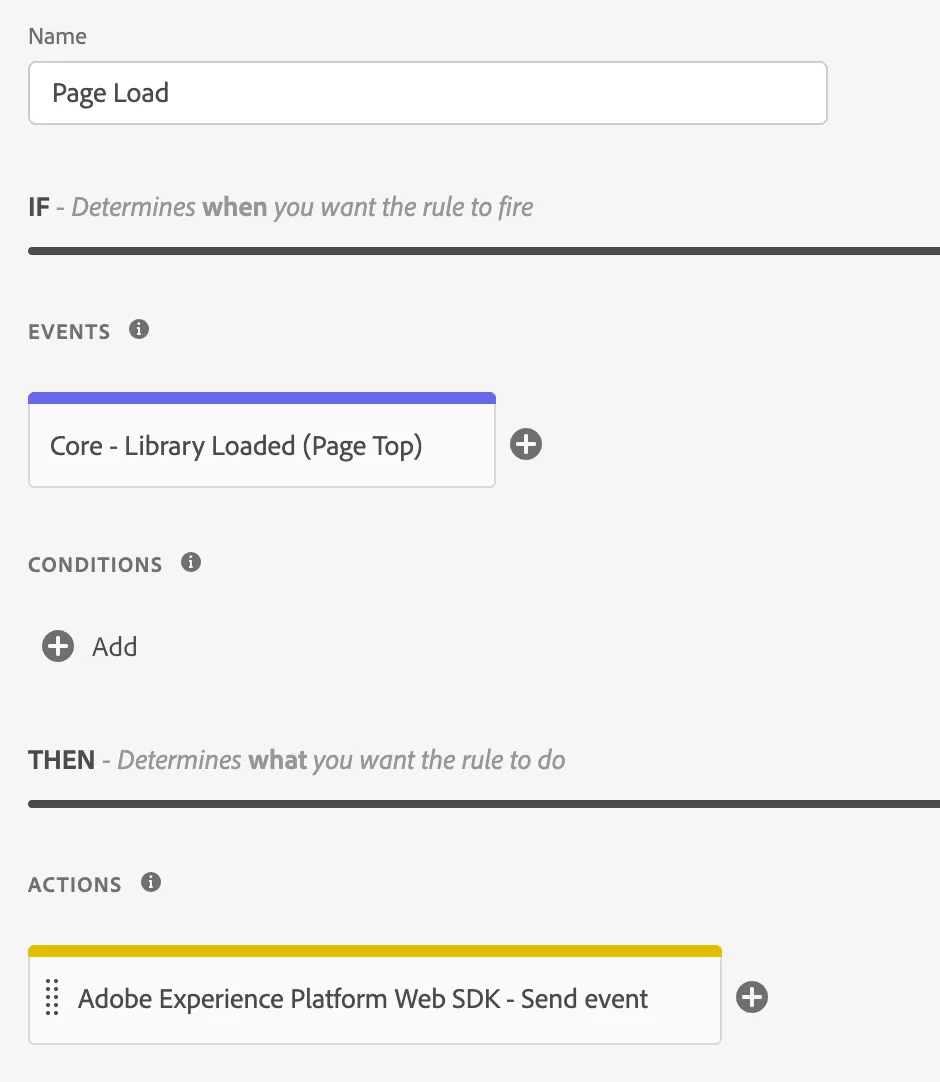
Step 7:Testing & Debugging
Open browser Developer Tools and filter Network requests by “configId”
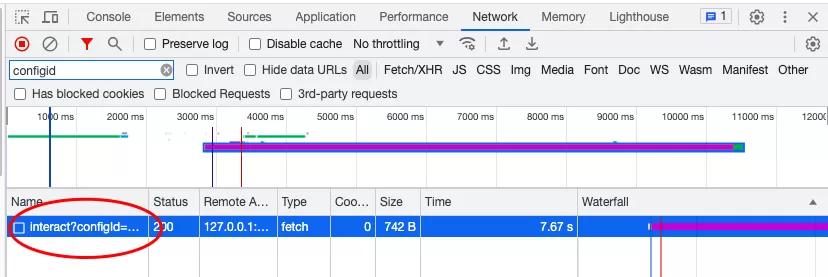
Inspect the request and verify that XDM data is present under the events payload.

Step 8:Validate in AEP
First, check dataset ingestion, In AEP,click 「Dadasets」,open Datasets Event Data(BCS):
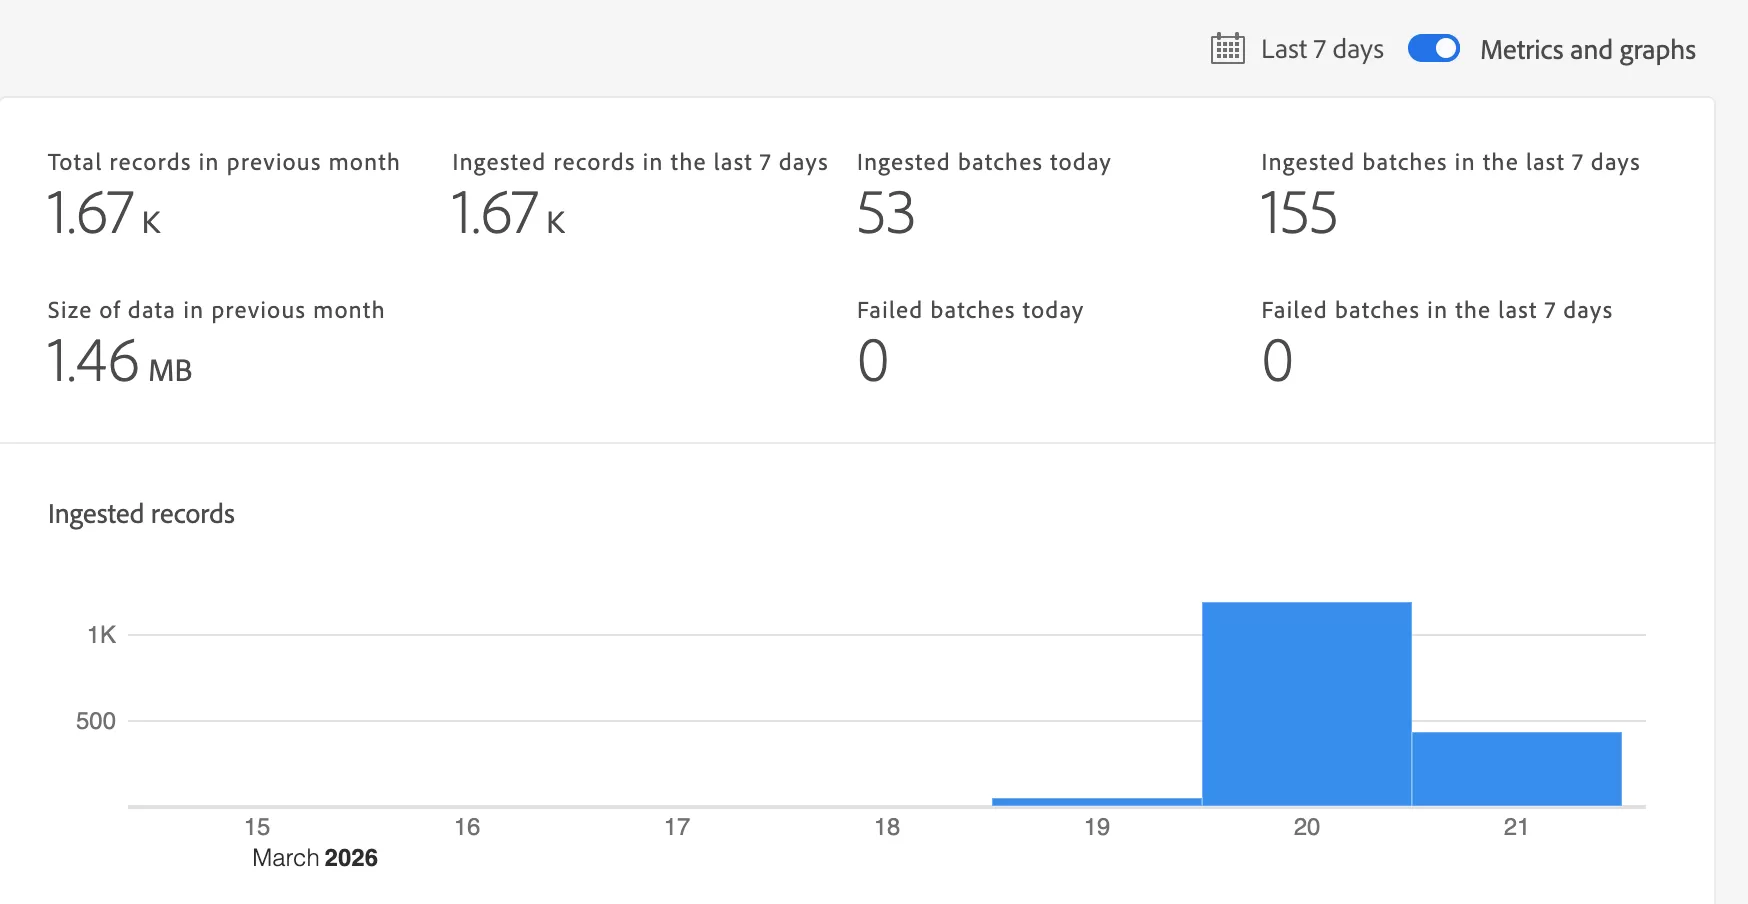
Second, check Profiles,In AEP,click 「Profiles」——「Browser」,
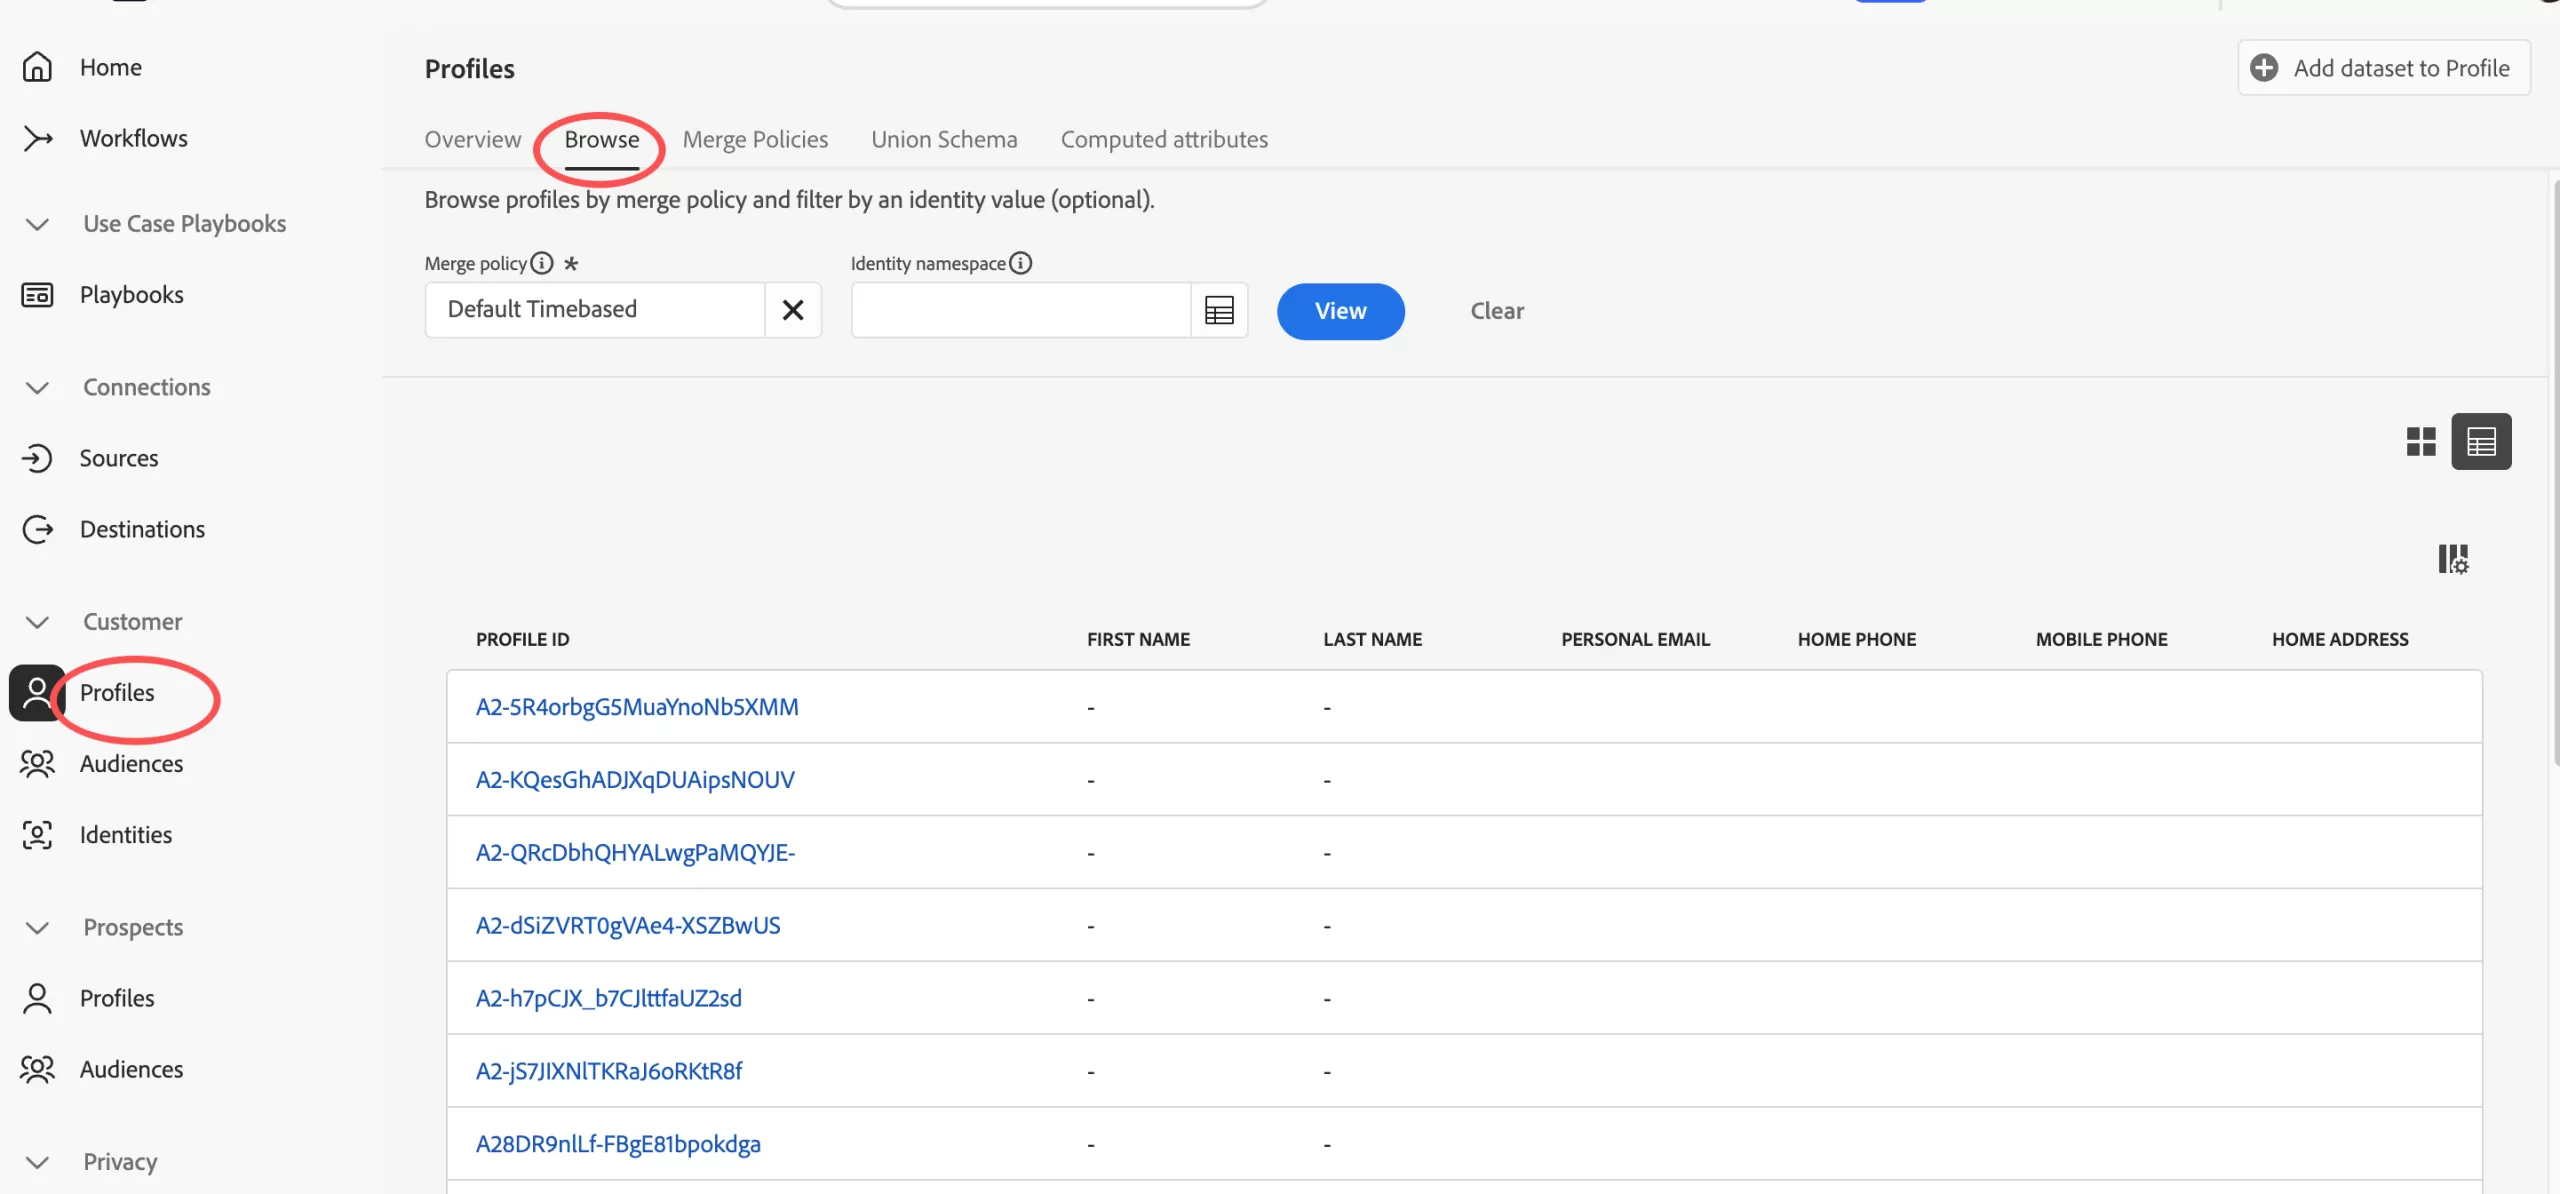
We can see a lot of user profiles,but the following fields are empty because the Profile Data has not yet been sent.
Find your ECID in your browser, such as 54855921733975574201690500415297052057, and then search for it in your Profile: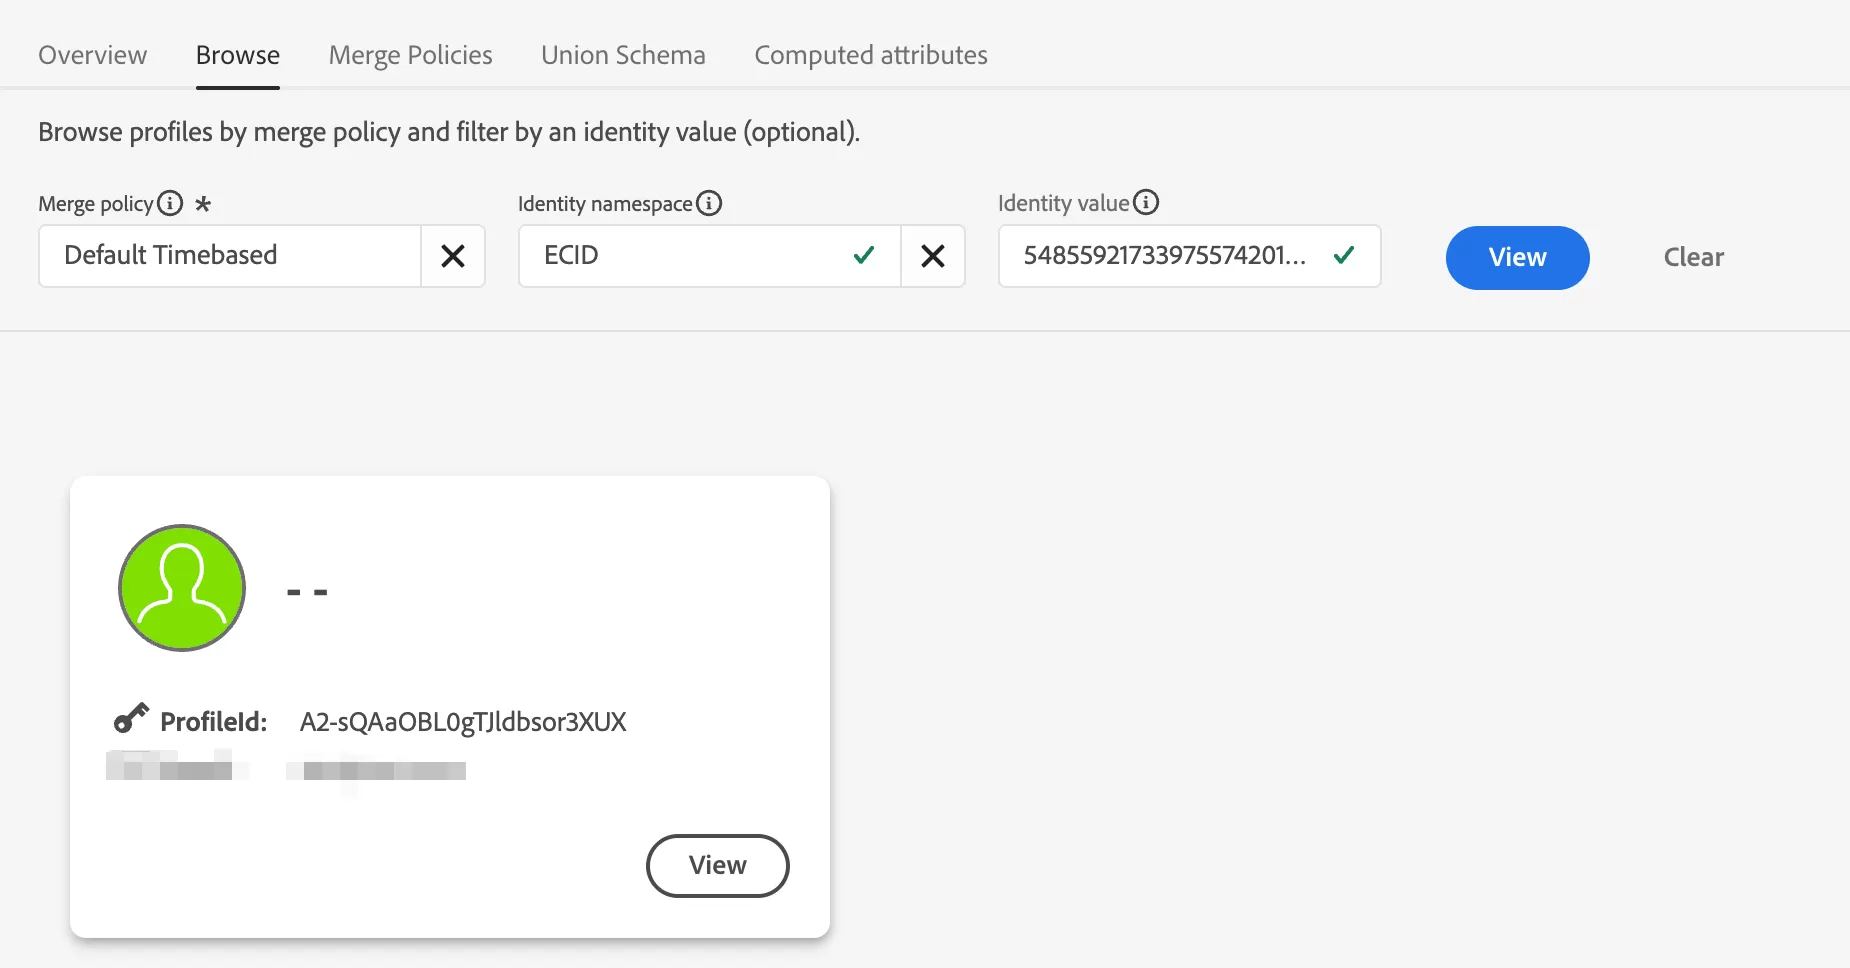
You can find the data you generated yourself.
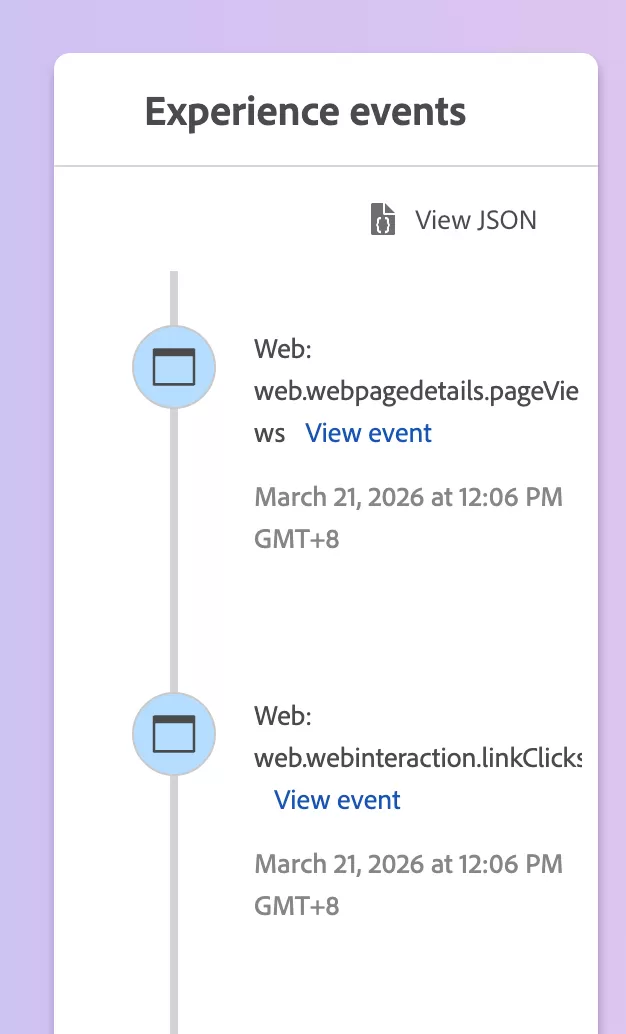
Finally, validate event association, open a profile and confirm event data appears under Experience Events
Send Profile Data to AEP
Currently, the Web SDK cannot directly send XDM Individual Profile data. Instead, this is done via Event Forwarding + HTTP API.
Step 1:Create an XDM Schema
In Adobe Launch, click 「Schemas」——「Create schema」——「Manual」——「Individual Profile」,and name it“ BCS Profile Data”.
Add an identity field and set it as the Primary Identity. For web implementations, this is typically ECID, with the namespace set accordingly.
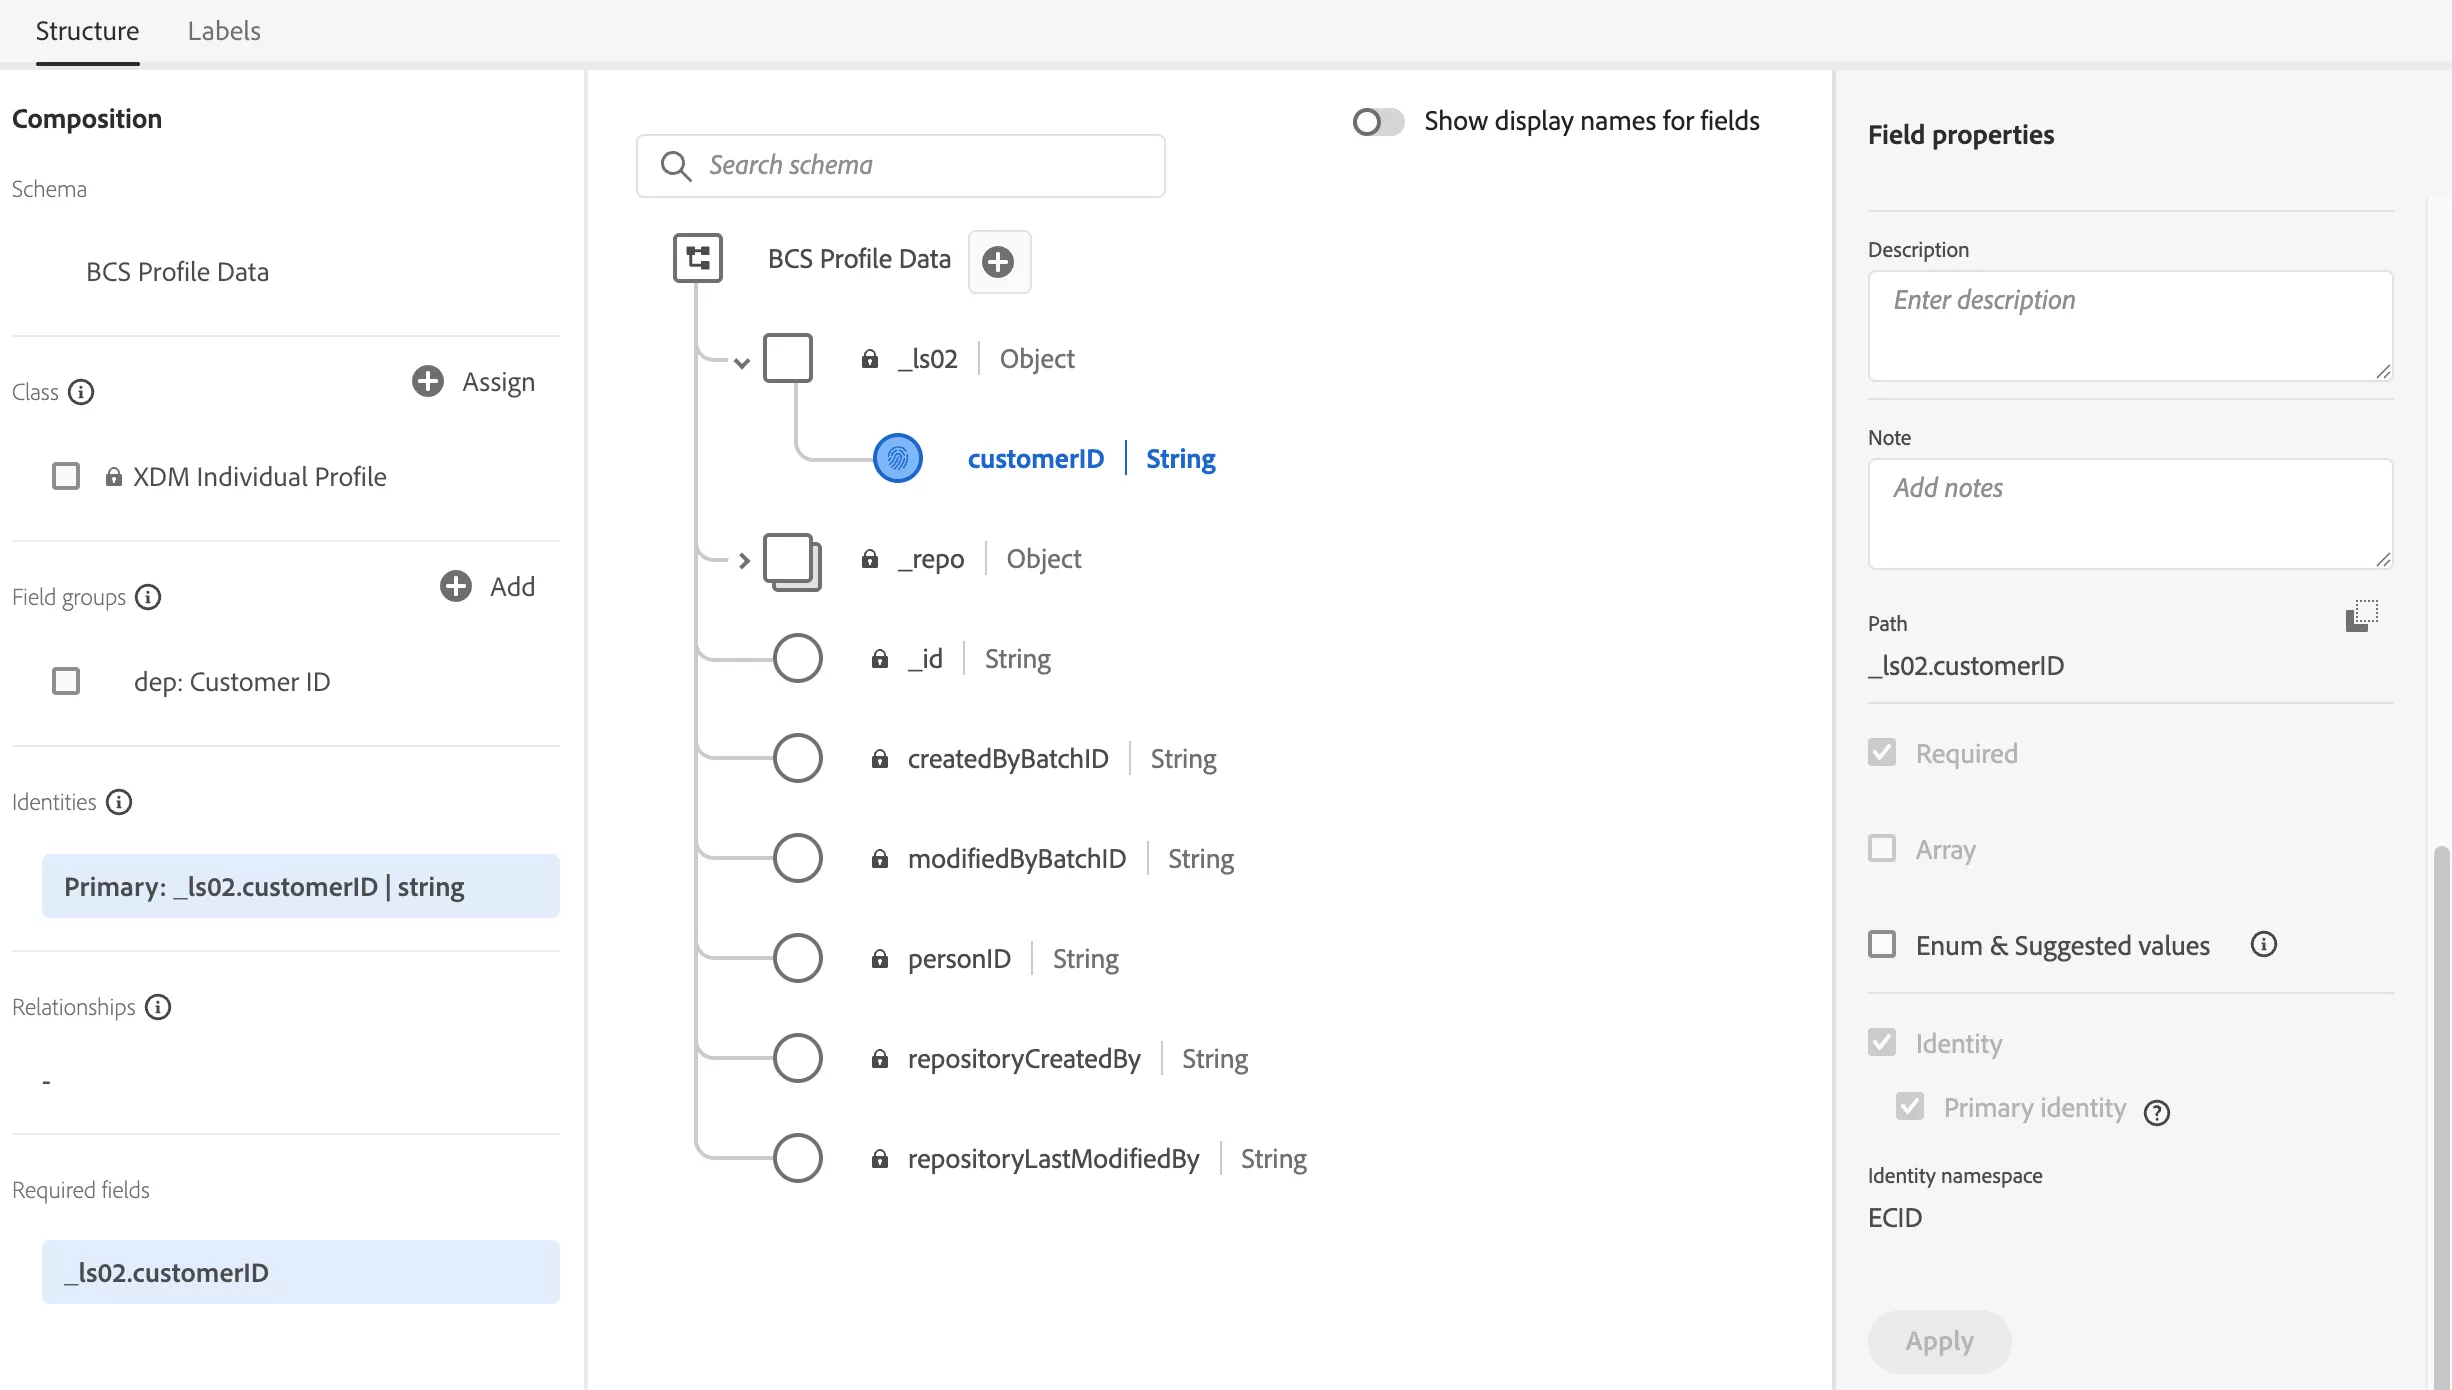
Profile can only be enabled after a Primary Identity is defined, ensuring that data can be ingested into the Profile.
Primary Identity defines the main identifier for the profile.
Both Experience Events and Profile data use identityMap for identity stitching.
Primary Identity is independent of identityMap.
Step 2:Create a Datasets
Click 「Datasets」——「Create dataset」——「Create dataset from schema」,check “BSC Profile Data”:
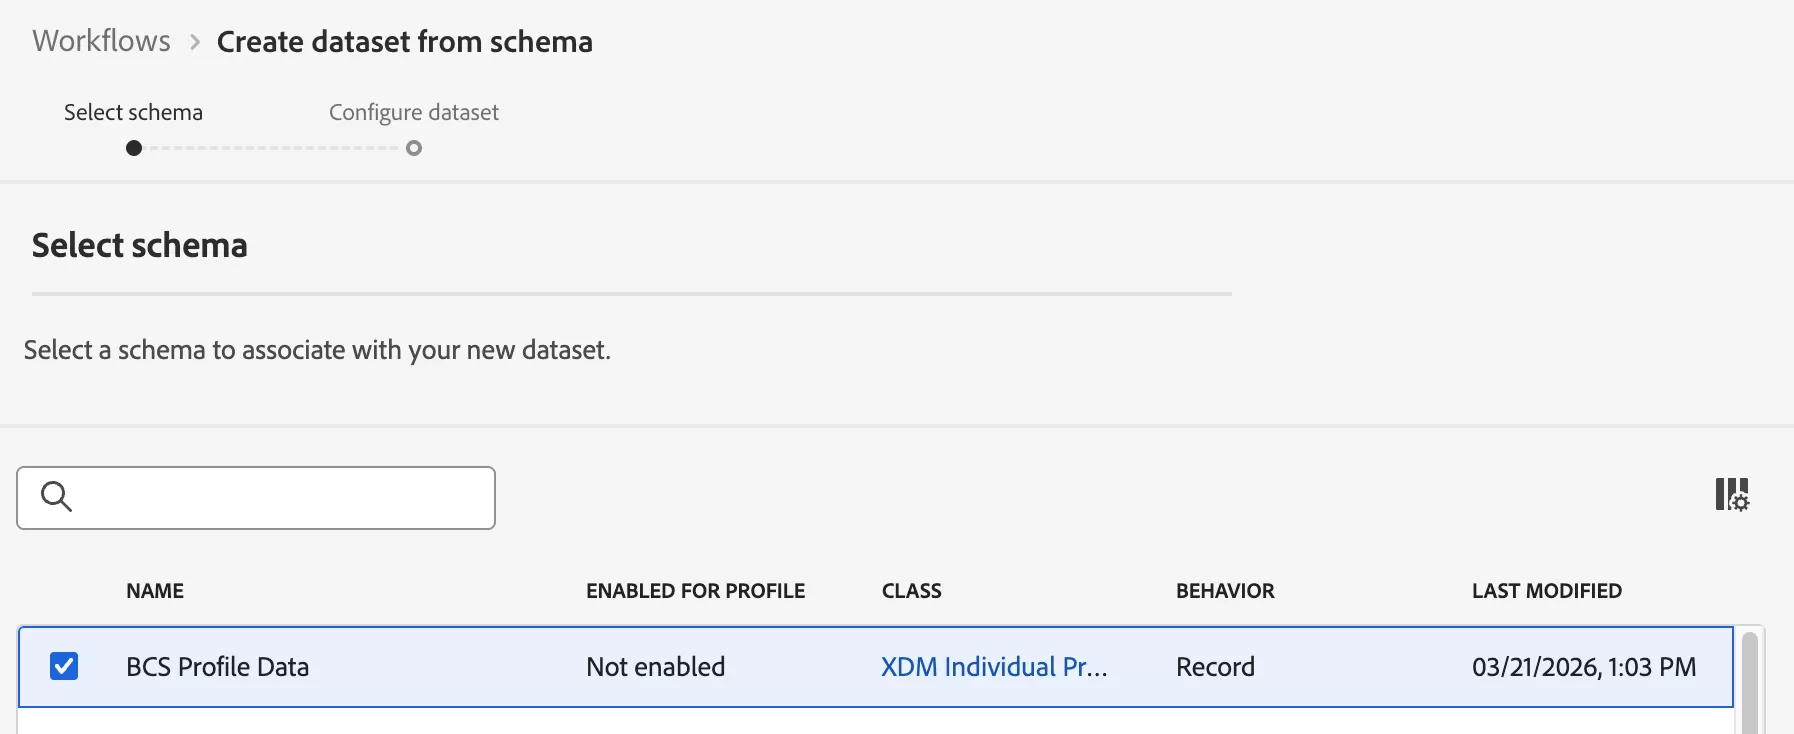
Then click Next and name it “Datasets Profile Data (BCS)”:
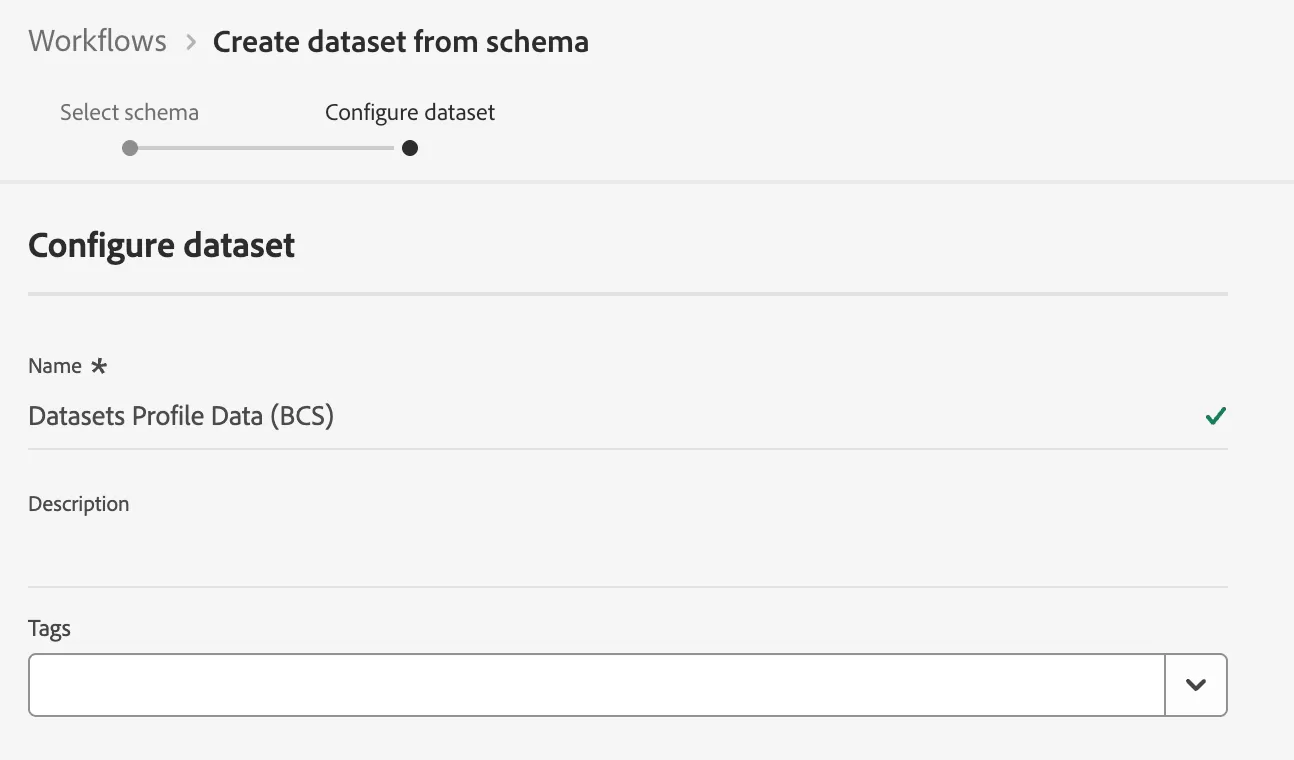
After creation, enable Profile in the Dataset so that Event data will be captured in the Profile
This step also requires enabling Profile.
Step 3:Configure Datastreams
Click 「Datastreams」——「New Datastreams」,open Adobe Experience Platform:
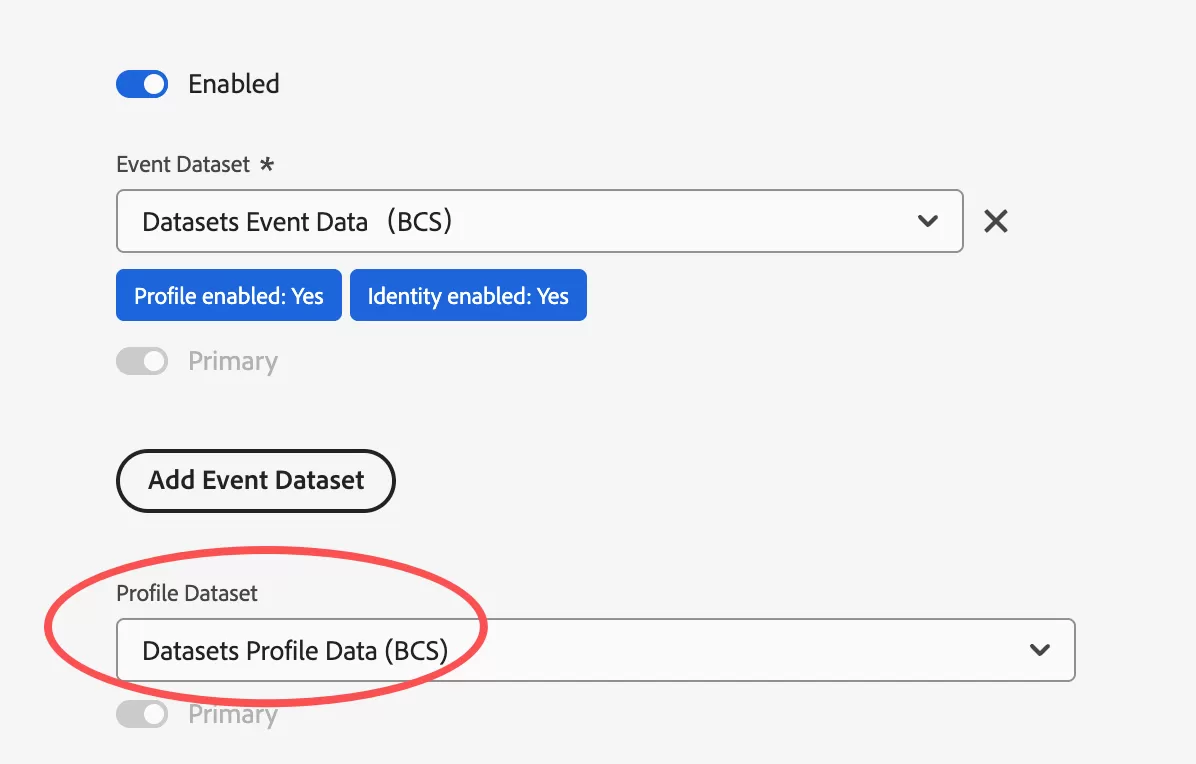
Add follow Configure:
- Profile Dataset: Select the datasets created earlier(Datasets Profile Data(BCS))
Save the configuration.
If a profile is not enabled in the Datasets, this Dataset will not appear in the Profile Dataset list.
Step 4:Add Profile Data
Use Data Elements to construct the Profile payload in JSON format, including ECID. The identityMap must include an ID that matches the event data (typically ECID).
Modify the Action in Rules as follows:
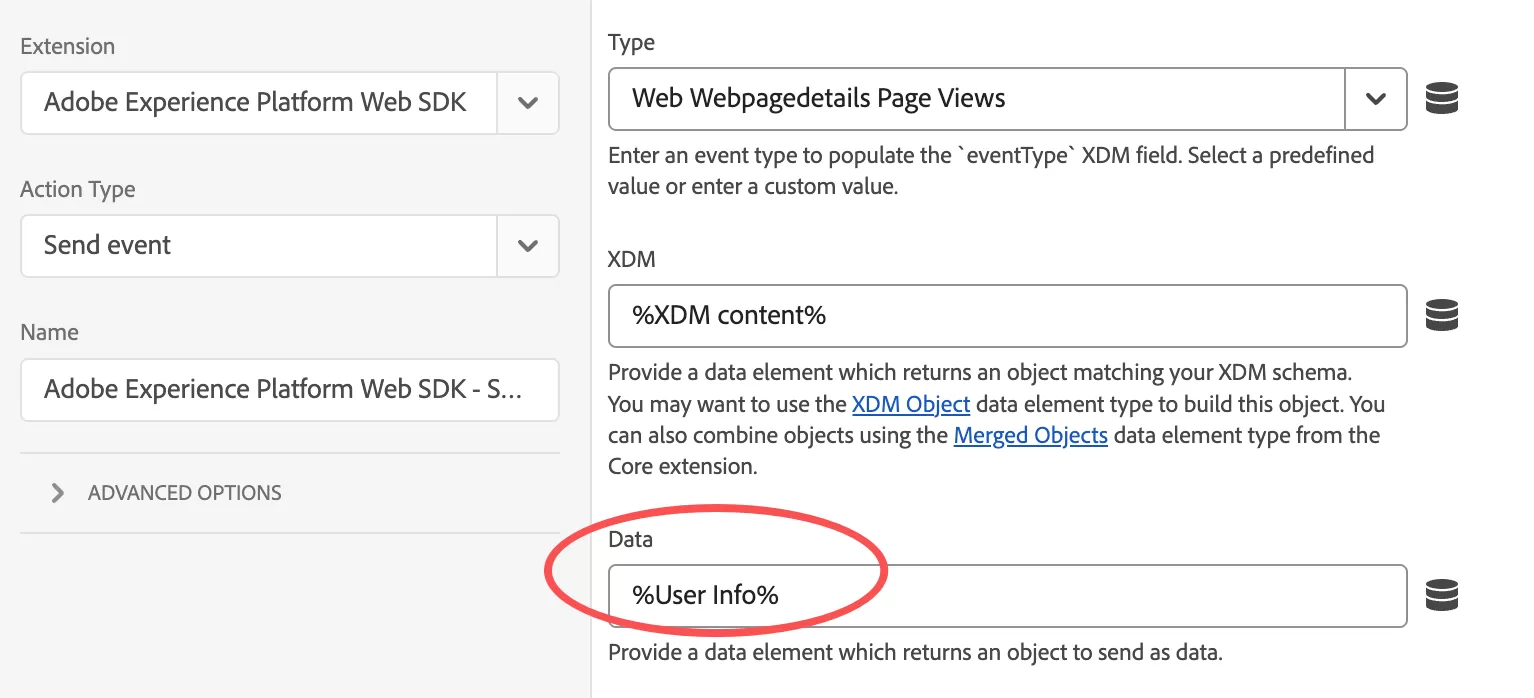
Then let’s test and verify:
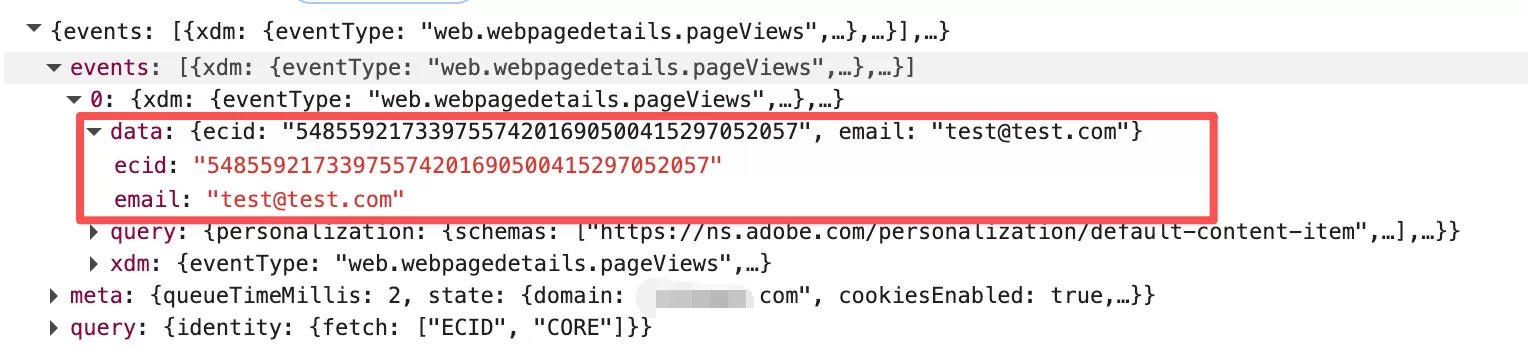
User info is stored in the data and can be used in Event Forwarding.
Step 5:Authenticate with AEP APIs
To send profile data via API, you need:
- {ACCESS_TOKEN}
- {API_KEY}
- {ORG_ID}
Step 6:Event Forwarding
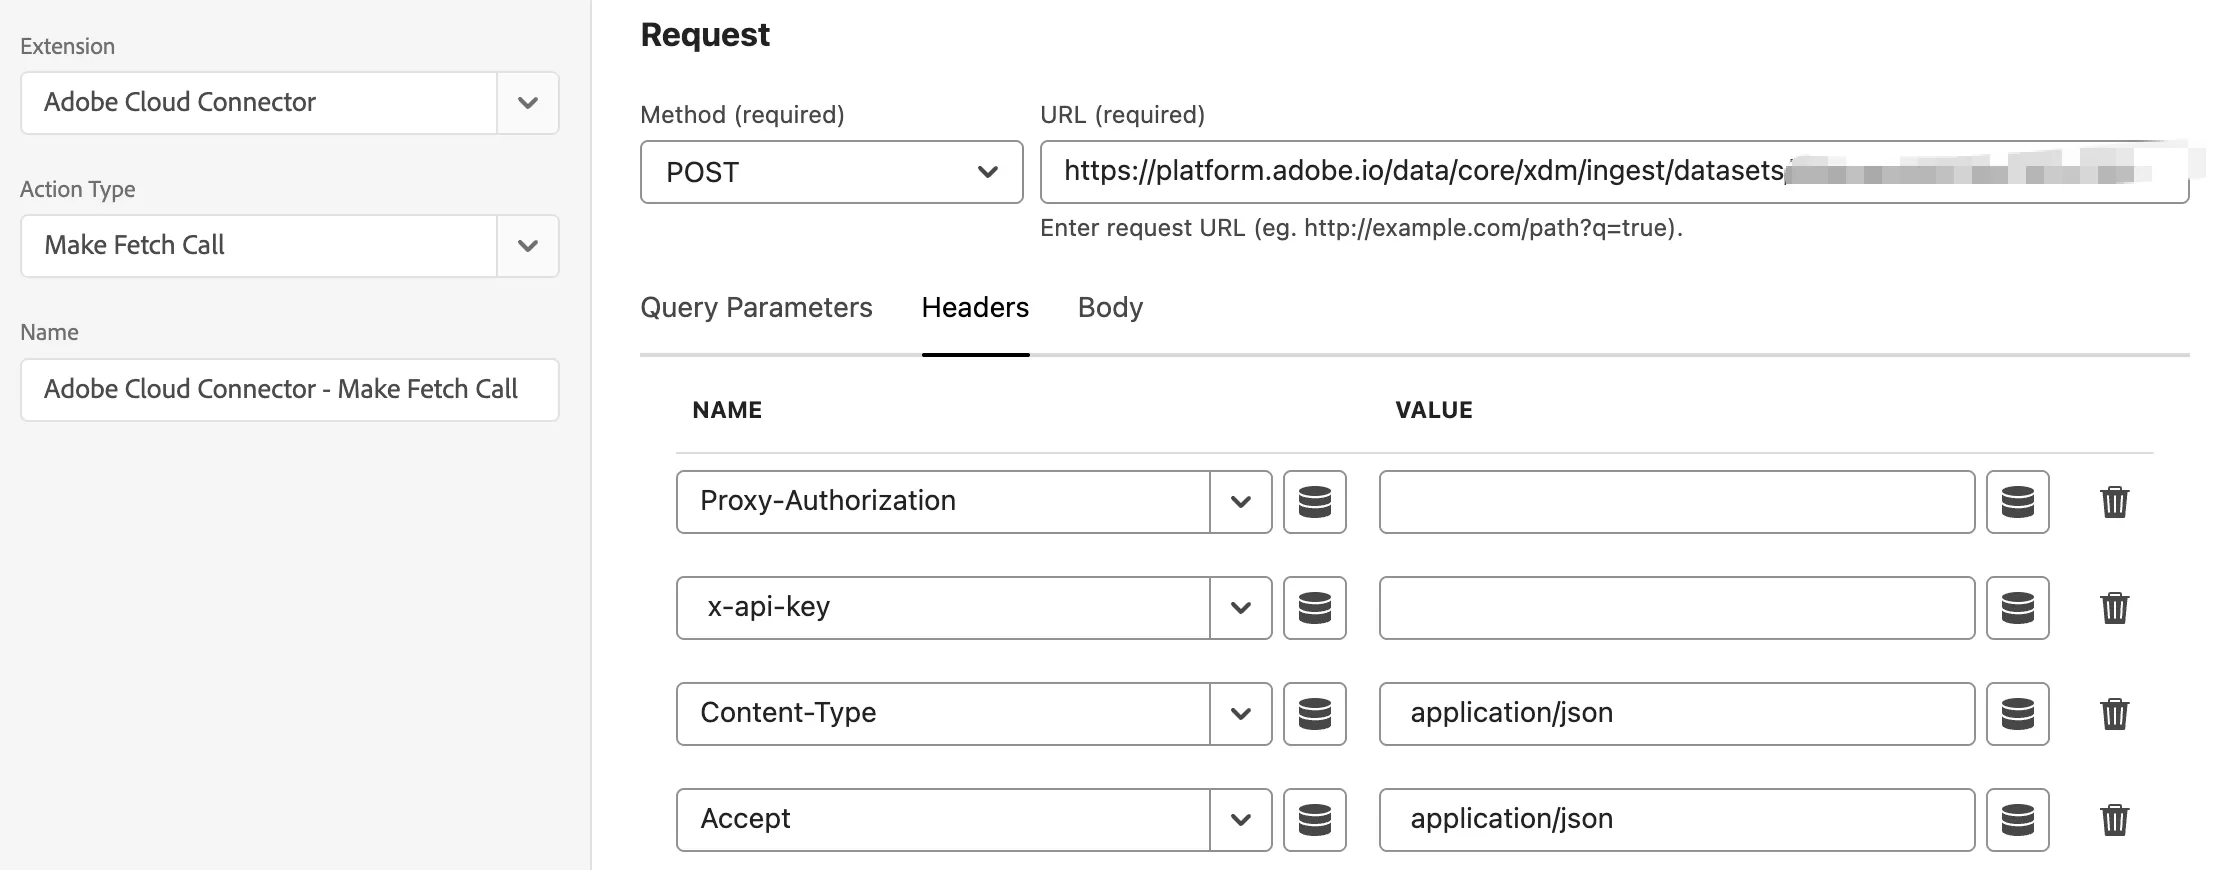
In Event Forwarding, you have two options:
- Use a Custom Code
- Use Adobe Cloud Connector Extension, example:
Step 7:Validate in AEP
First, check dataset ingestion, In AEP,click 「Dadasets」,open Datasets Profile Data(BCS)and confirm data is present.
Second, check profile attributes. In AEP,Search for your ECID (54855921733975574201690500415297052057)and verify that attributes (e.g., email [email protected] ) appear in the profile.
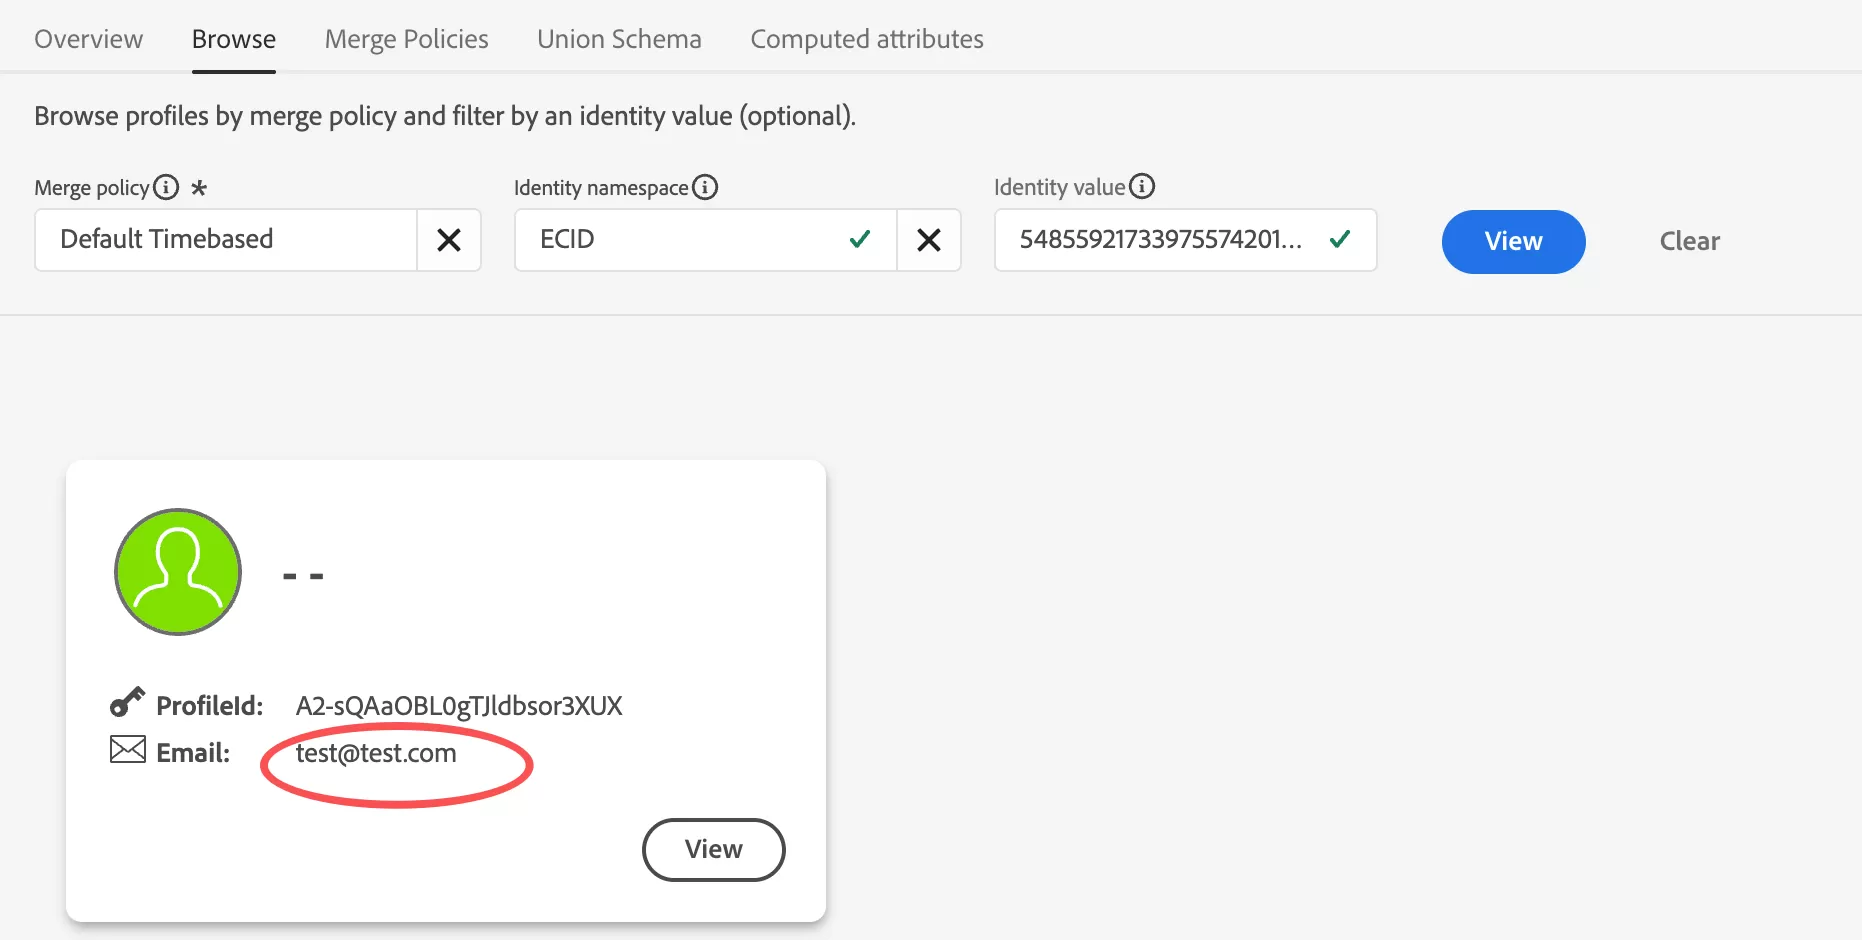
This indicates that the XDM Individual Profile was successfully sent.
Adding an Additional Identity to identityMap
By default, ECID is included in Experience Events but may not be visible in the payload.
To improve identity stitching, you can add another ID (e.g., GA4 Client ID).
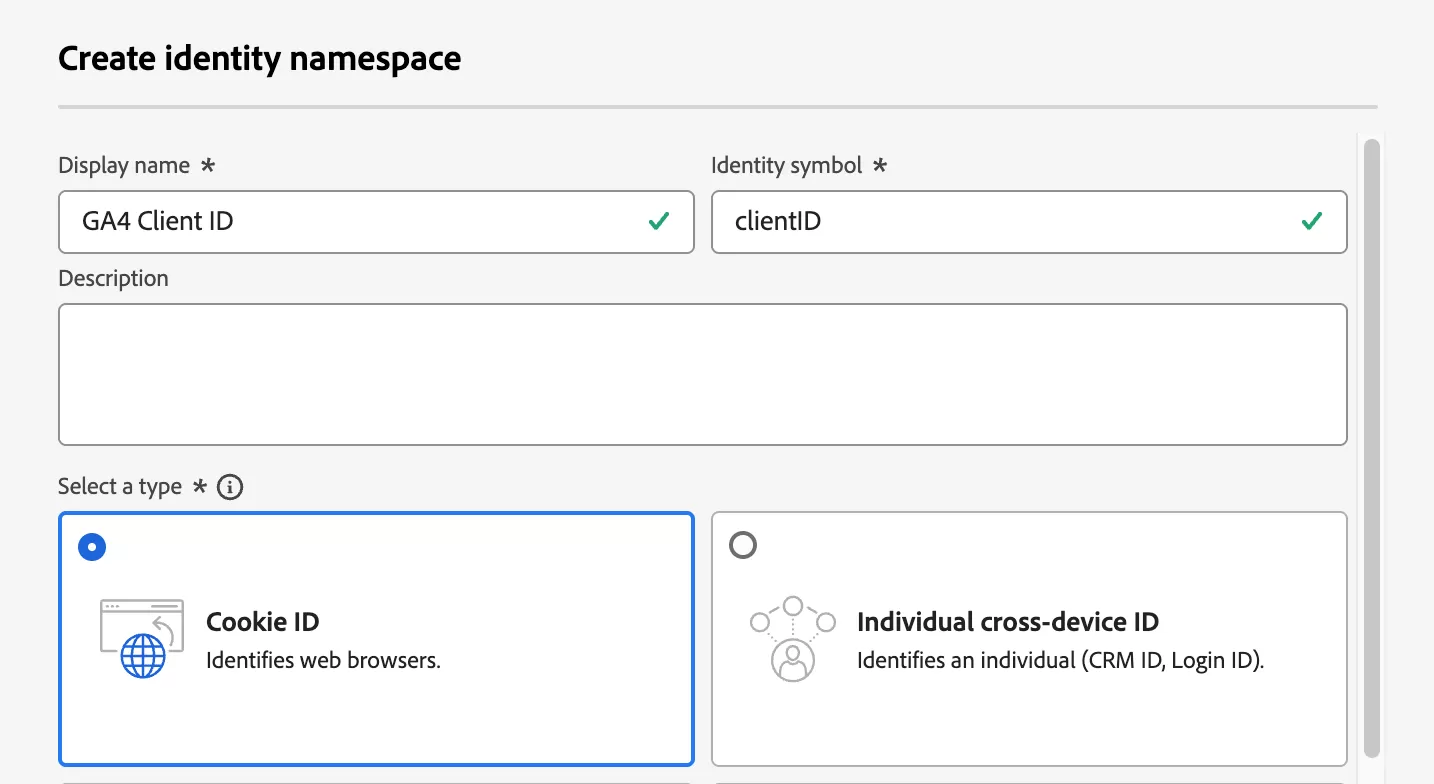
Step 1:Create a Namespace
Define a custom namespace in Identities:
Step 2:Configure Data Element
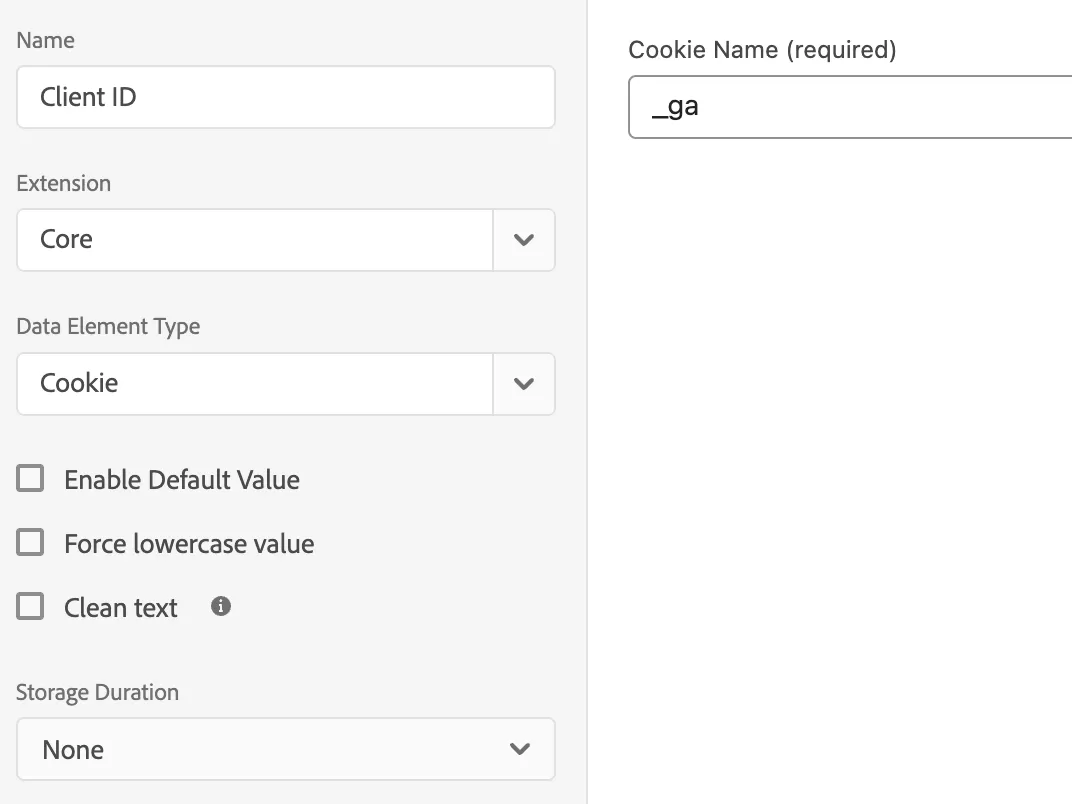
First, Extract the Client ID from cookies (using the entire ID).
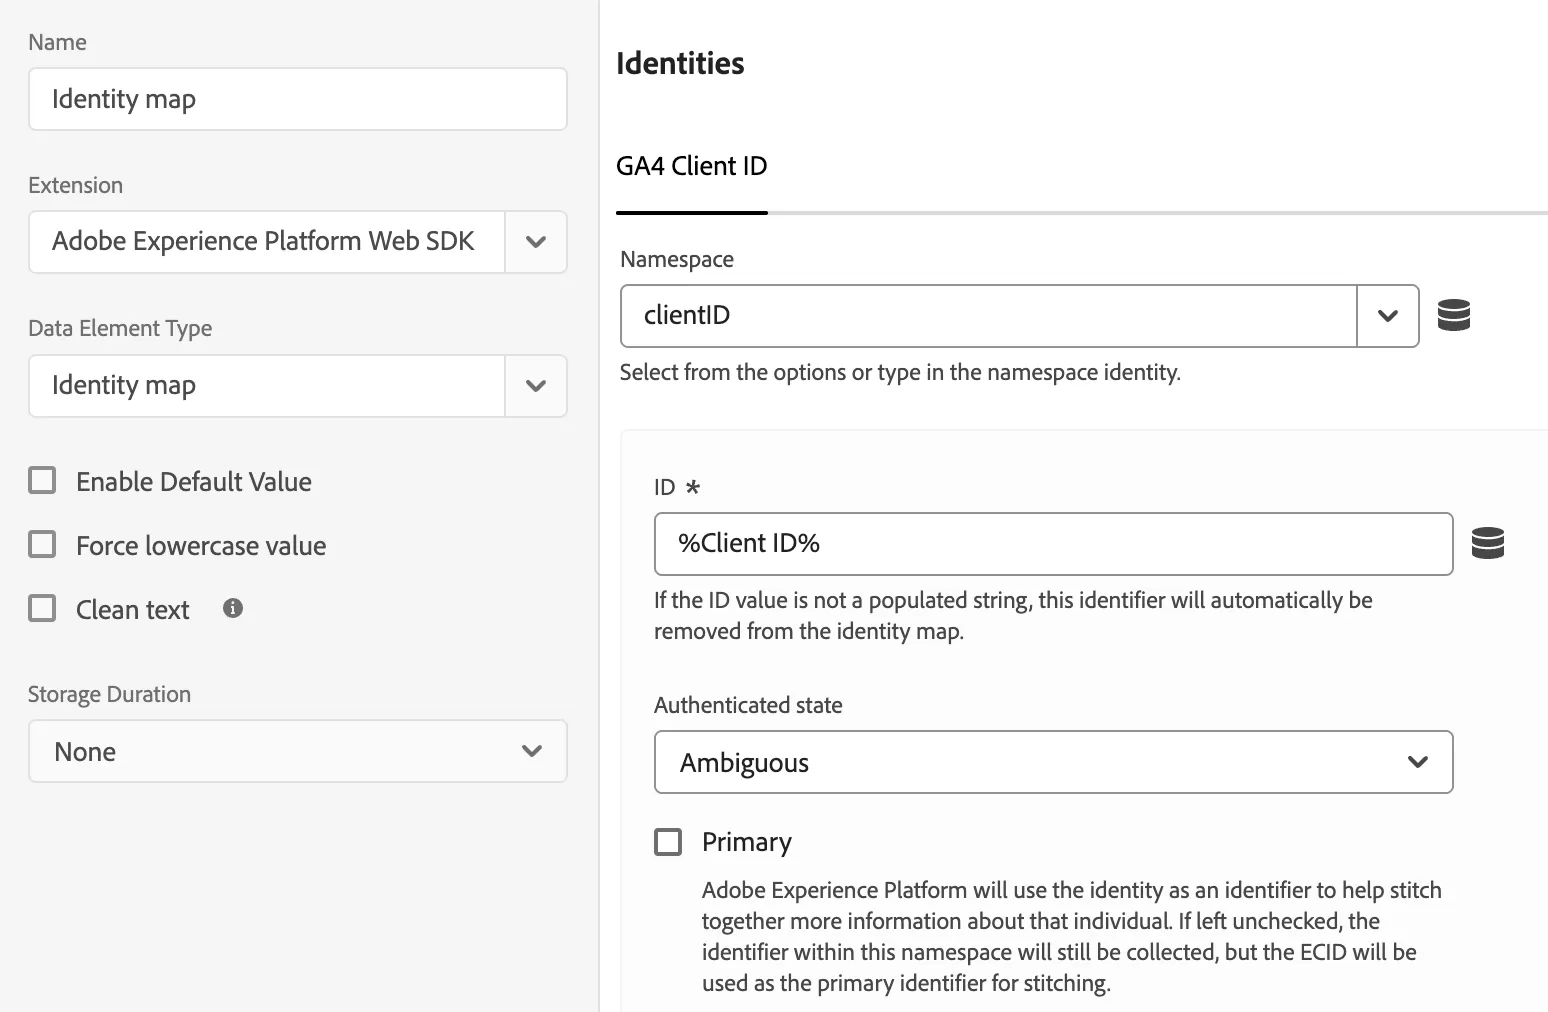
Then add it to identityMap
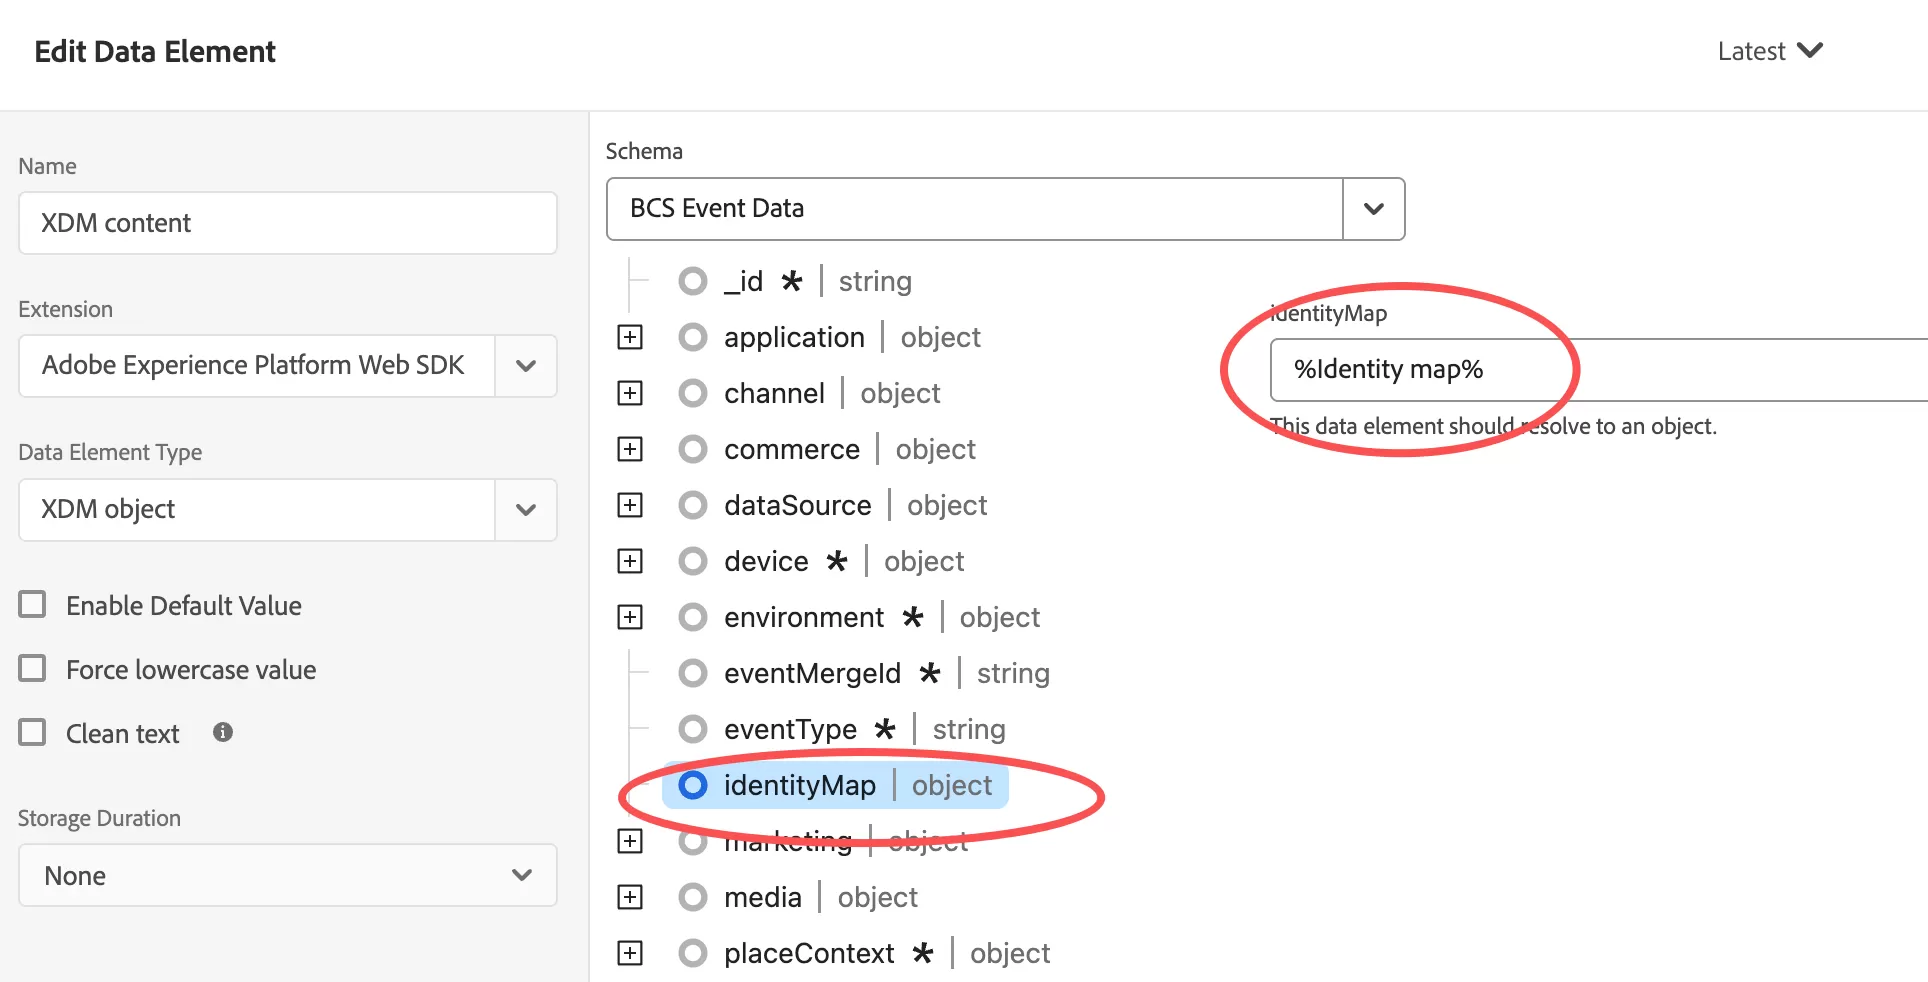
Finally updated in XDM content:
Step 4:Testing & Debugging
Verify in the network request that the Client ID appears in identityMap.
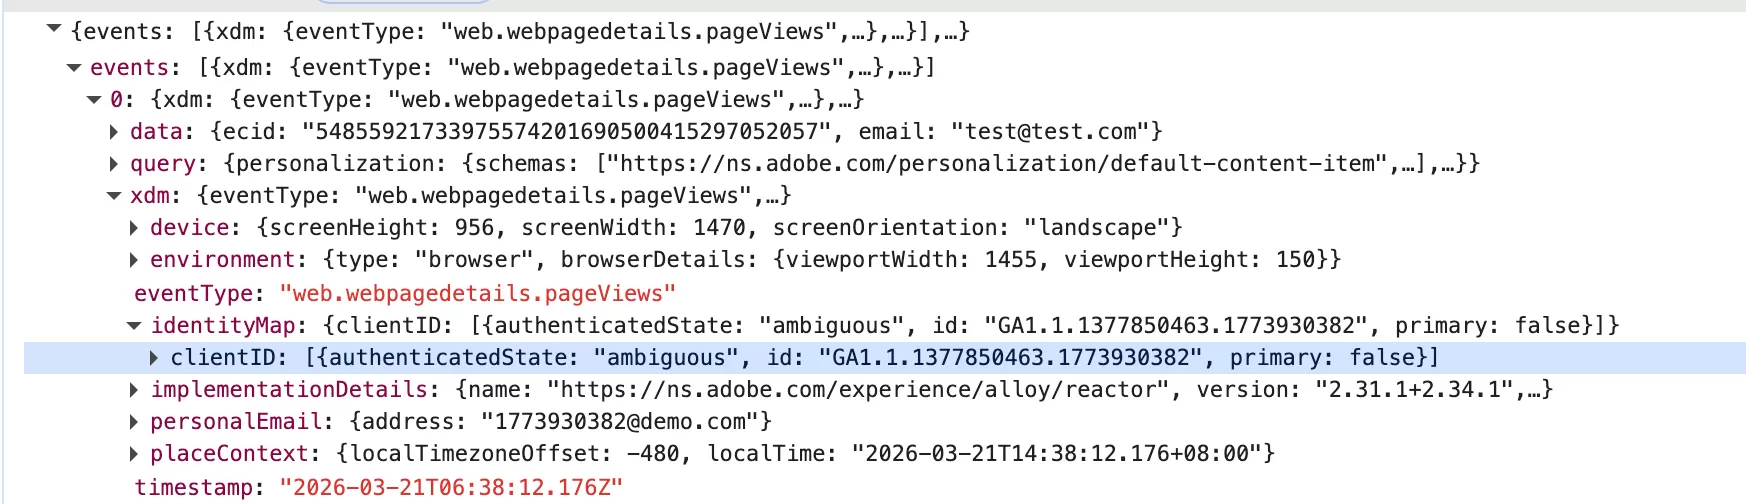
As you can see, the Client ID is already in the identityMap.
Step 5:Validate in AEP
Check profile attributes. In AEP,Search for your ECID (54855921733975574201690500415297052057)and verify Linked identities:
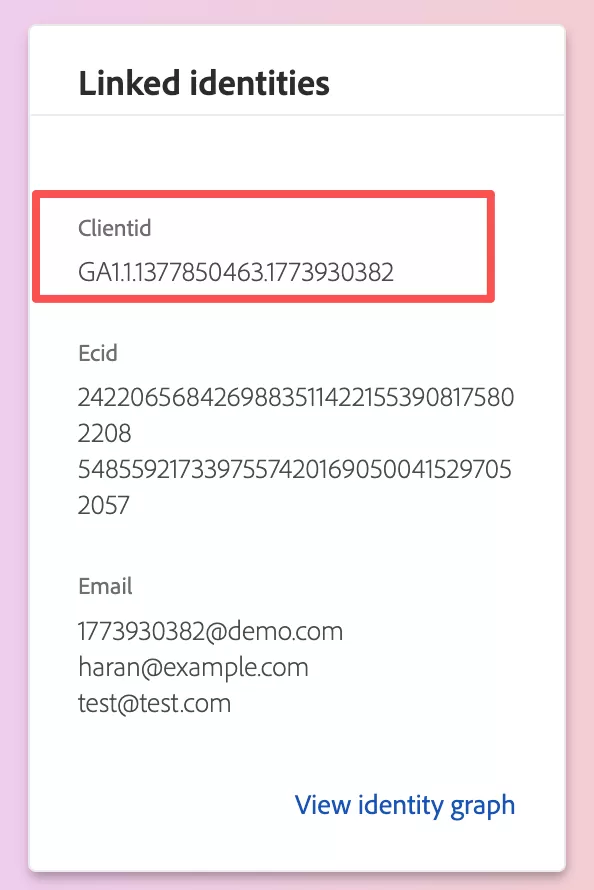
This confirms successful identity enrichment.