Updated: January 21, 2025
If you’re new to Google Tag Manager, you’ve probably heard the term “data layer” thrown around a lot. And if you’re like most people starting out, your first reaction is probably: “What is it, and why do I need it?”
That’s fair. The data layer is one of those concepts that sounds abstract until you see it in action. But once you understand it, everything about GTM clicks into place.
In this article, I’ll walk you through what the data layer is, why it matters, and how to use it with real examples.
What Is the Data Layer?
The GTM data layer is a JavaScript object stored on your web page. Think of it as a messenger between your website’s code and your GTM tags.
Here’s the old way vs the new way:
- Back in the old days, if you wanted to send data to GA4 you had to hardcode the tracking directly into your website’s source code. Want to track a new event? Call the developer. Want to change a parameter? Call the developer again.
- That’s where the data layer comes in. Instead of baking tracking into your site code, your website pushes data into the data layer, and GTM reads it from there. The data layer acts as a structured, unified bridge — your website doesn’t need to know which tags are running, and your tags don’t need to know how your website works.
Why Use a Data Layer?
The Data Layer has the following advantages:
- Unified data collection: Data is collected consistently regardless of which tags you add or remove. Less code redundancy, fewer bugs.
- Dynamic data delivery: Data can be pushed to the data layer after the page loads, without reloading the page.
- Enhanced analysis and marketing: With structured data, your analytics and marketing tools can track user behavior more accurately.
- Improved user experience: By decoupling tracking from page code, you can reduce page load time.
How to Initialize the Data Layer
The first thing you need is the data layer initialization code:
window.dataLayer = window.dataLayer || [];
This line checks whether dataLayer already exists in the global window object. If it doesn’t, it creates an empty array. If it already exists (for example, GTM’s container snippet already set it up), it leaves it alone.
How to Push Data to the Data Layer
Once the data layer is initialized, you push data into it using dataLayer.push():
dataLayer.push({
    'event': 'test',
    'pageType': 'product'
});
A quick note: it’s dataLayer.push({...}), not dataLayer.push = ({...}). The push method adds a new object to the array. Using an assignment (=) would overwrite the array entirely.
Here’s how different data structures look:
| Scenario | Code Example |
|---|---|
| Single variable | dataLayer.push({'event': 'test', 'pageType': 'product'}); |
| Multiple variables | dataLayer.push({'event': 'test', 'pageType': 'product', 'pageTitle': 'BCS'}); |
| Nested variable | dataLayer.push({'event': 'test', 'pageInfo': { pageURL: 'https://www.bbccss.com' }}); |
Clearing Variables
If you’re sending dataLayer.push() continuously, you might run into an issue where old variables carry over into new pushes. To avoid that, include the initialization line before each push:
window.dataLayer = window.dataLayer || [];
dataLayer.push({
    'event': 'test',
    'pageType': 'product'
});
This clears the previous push’s variables so you don’t get stale data.
dataLayer vs dataLayer.push
dataLayer— initializes the data layer (sets up the empty array).dataLayer.push()— pushes new data into the data layer (sends the data).
Configuration Example in GTM
Let’s walk through a real example. Suppose you want to fire a GA4 event when a user clicks this link:

Step 1: Add dataLayer.push to the HTML
The source code for tracking location is:
<a>dataLayer.push demo test</a>
DE needs to add dataLayer.push as:
dataLayer.push = ({
    'event': 'test',
    'pageType': 'product'
});
Add the dataLayer.push call directly to the element’s onclick attribute:
<a onclick="dataLayer.push({'event': 'test','pageType': 'product'});">dataLayer.push demo test</a>

Now every time someone clicks this link, the data layer receives the event and page type.
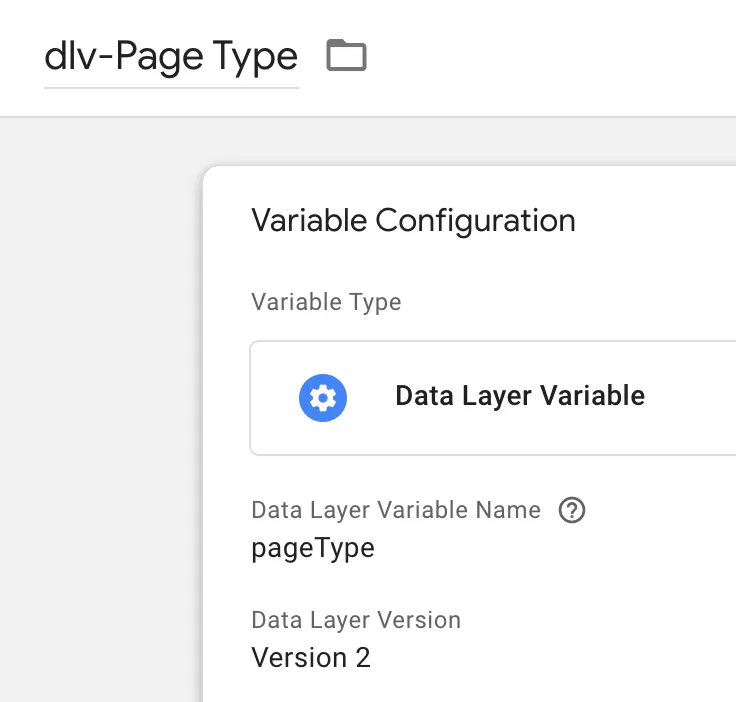
Step 2: Set Up a Data Layer Variable
In GTM, click「 Variables」——「New」——「Choose a variable type to begin setup…」——「Data Layer Variable」, name it “dlv-Page Type”, and then set as follows:
Step 3: Set Up a Custom Event Trigger
In GTM , click「Triggers」——「New」——「Choose a trigger type to begin setup…」——「Custom Event」,Name it “dataLayer.push demo”, and make the following settings: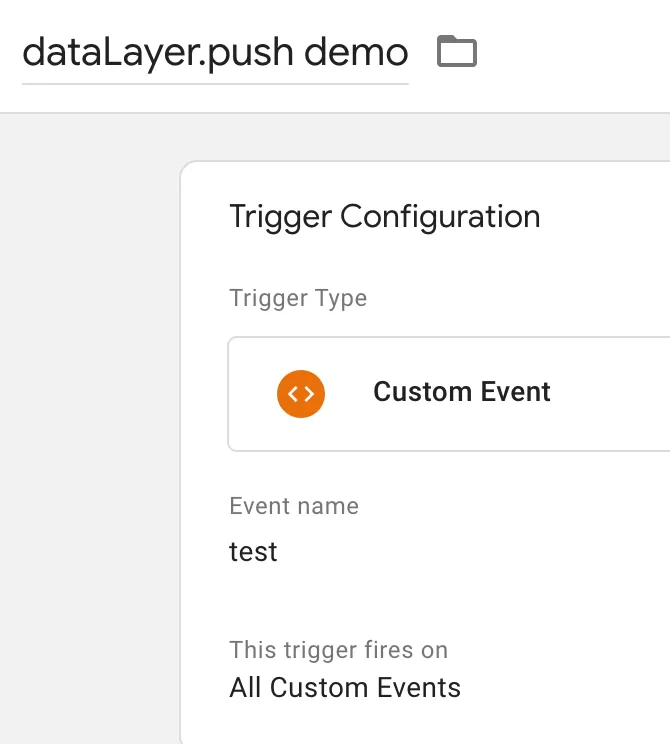
Whatever the value of the event in dataLayer.push is, fill in the event name.
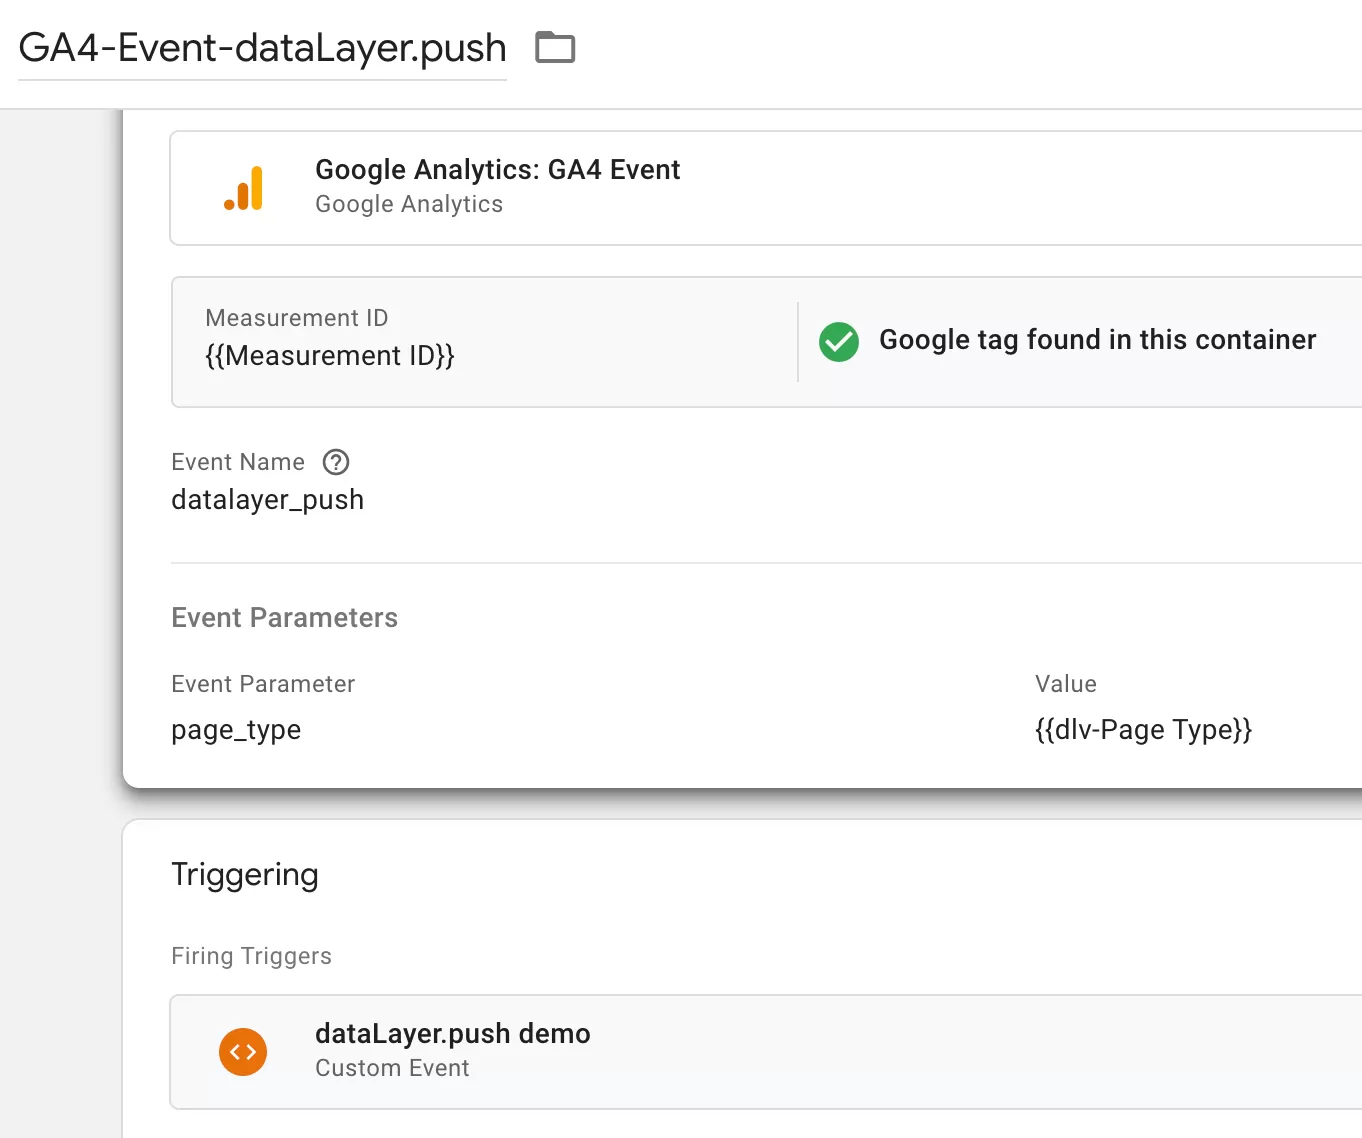
Step 4: Set Up a GA4 Event Tag
In GTM , click「Tags」——「New」——「Choose a tags type to begin setup…」——「Google Analytics: GA4 Event」,Name it “GA4-Event-dataLayer.push”, and make the following settings:
Step 5 : Preview and Publish
Next is the Preview test:
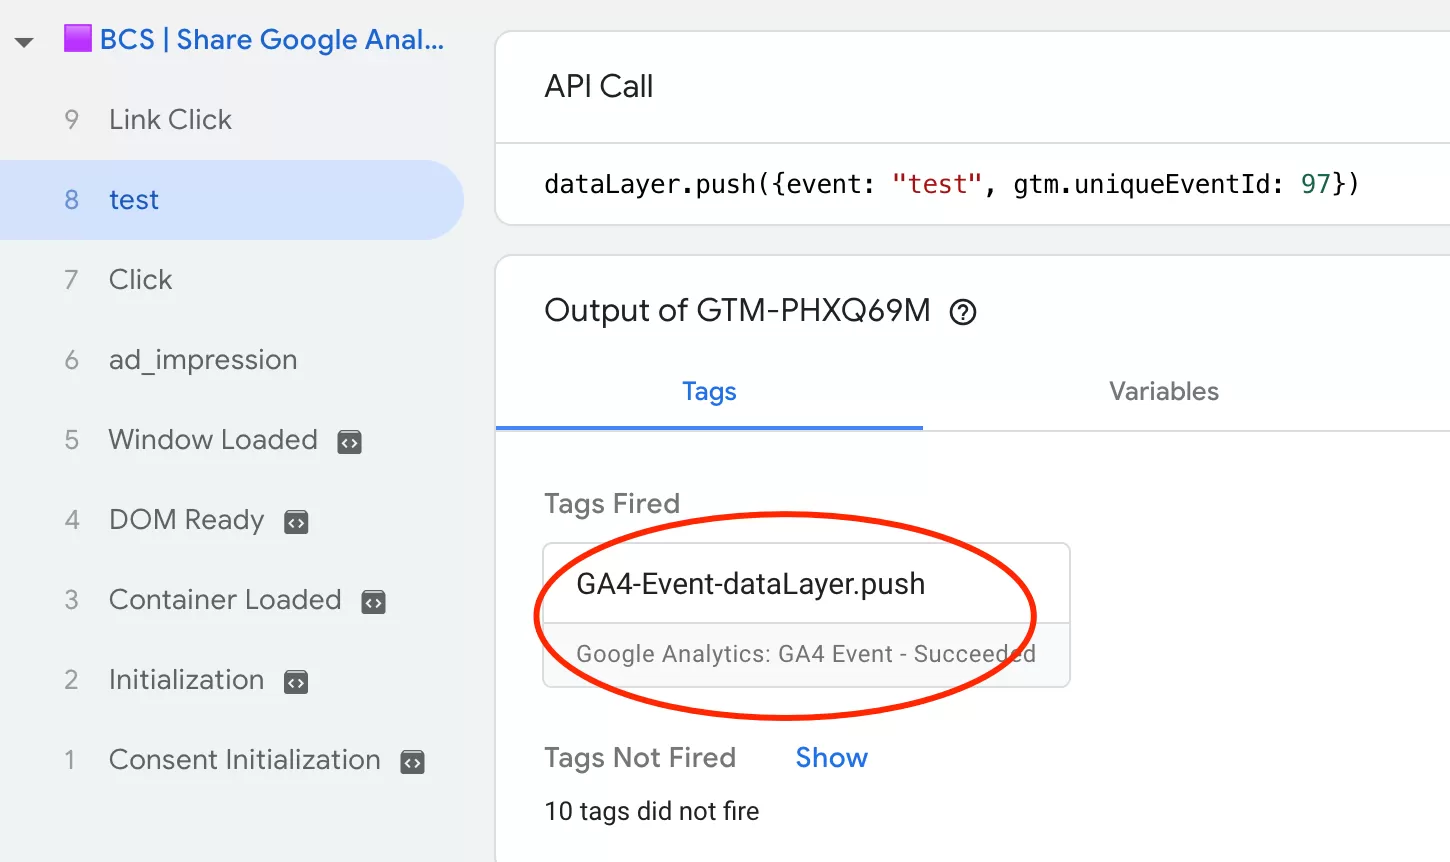
Tags is triggered, click it to open and check whether the value of the event parameter page_type is accurate:
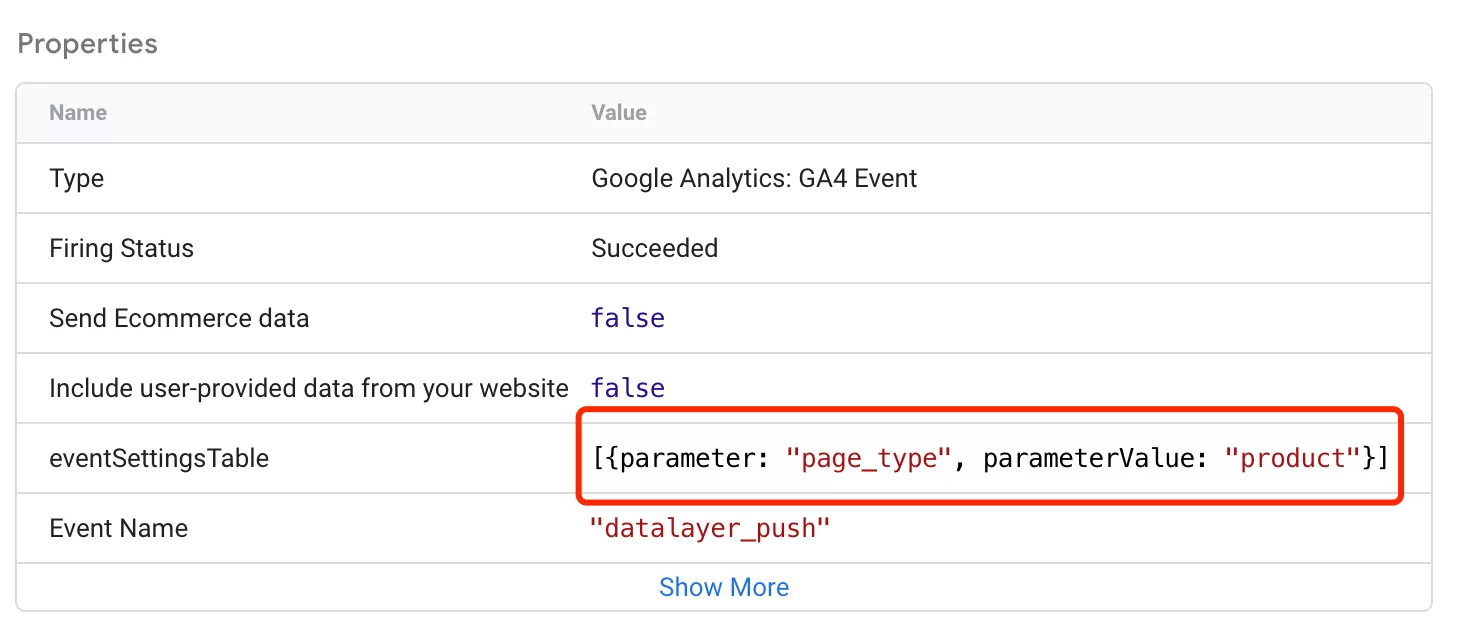
The event parameters are accurate, and can be published.
How to Validate the Data Layer
When you’re working with the data layer — especially for e-commerce — you need to verify that the data format is correct and that the right values are being sent. Here are two methods.
Method 1: Tag Assistant (GTM Preview)
In GTM’s preview mode, click on any GTM call and look at the Data Layer tab. You’ll see the full data layer state at the time that call was made.
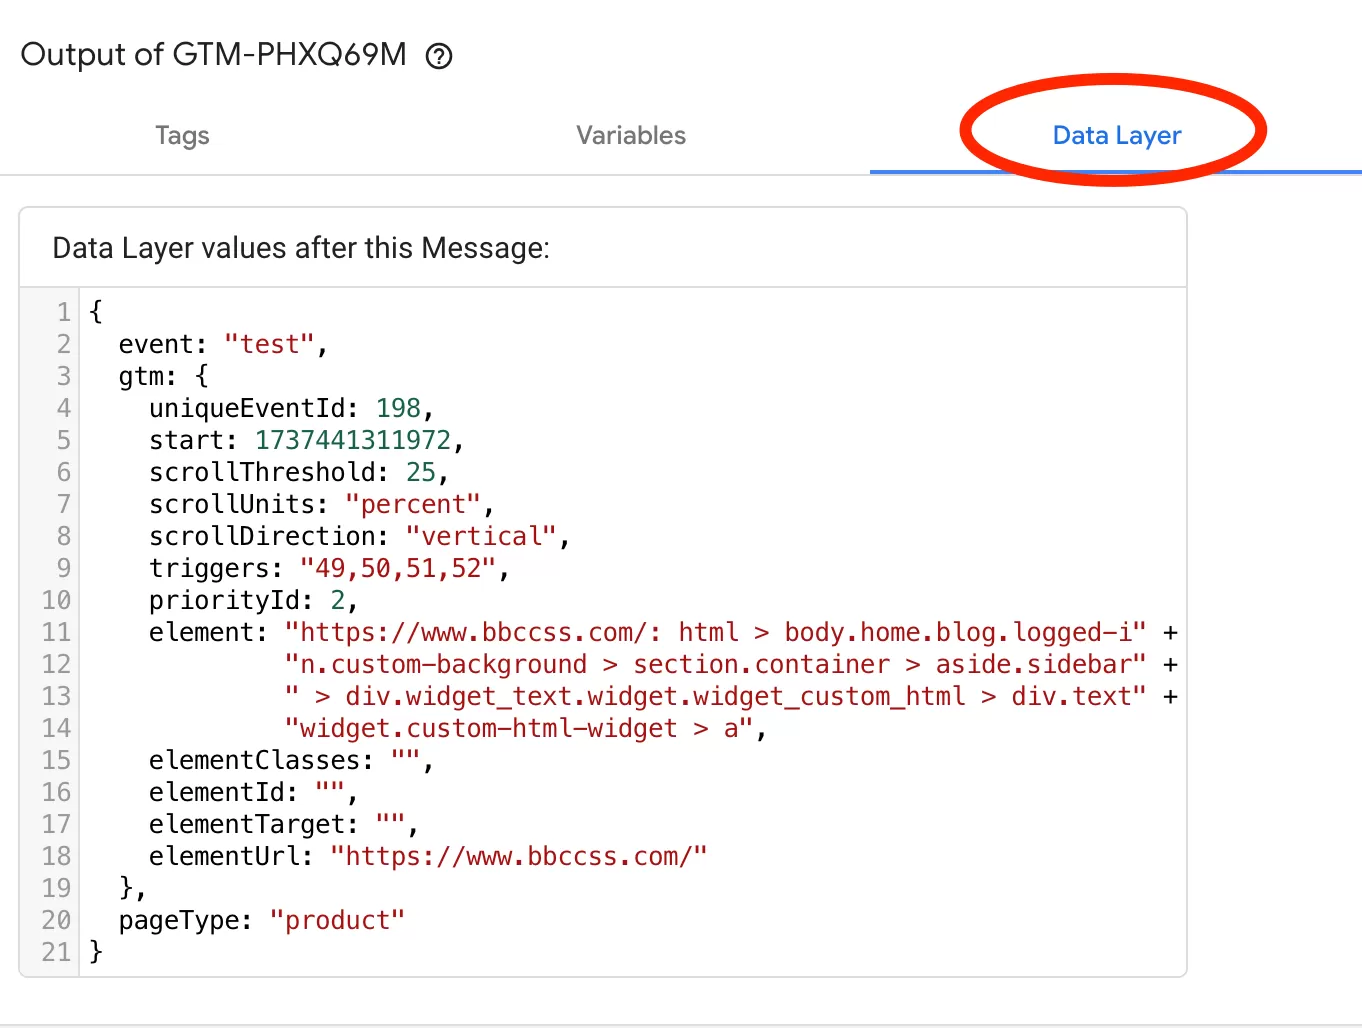
Alternatively, look at the API Call tab for a more detailed view.
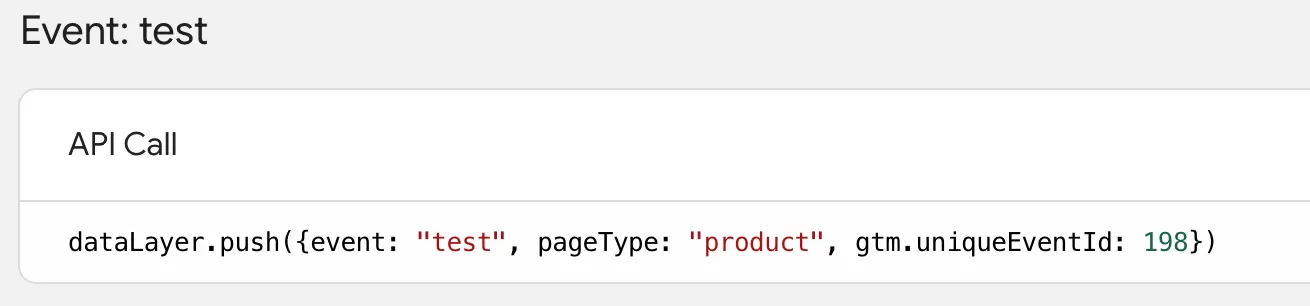
There are also browser extensions that make this easier: ADSWERVE, Data Layer checker, datalayers, and Simple Data Layer Viewer are all solid options.
Method 2: Browser Console
Open your browser’s developer console and type:
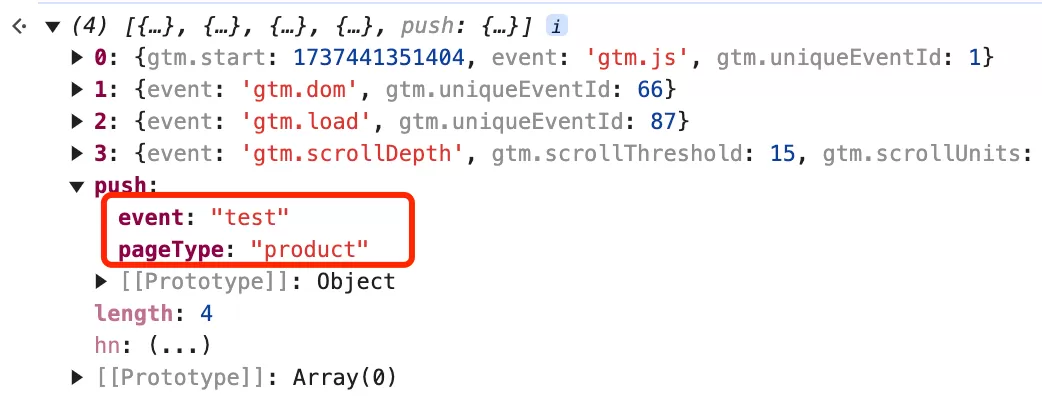
You’ll see an array containing every object that was pushed to the data layer. You can expand each entry, search by event name, and inspect the data structure.
Final Words
The data layer is one of those concepts that seems intimidating until you actually start using it. But once you do, you’ll wonder how you ever managed GTM without it. It’s the foundation that makes GTM flexible, scalable, and developer-friendly.