Update time: April 22, 2026
If you’re running GA4 and you’ve noticed your data slipping through the cracks — blocked by browser extensions, ITP, or consent mode gaps — you’ve probably looked into server-side tagging.
It sounds great in theory: move tracking off the browser, own your data, bypass the blockers. But then you look at the infrastructure cost, and suddenly it feels like a project for enterprises with dedicated DevOps teams.
That’s where Stape comes in.
What is Stape?
Stape is a SaaS platform that handles the heavy lifting of server-side tagging infrastructure.
Instead of provisioning servers, managing SSL certs, and worrying about scaling, you just set up a container and go.
Handling 20 million requests per month costs around $200. Compare that to the hourly rate of a cloud engineer, and the math writes itself.
How the Architecture Works
You’ll be running two Google Tag Manager containers, the schematic diagram of Stape is as follows:
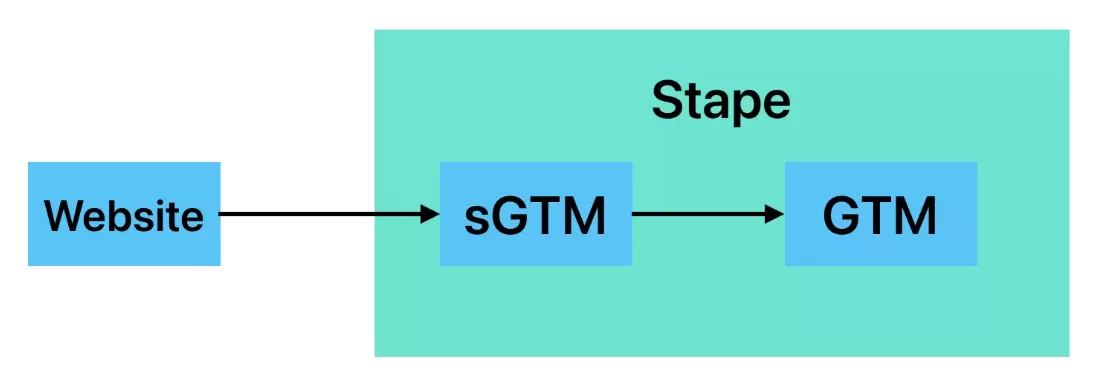
- Web GTM (client-side GTM) — runs in the browser, collects data from the user’s device
- Server-side GTM (sGTM) — runs on Stape’s infrastructure, processes and forwards the data
The data flows from browser → Web GTM → Stape’s tagging server → GA4 (or any other endpoint). Here’s what that looks like:
Step 1:Creating an sGTM Container
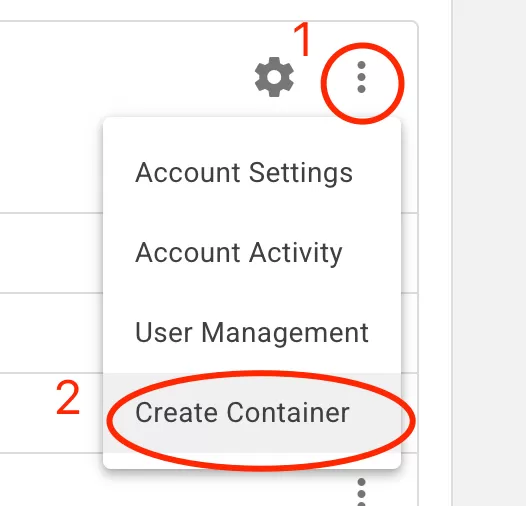
First, head to Google Tag Manager and create a new container.
Click「⋮」——「Create Container」:
You’ll see the container settings:
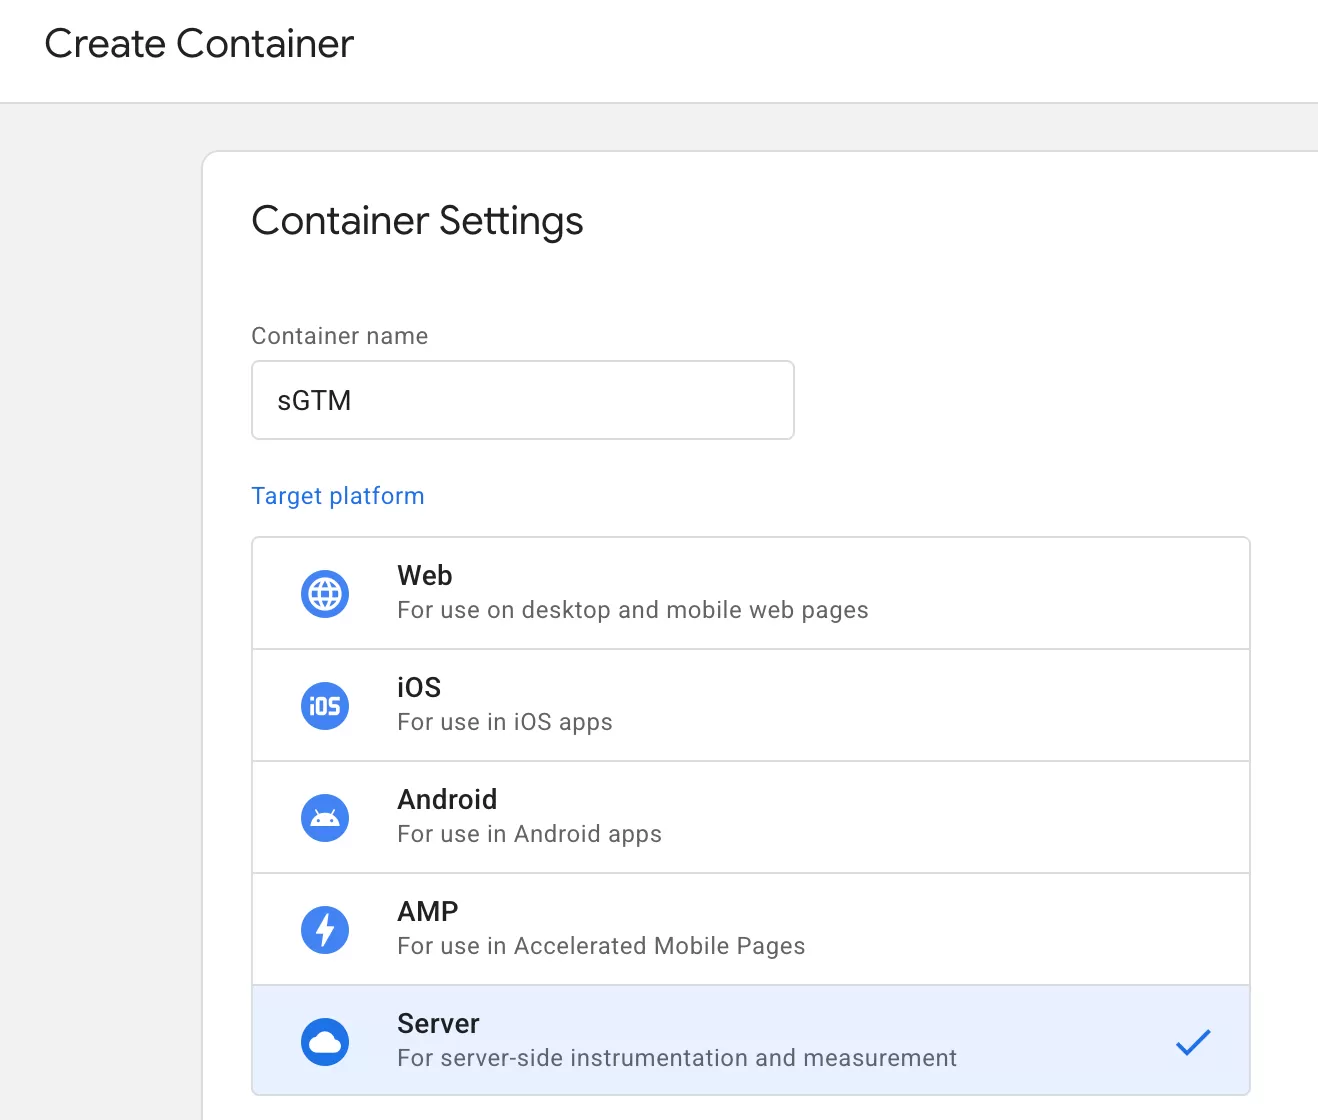
- Container Name:usually your domain (e.g.
sGTM) - Target Platform:select Server
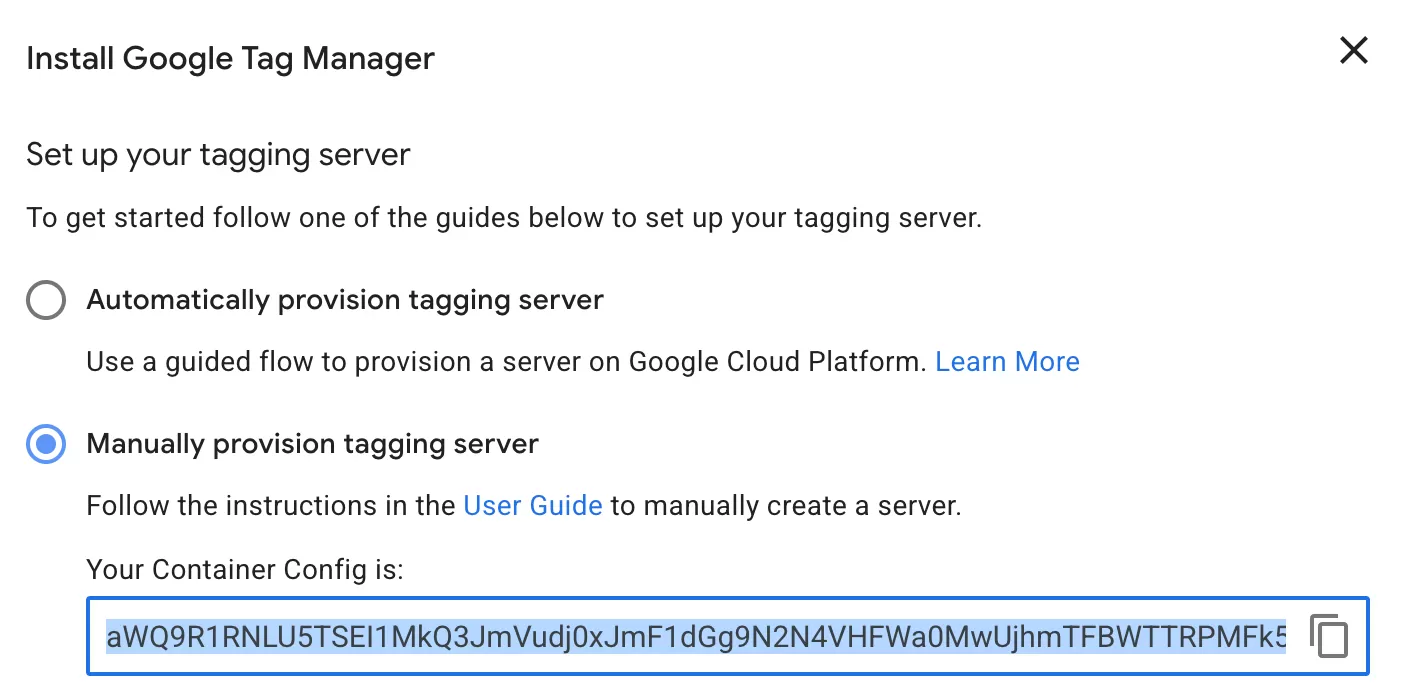
Finally click 「Create」,select 「Manually provision tagging server」, You’ll get a Container Configuration string, for example: aWQ9R1RNLU5TSEI1MkQ3JmVudj0xJmF1dGg9N2N4VHFWa0MwUjhmTFBWTTRPMFk5UQ==, this will be used in Stape configuration.
Step 2:Set Up sGTM in Stape
In your Stape dashboard,, click 「sGTM」——「Create sGTM container」
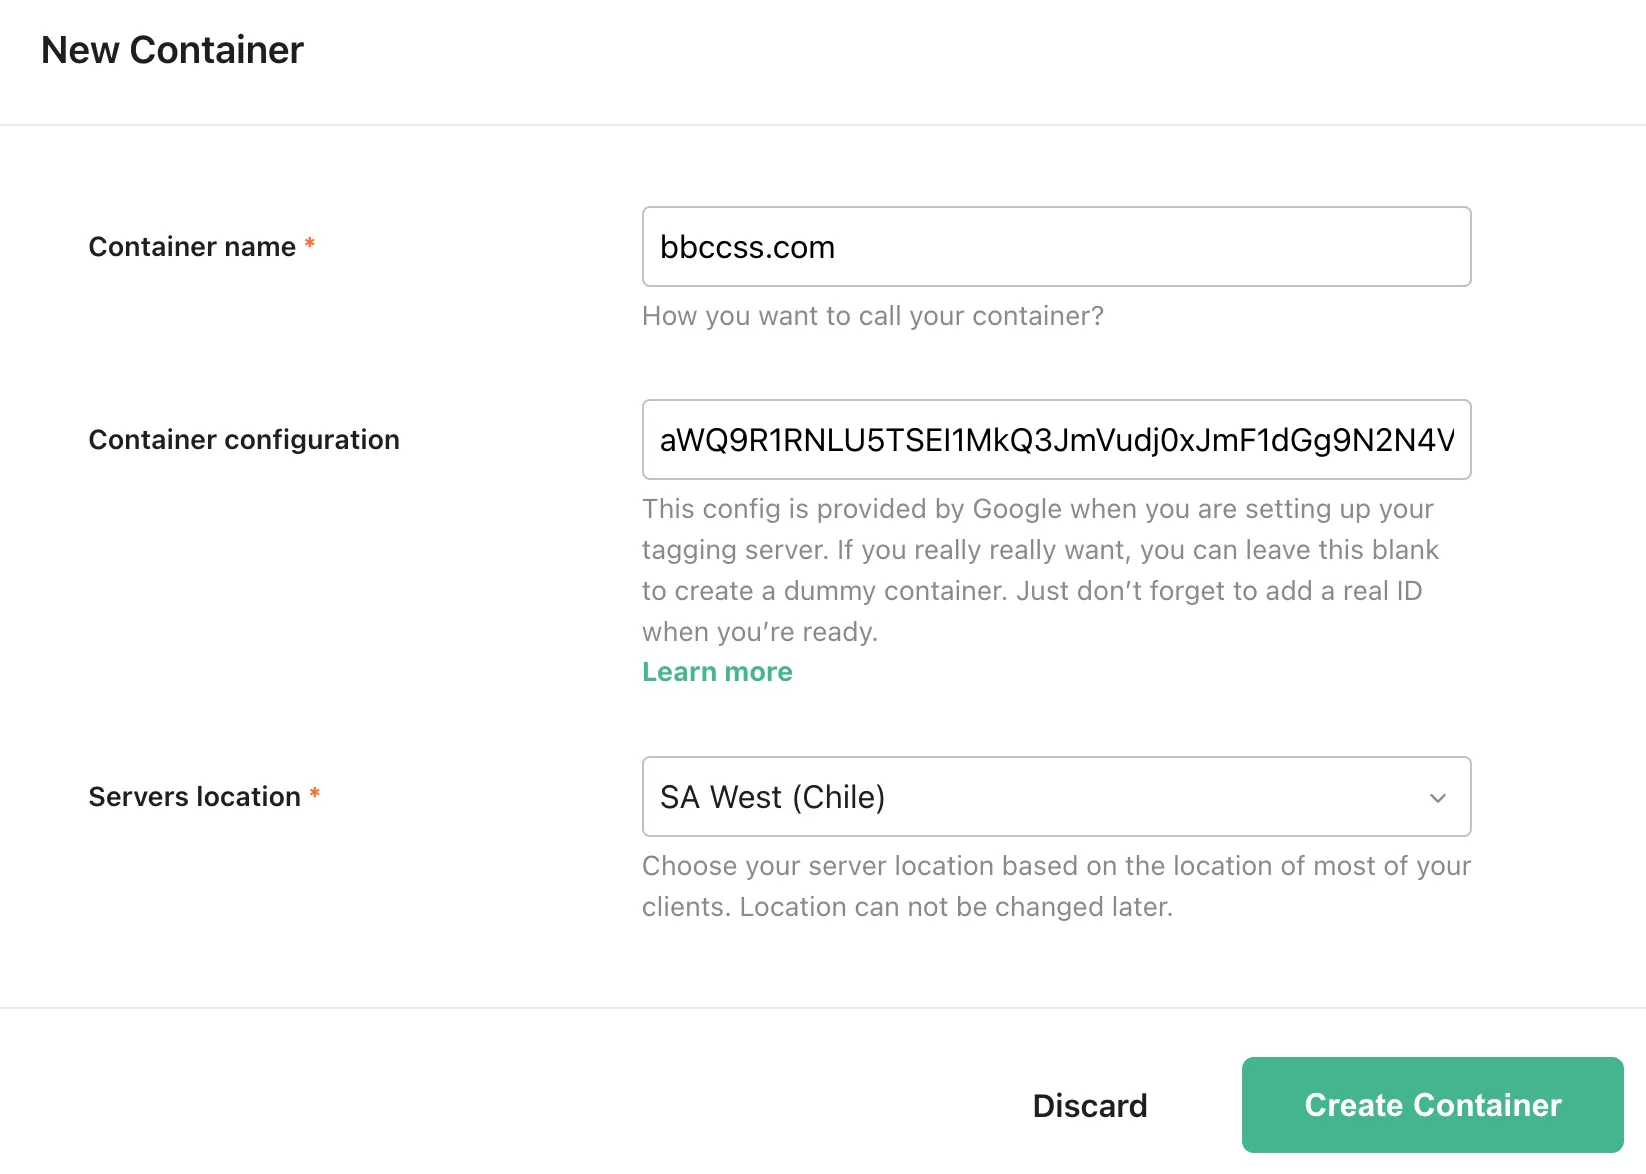
Fill in the details:
- Container name: eg. bbccss.com
- Container configuration: paste the string from Step 1
- Servers location: pick the region closest to your audience
Click 「Create Container」, Stape will ask you to pick a subscription plan. Start with the free trial. You can upgrade to a paid plan later if needed.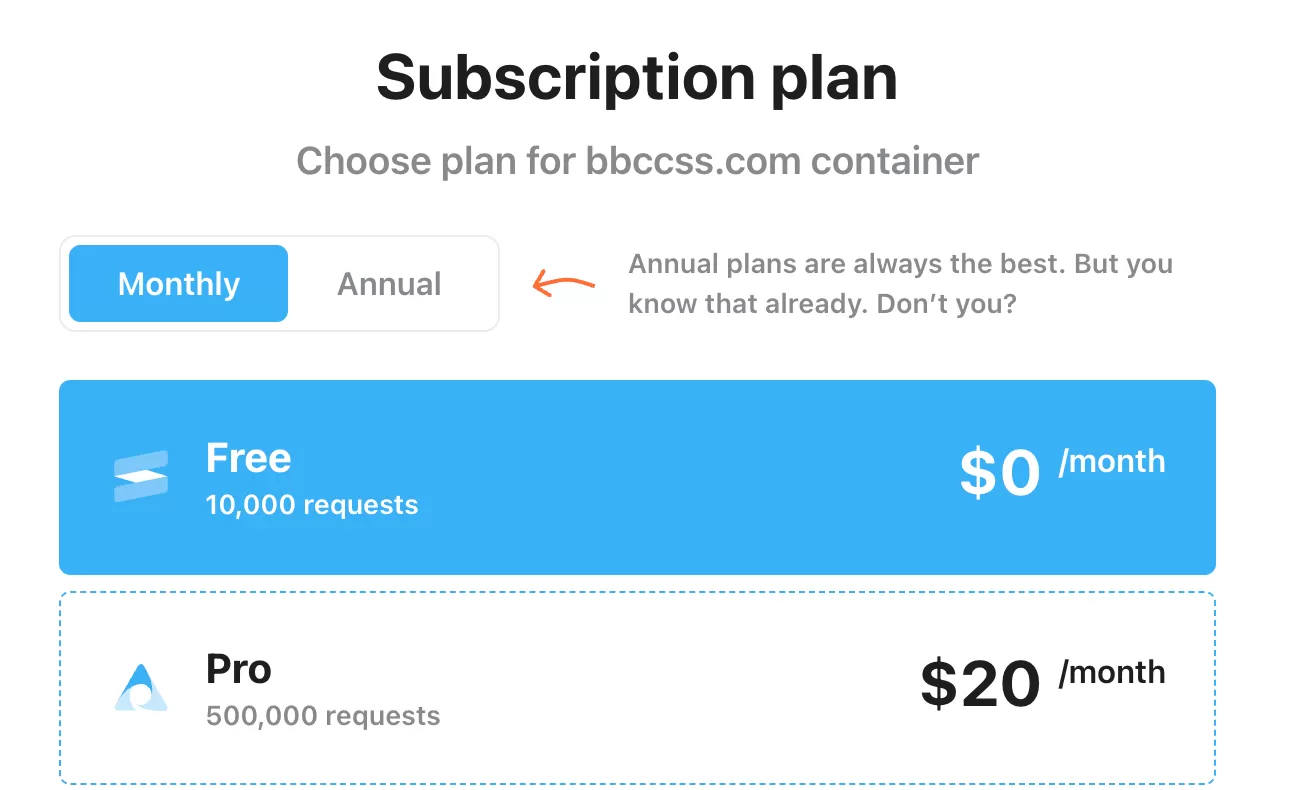
Step 3:Configure Tagging Server Domain
Inside your Stape container, click 「Add custom domain」 in the bbccss.com container of Stape: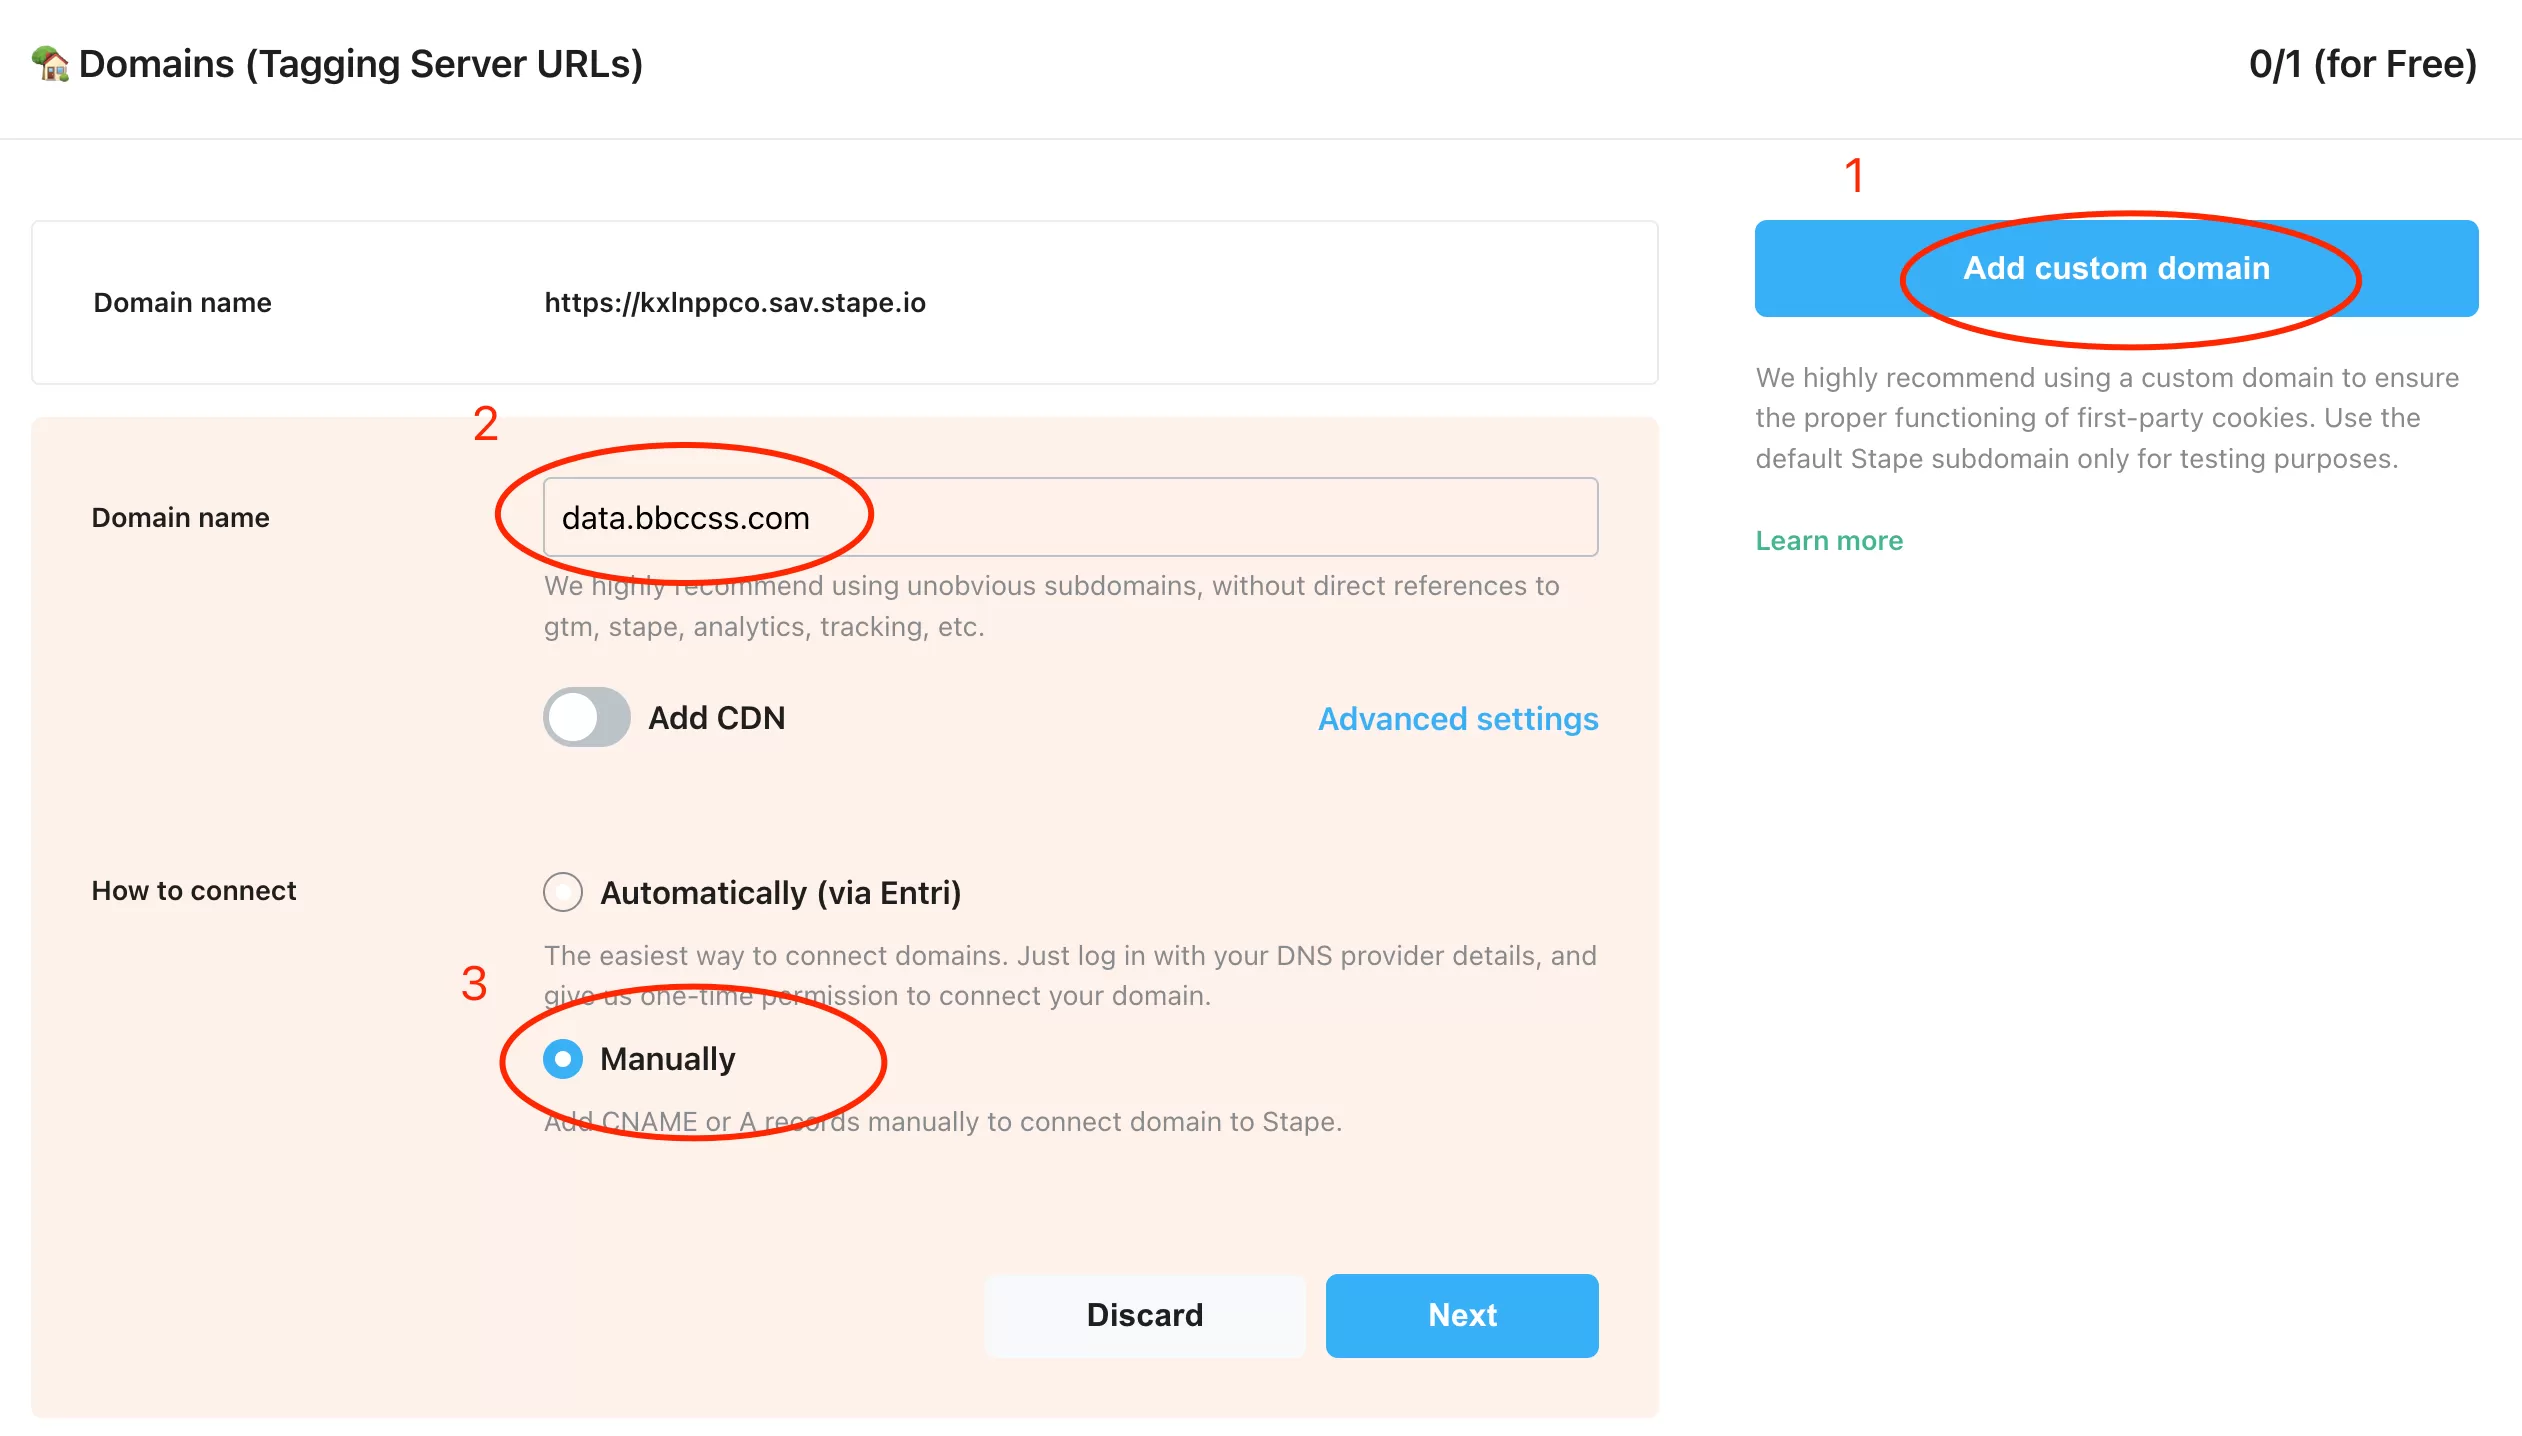
After clicking 「Next」, Stape will give you a CNAME record. Take that record and configure it in your CDN or DNS provider. Once that’s done, click 「Verify」.
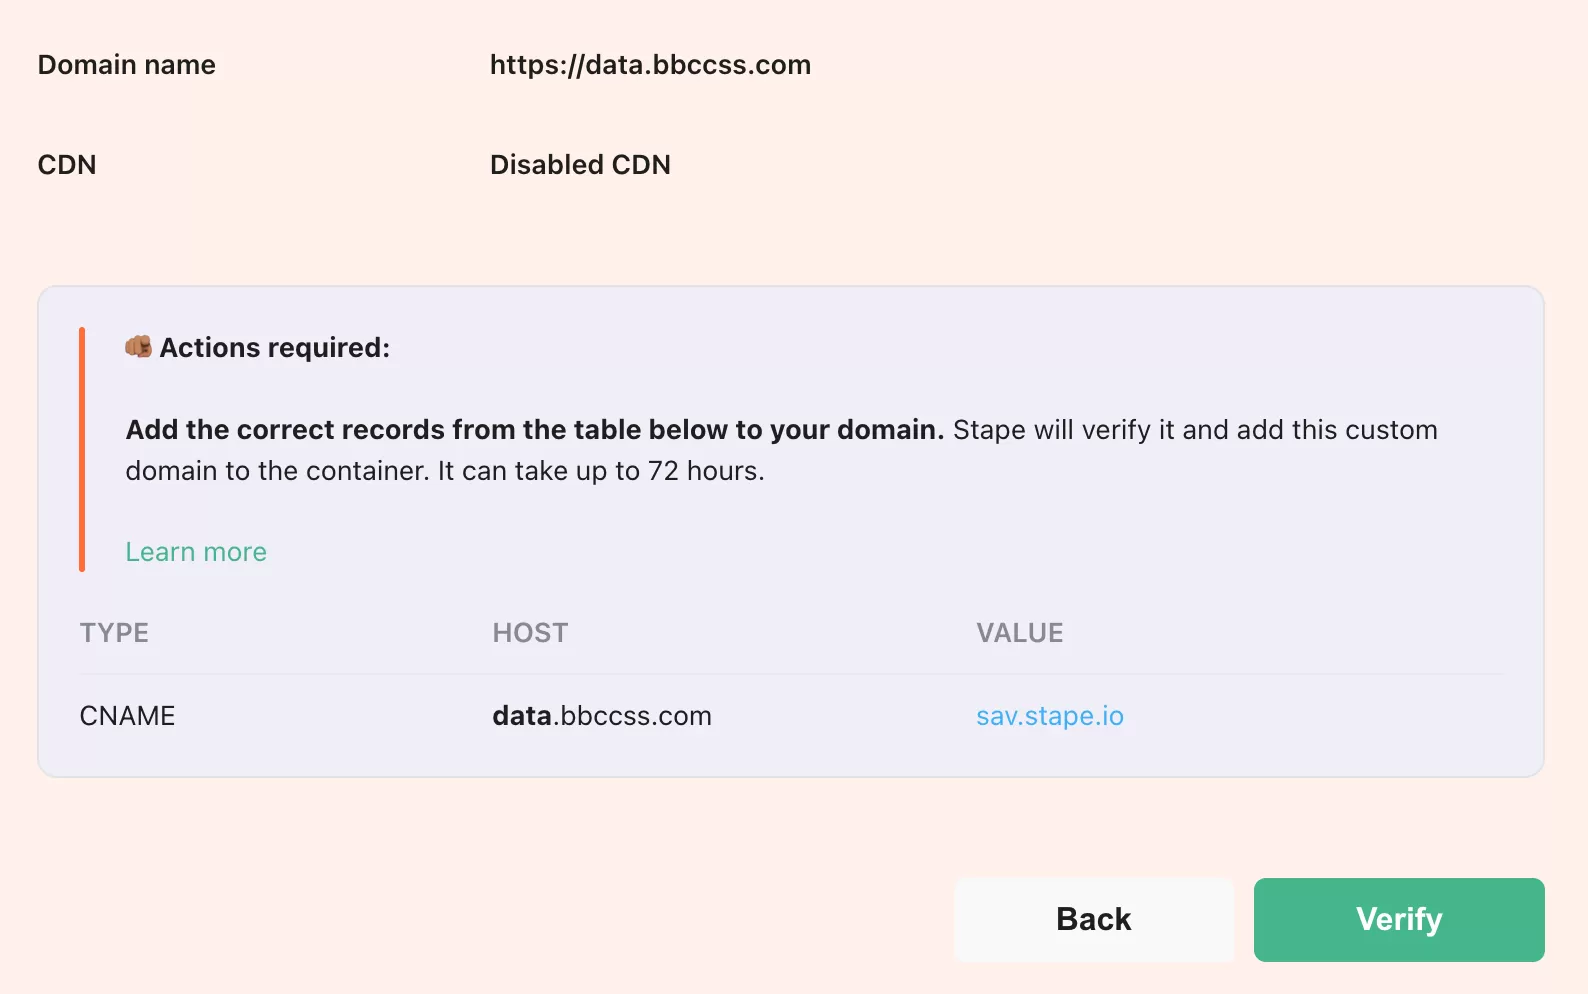
If everything is set up correctly, the status will show “Ready”:
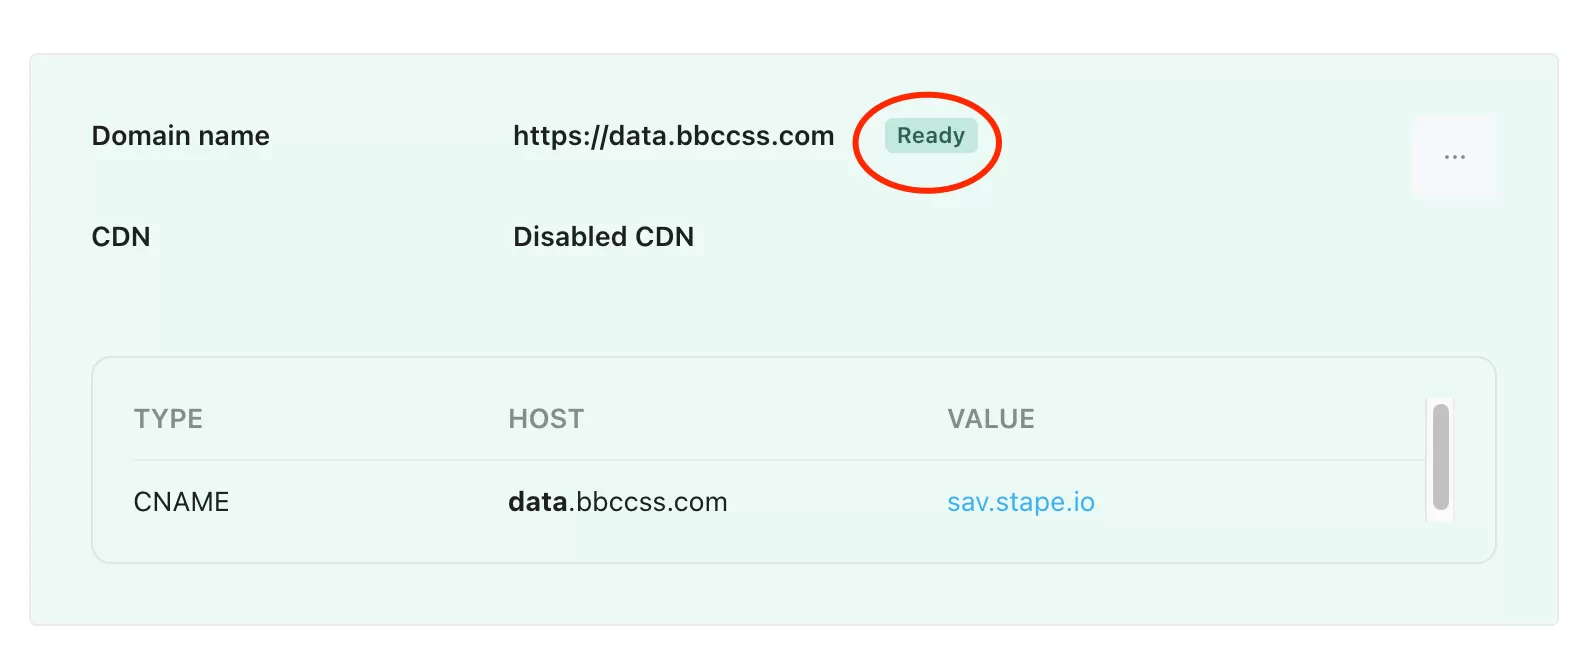
One catch: the free version of Stape only allows one CNAME. If you’re on a paid plan, I’d recommend setting up two — one for loading GTM (e.g., gtm.bbccss.com) and one for receiving GA4 data (e.g., data.bbccss.com). Without a first-party endpoint, you won’t get far with bypassing tracking restrictions.
Step 4:Set Server Container URL in sGTM
Back in your server-side GTM container,, click「Admin」——「Container Settings」,set the Server container URLs to https://data.bbccss.com: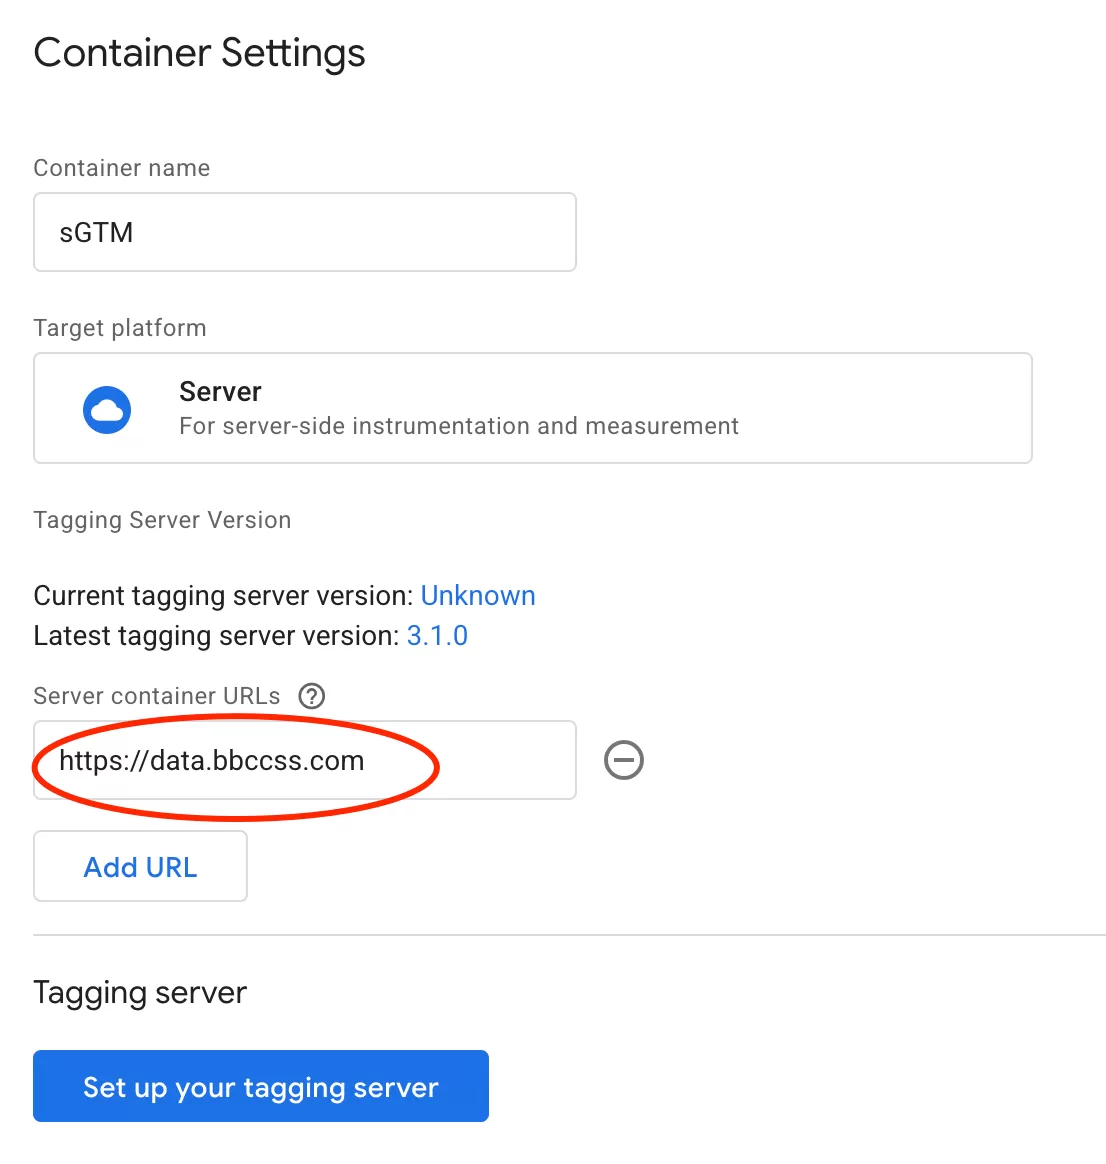
Now all tracking data will flow through your server.
Step 5:Create Web GTM (Client-Side)
Create a standard website GTM container (regular web, not server). Let’s say its container ID is GTM-PHXQ69M — you’ll need this in the next step.
Inside this container, set up a GA4 tag (e.g., GA4 – Basic Tracking). The key field here is server_container_url — set it to data.bbccss.com. This tells the browser to send data to your server-side endpoint instead of directly to Google.
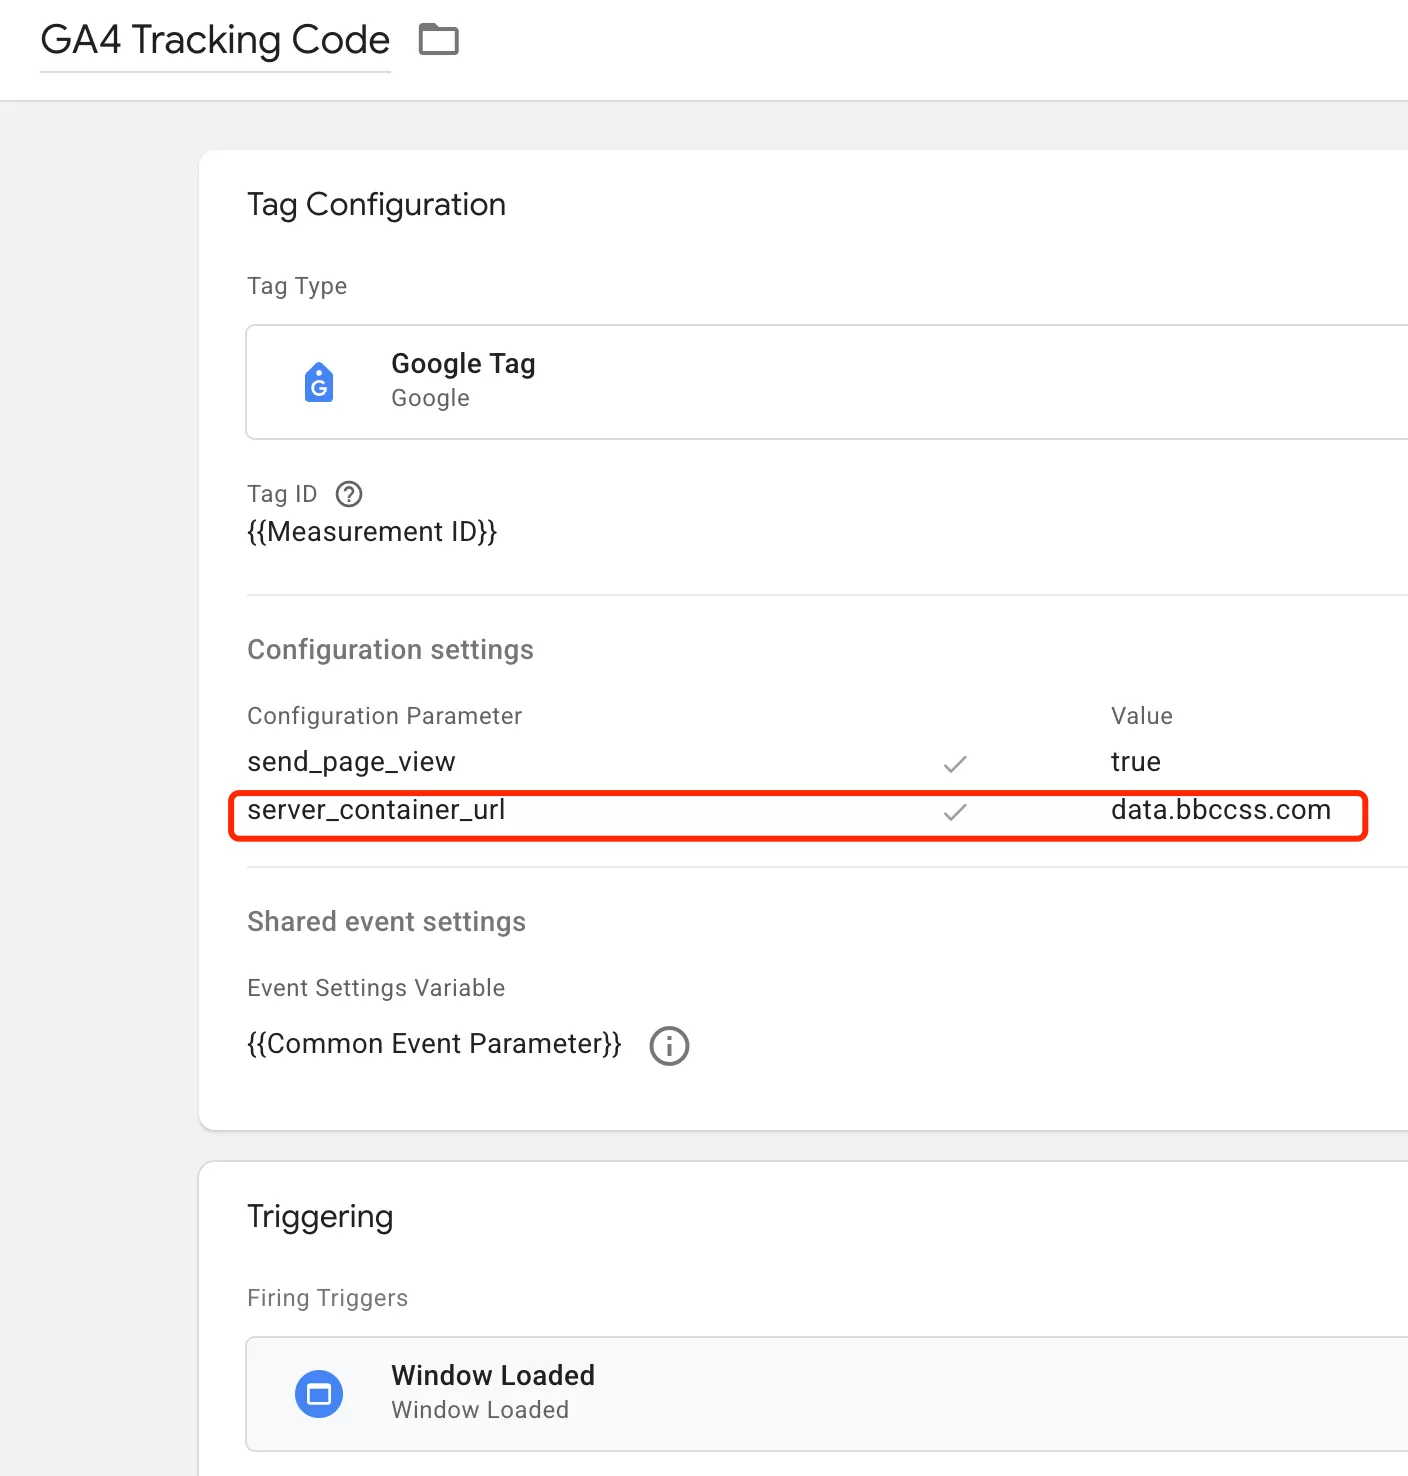
Step 6:Install Stape Loader Script
In Stape,click「Power-Ups」——「Custom Loader」——「Save Change」,then set up as follows: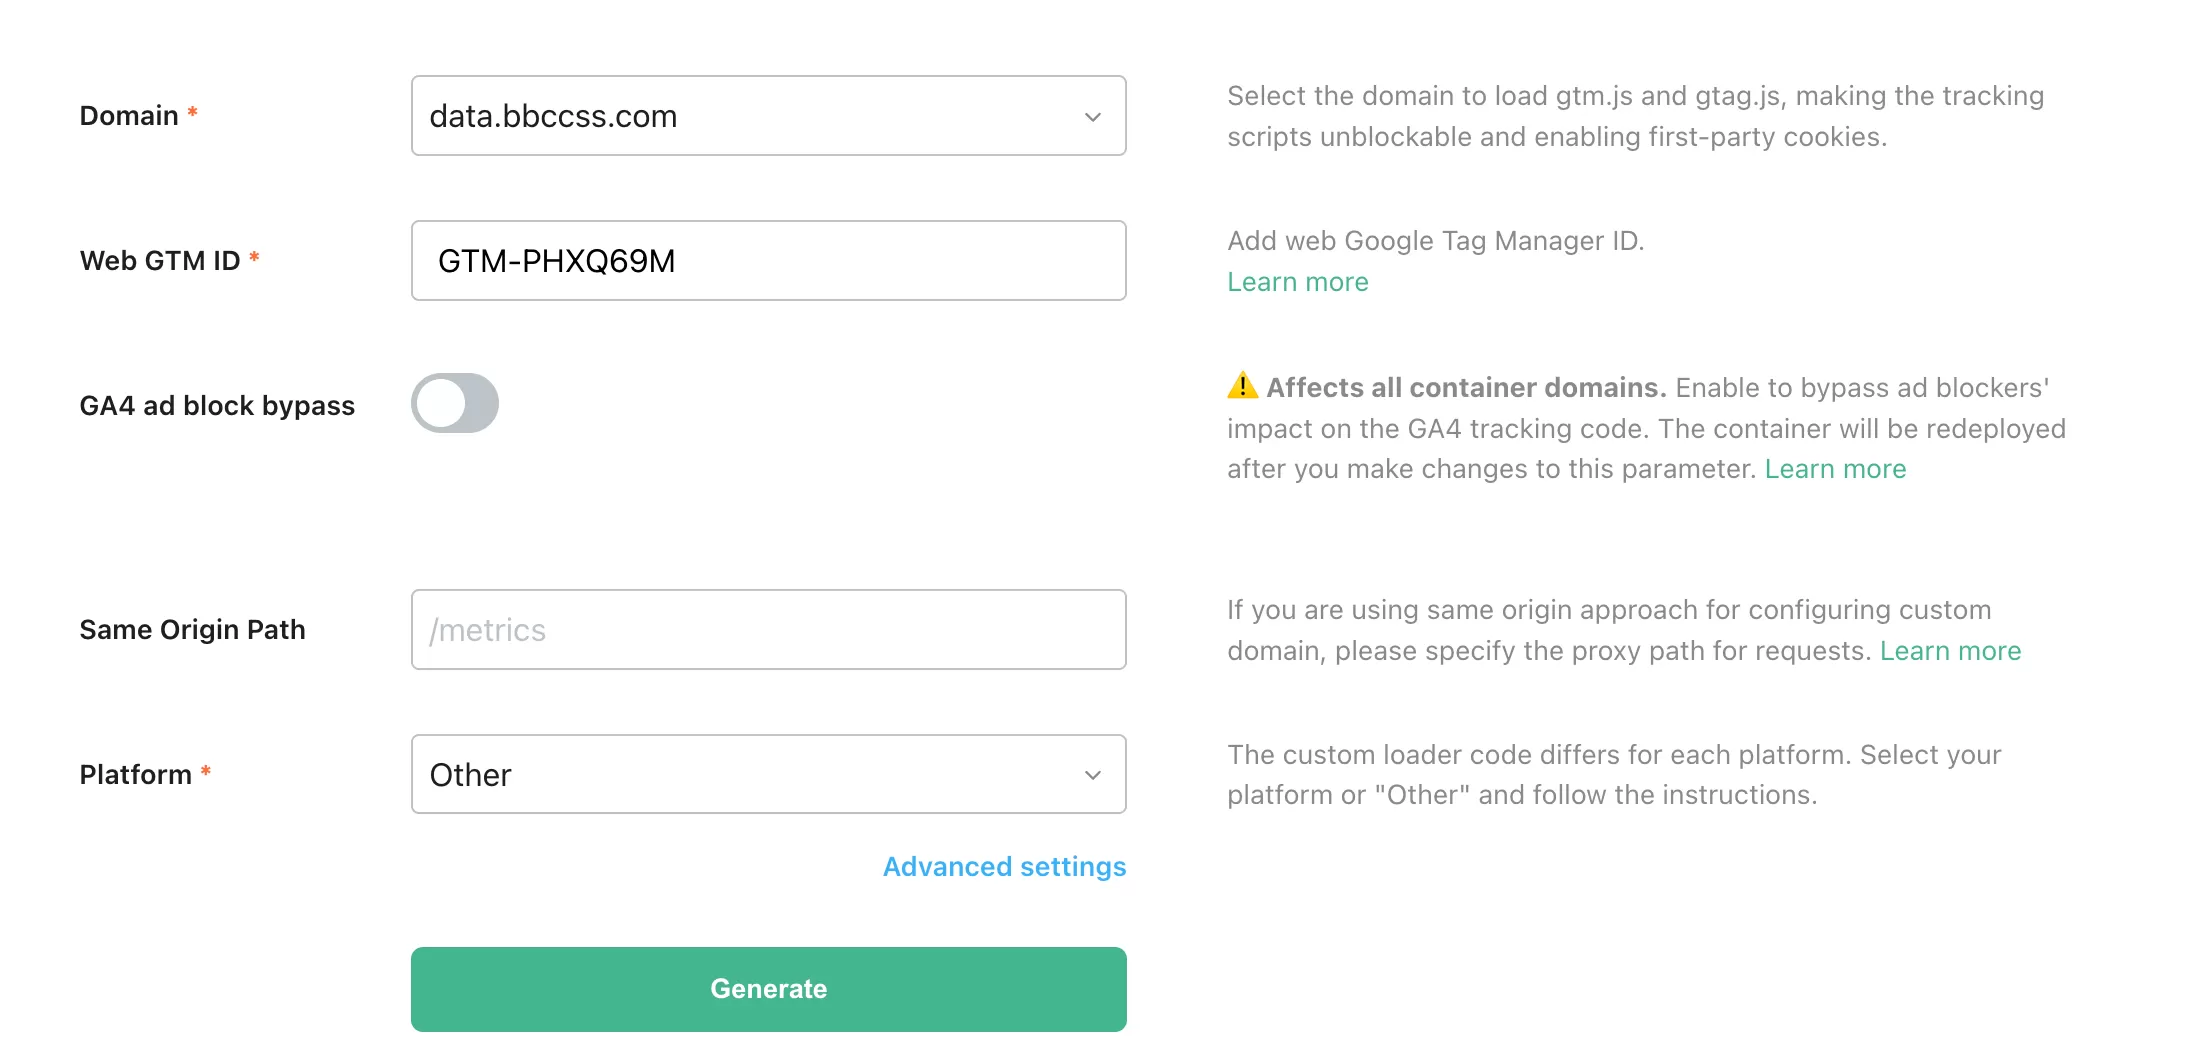
Configure it with your Web GTM ID (that’s GTM-PHXQ69M, not the sGTM ID).
Stape will generate two tracking code snippets. Install them on your website template.
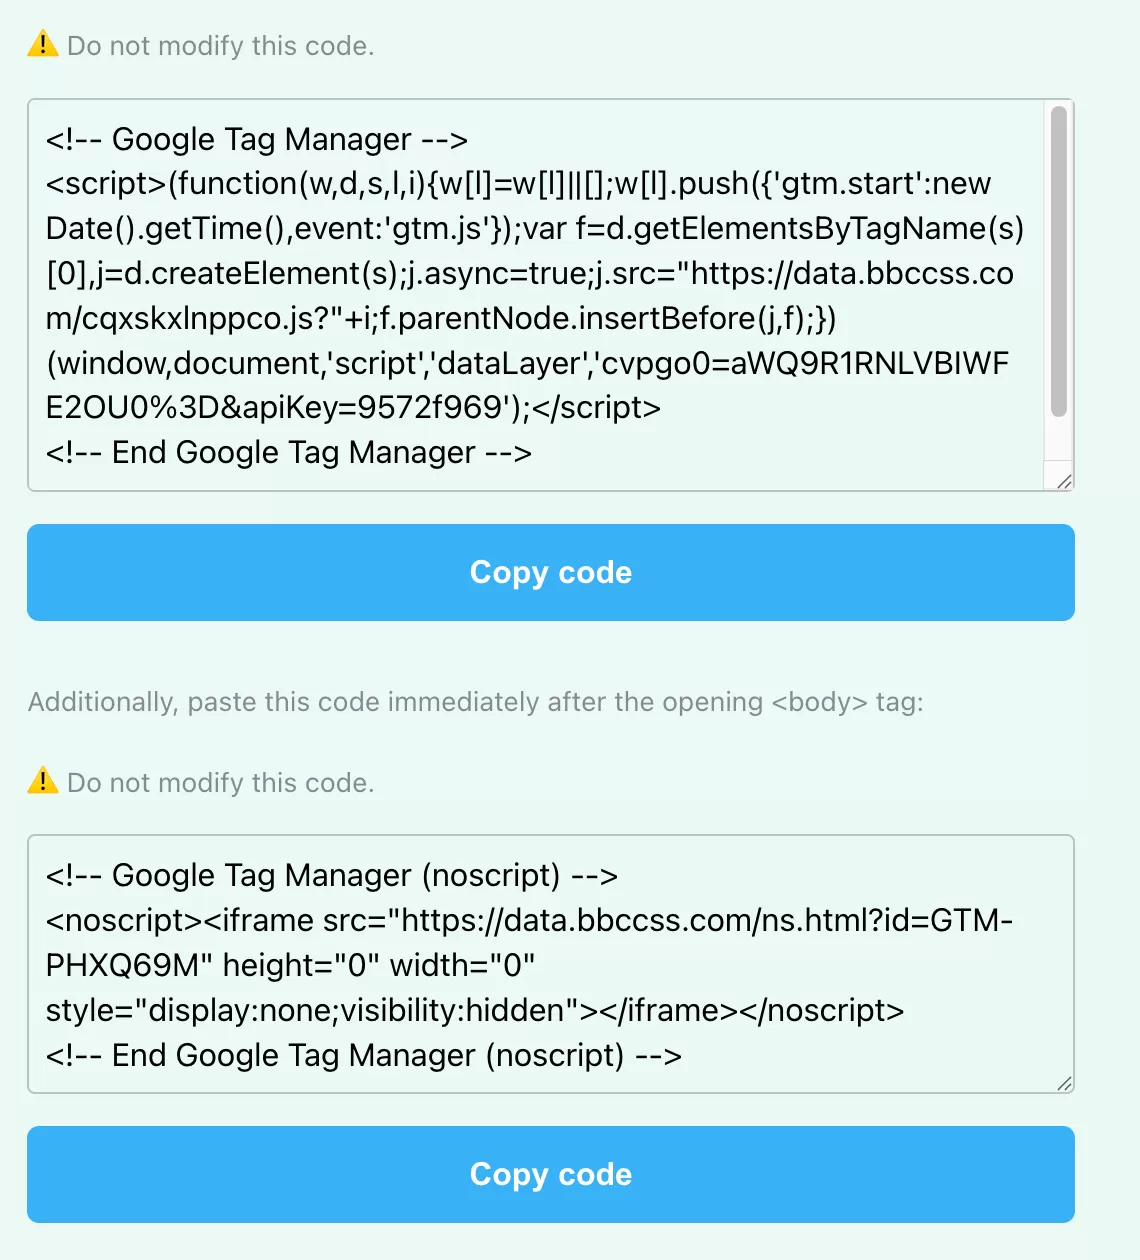
Step 7:Configure sGTM Clients, Variables, Triggers, and Tags
Now the meaty part — setting up the server-side container.
Clients
In sGTM, click「Client」——「New」——「Choose a client type to begin setup…」——「Google Analytics: GA4 (Web)」,then set up as follows: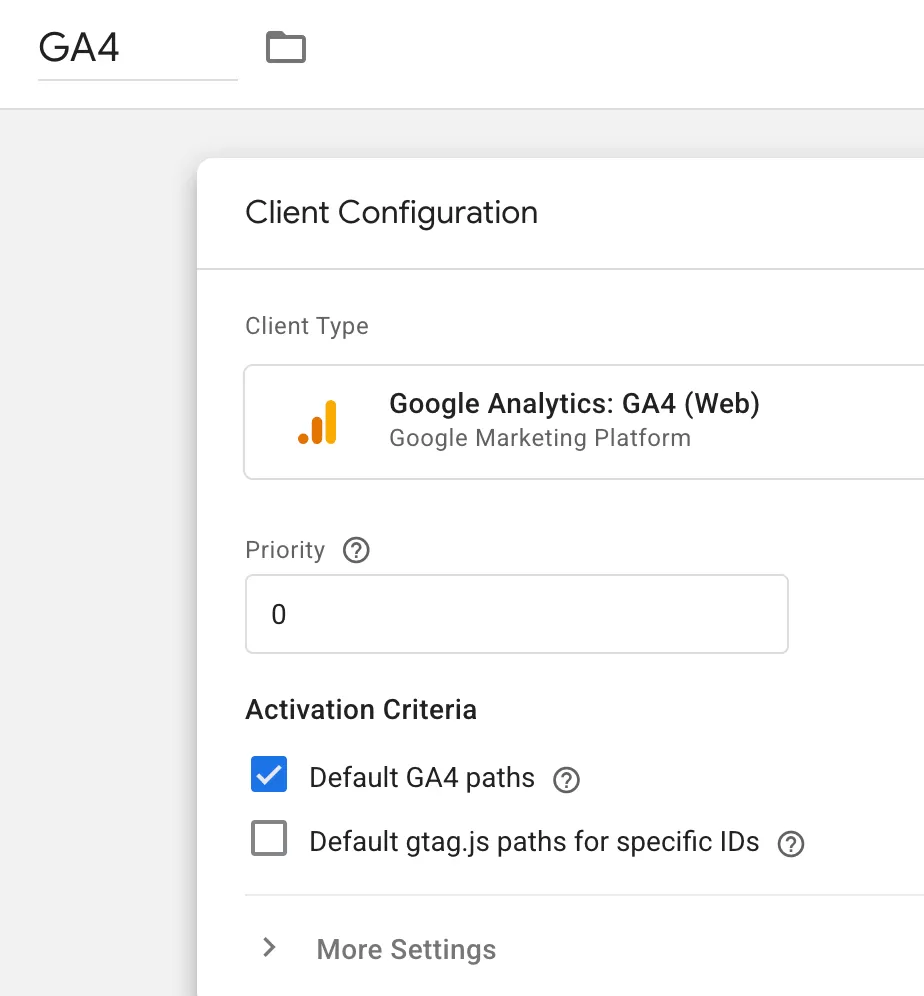
Then add another client, click「Client」——「New」——「Choose a client type to begin setup…」——「Google Tag Manager: Web Container,then set up as follows:
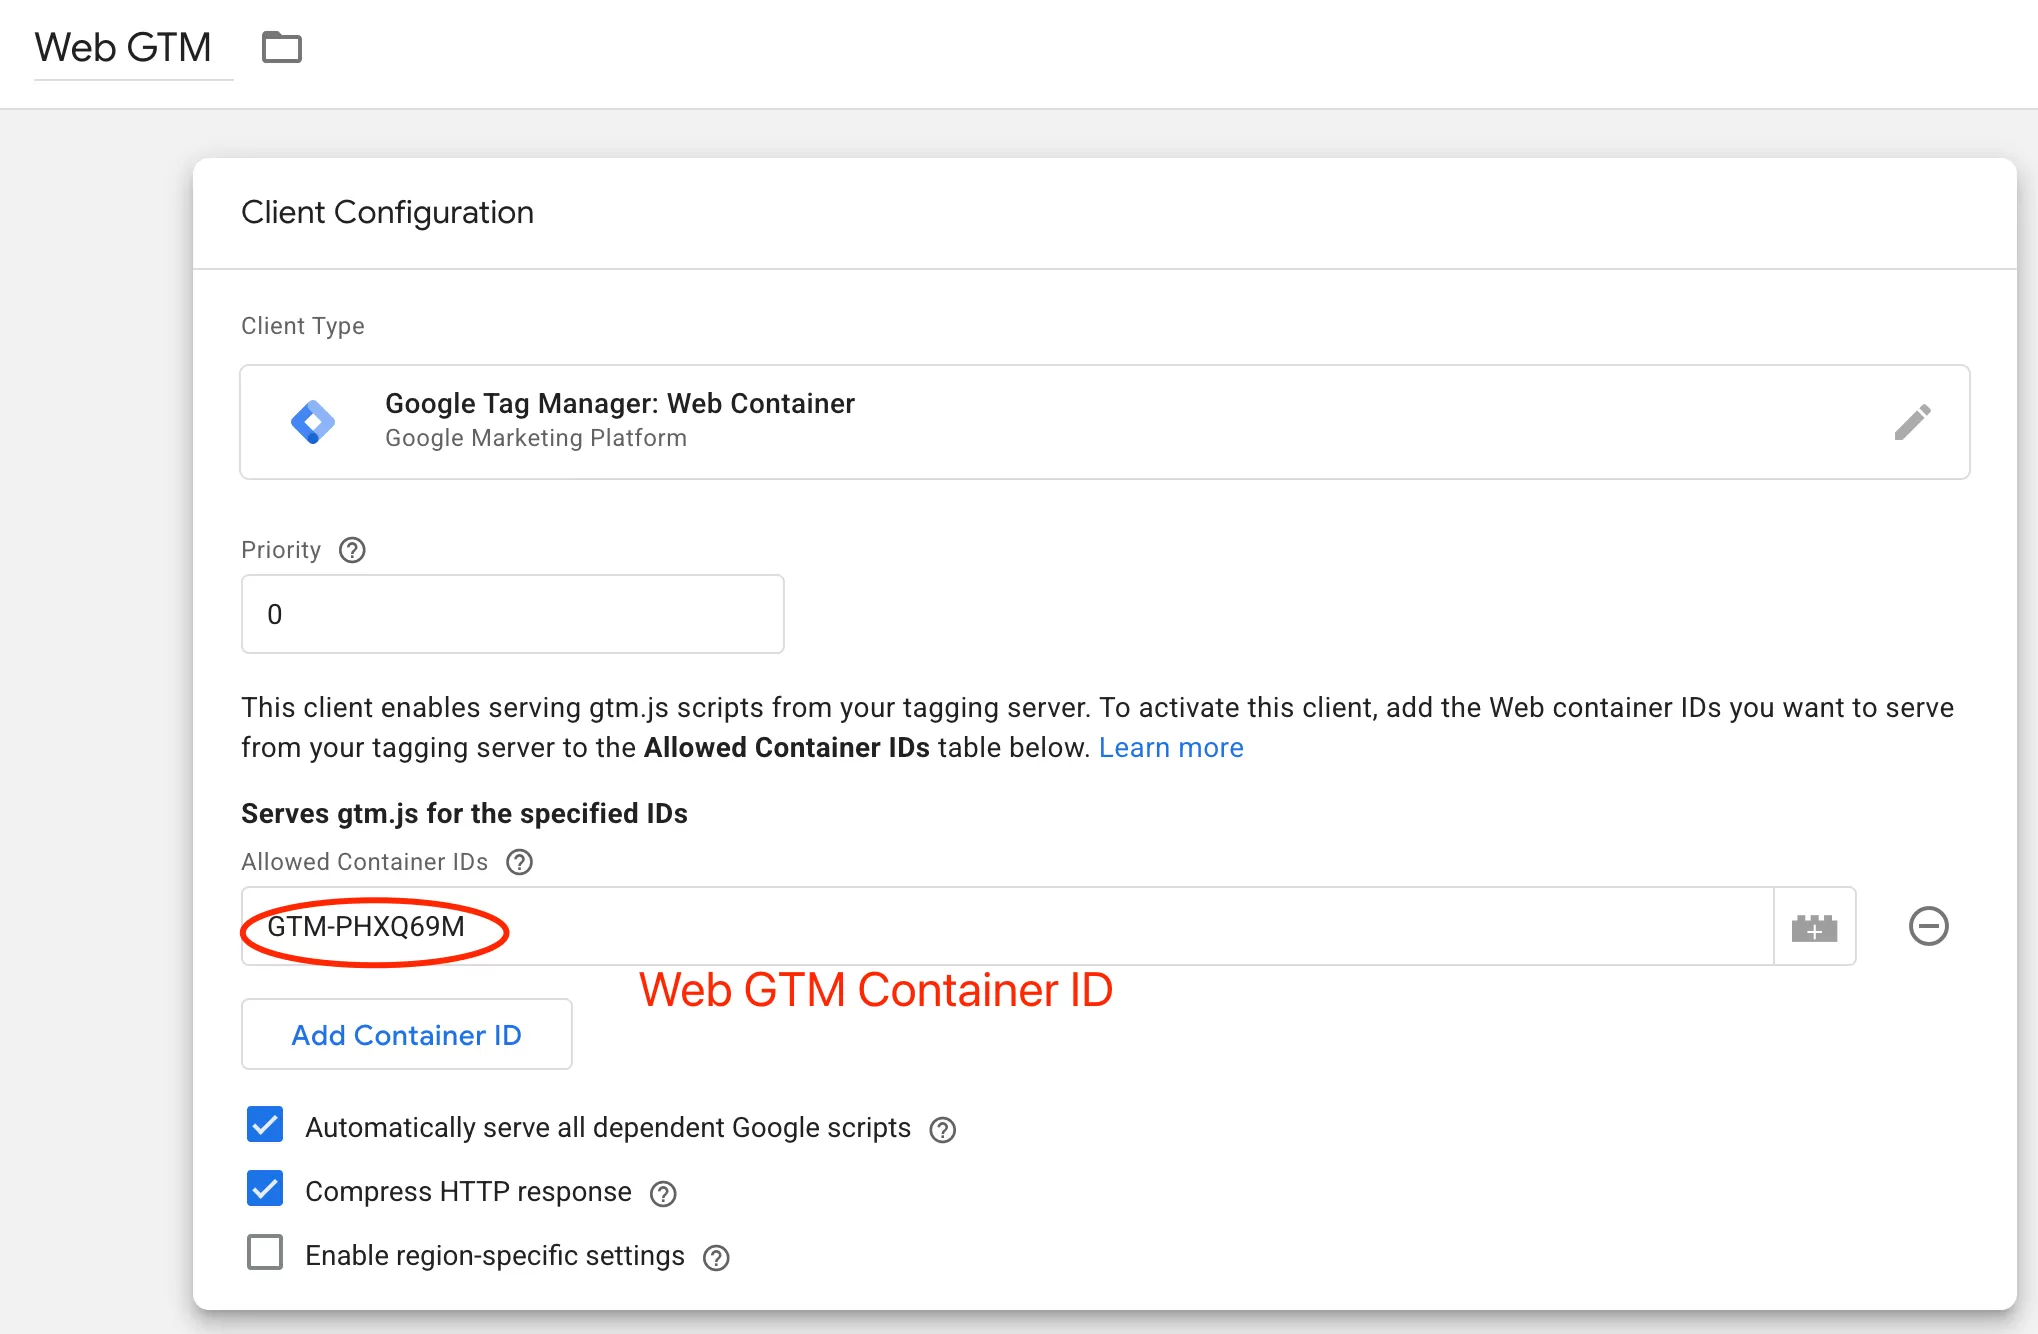
Variables
In sGTM, click 「Variables」 ——「Configuration」 and check Event Name and Client Name.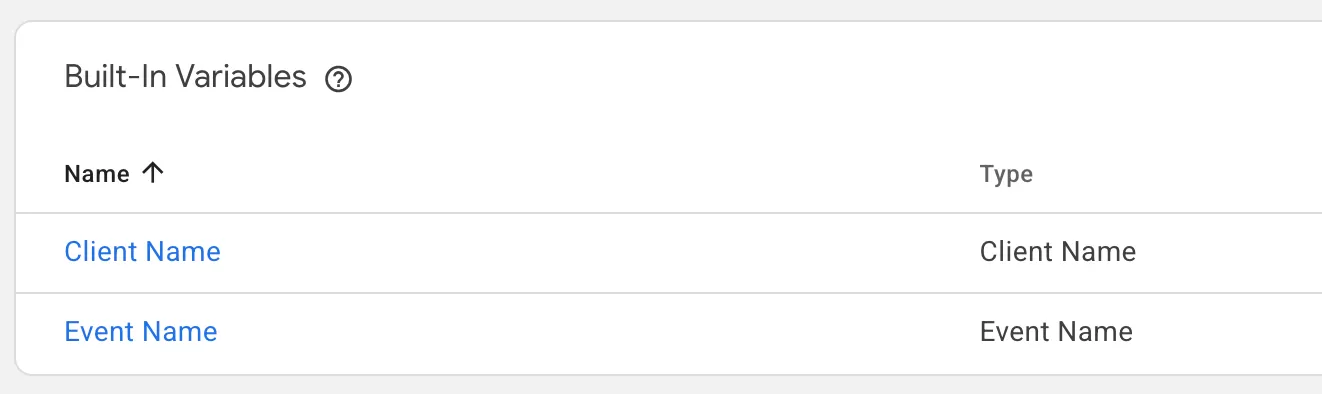
Triggers
In sGTM, click 「Triggers」——「New」——「Choose a trigger type to begin setup…」——「Custom」, and then set the following: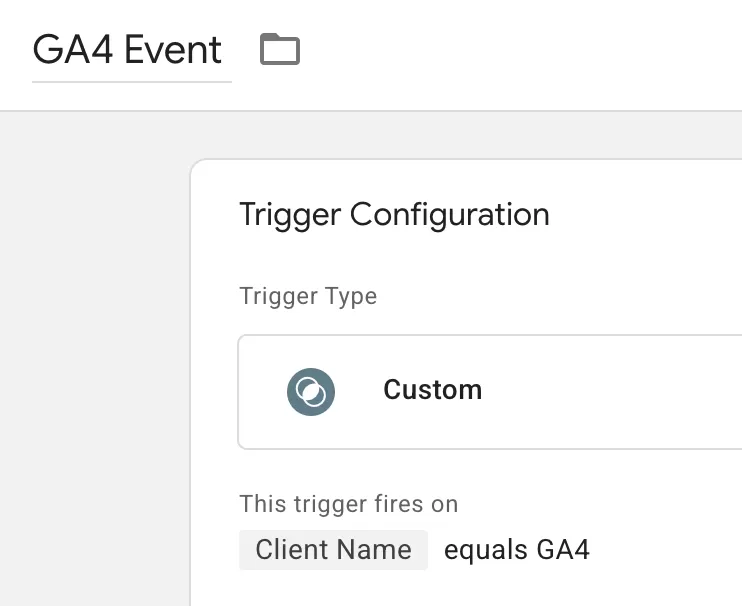
Tags
In sGTM, click 「Tags」——「New」——「Choose a trigger type to begin setup…」——「Google Analytics」——「Google Analytics 4」, and then set the following: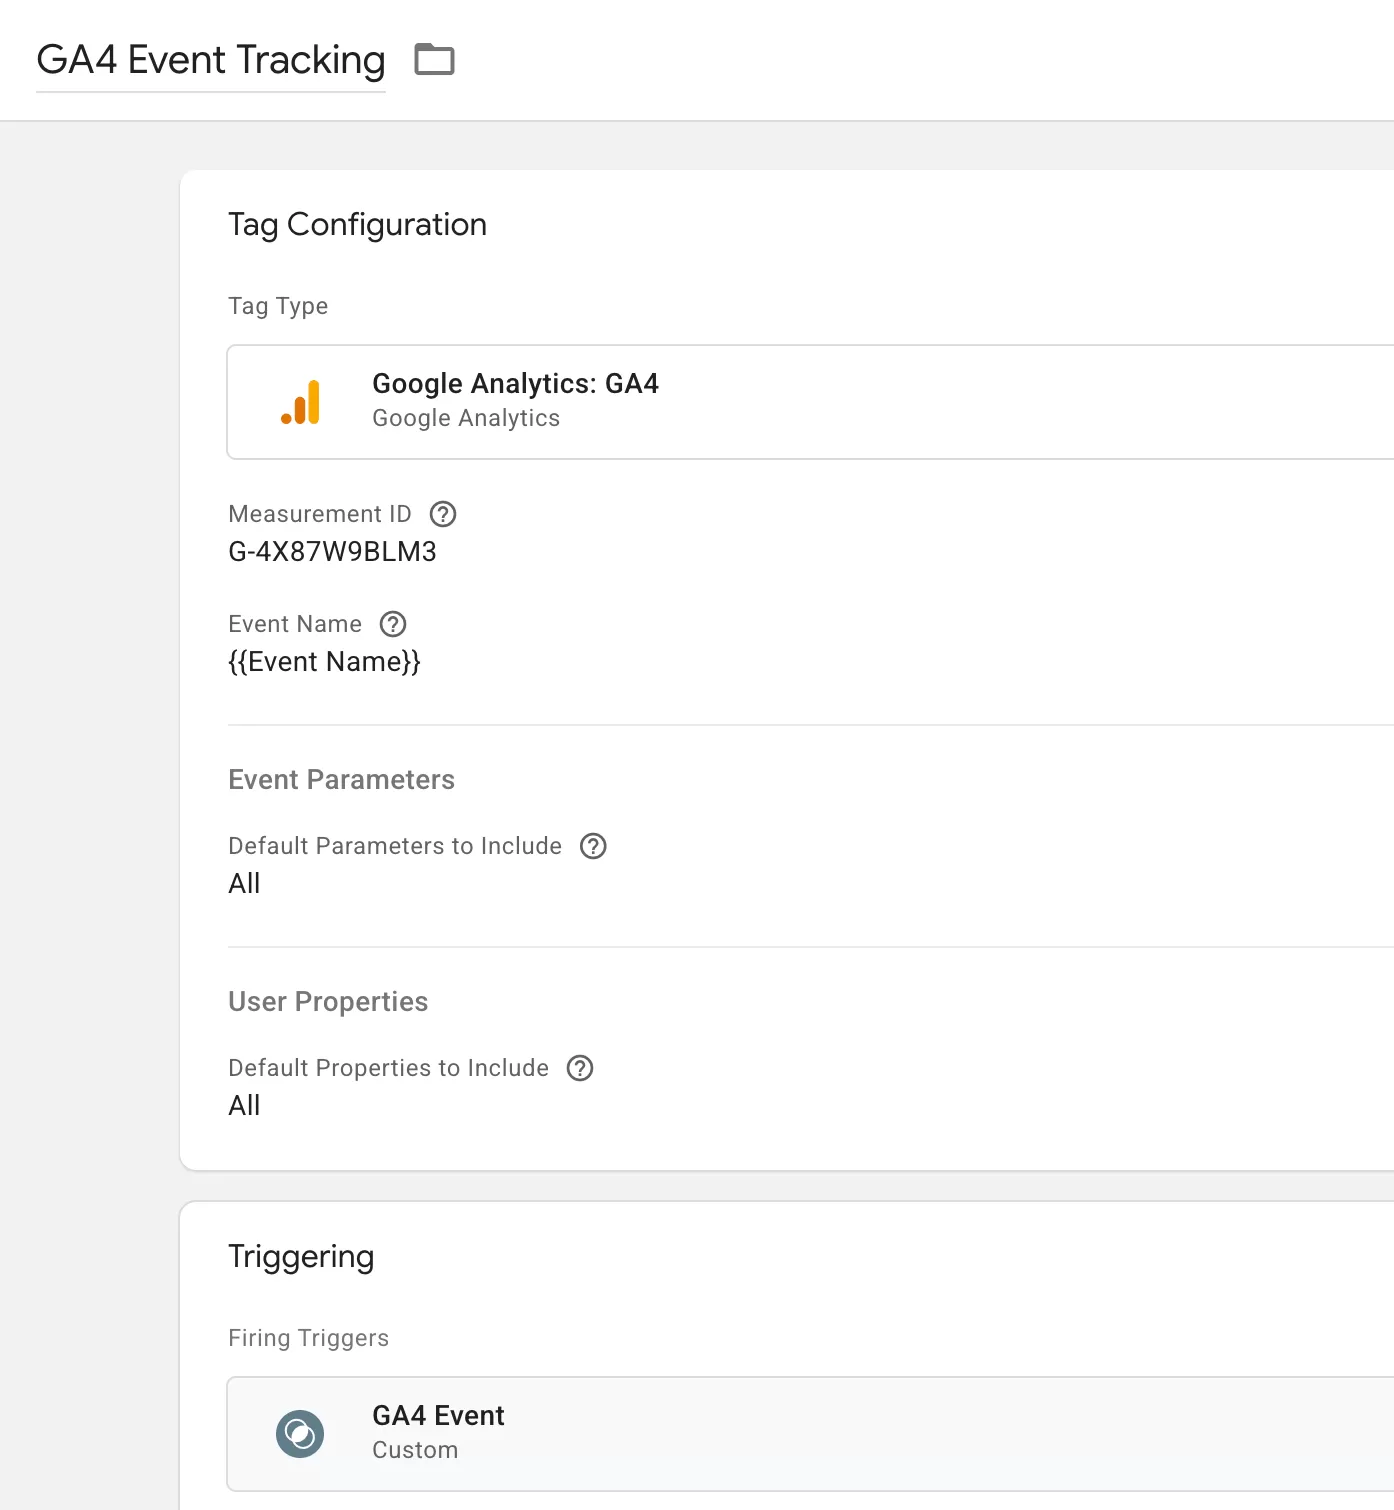
What this does: all events get forwarded to GA4 without any filtering or restrictions.
Step 8:Preview and Testing
Click 「Preview」 in sGTM container,then open your website. In Tag Assistant, you should see the data flowing: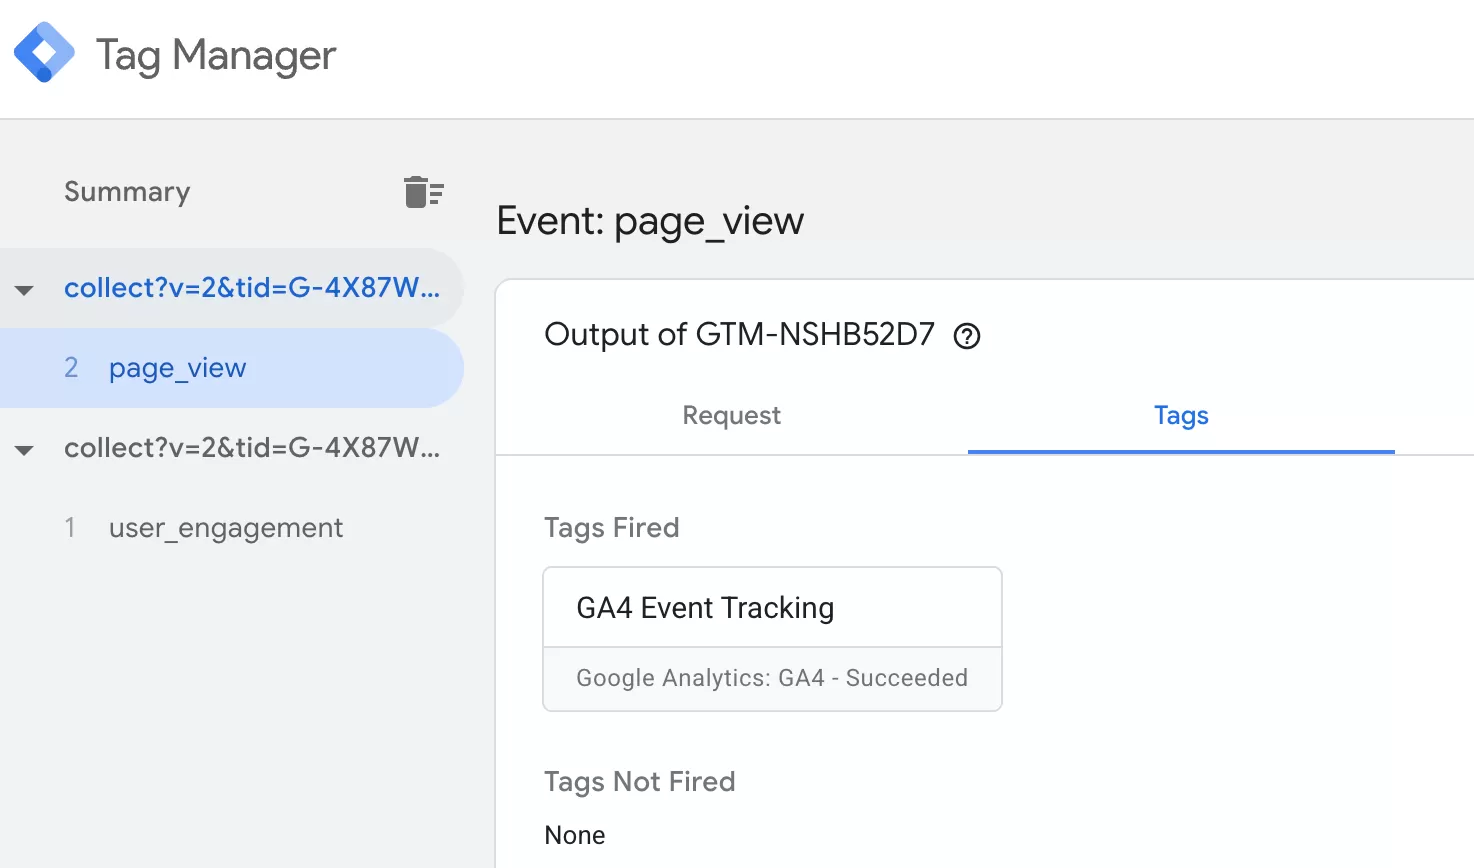
Check that GA4 events are being sent to your custom domain (data.bbccss.com):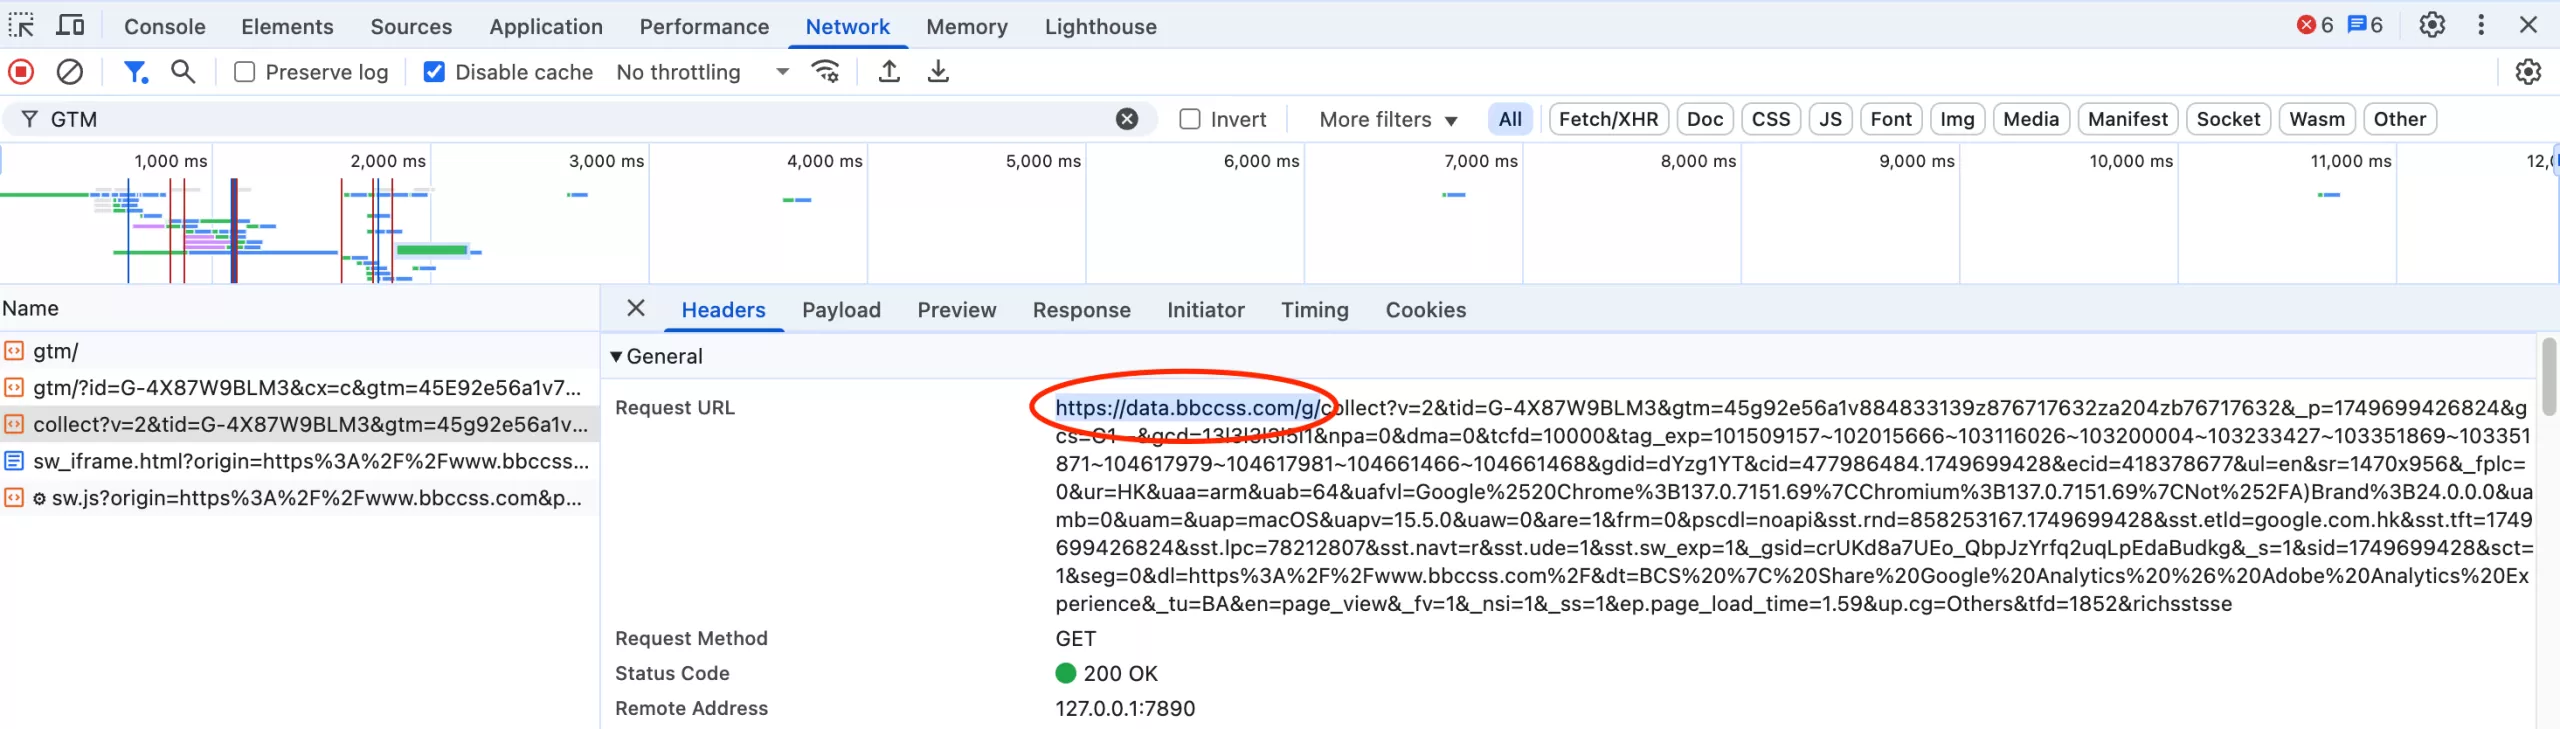
You should also see the FPID (First-Party Device ID) in the cookies: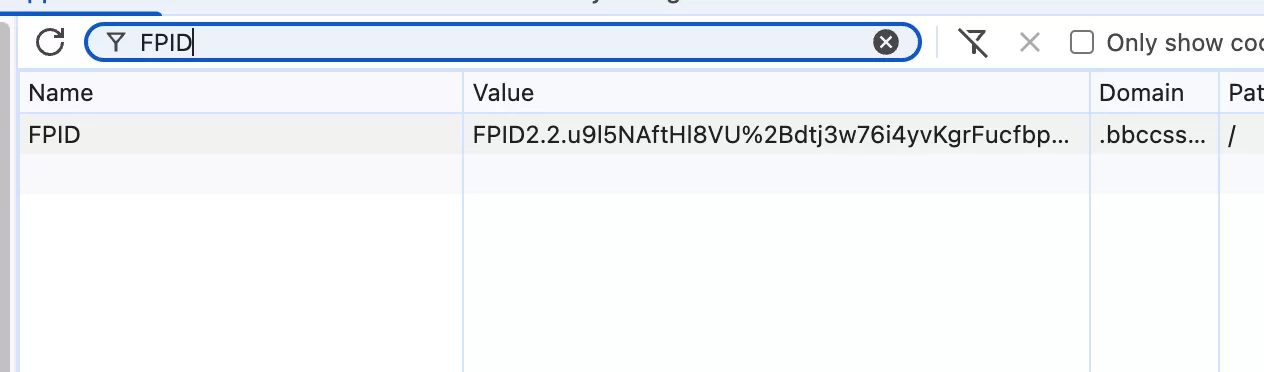
Final Words
Server-side tagging is one of the most effective ways to reclaim your analytics data in an era of increasing privacy restrictions. Stape makes it accessible without needing a DevOps background — you can go from zero to a working sGTM setup in about 30 minutes.
That said, I know every setup is a little different. Maybe your domain provider handles CNAMEs differently, or you’re using Cloudflare Workers alongside Stape, or you hit a snag with a specific client type. I’d love to hear about your experience. If you’ve set up Stape before and have tips — or if you ran into something I didn’t cover — drop a comment below.