GA4 gives you powerful measurement capabilities, but if the tracking isn’t set up right, you’re collecting data that doesn’t mean much. Most people reach for GTM, and that’s fine — but if you’re a developer (or work with one) who prefers handling things directly in the source code, gtag.js is the cleaner path. You get full control over how data is collected, no tag manager overhead.
In this guide, I’ll walk through the whole setup: installing the base code, configuring User ID and user properties, sending custom events, and implementing full e-commerce tracking.
Section 1:Installing GA4 Tracking Code
Step 1:Create GA4 Property
If you already have a GA4 Property, you can skip to the next section.
In GA4,go to「Admin」——「+Create」——「Property」:
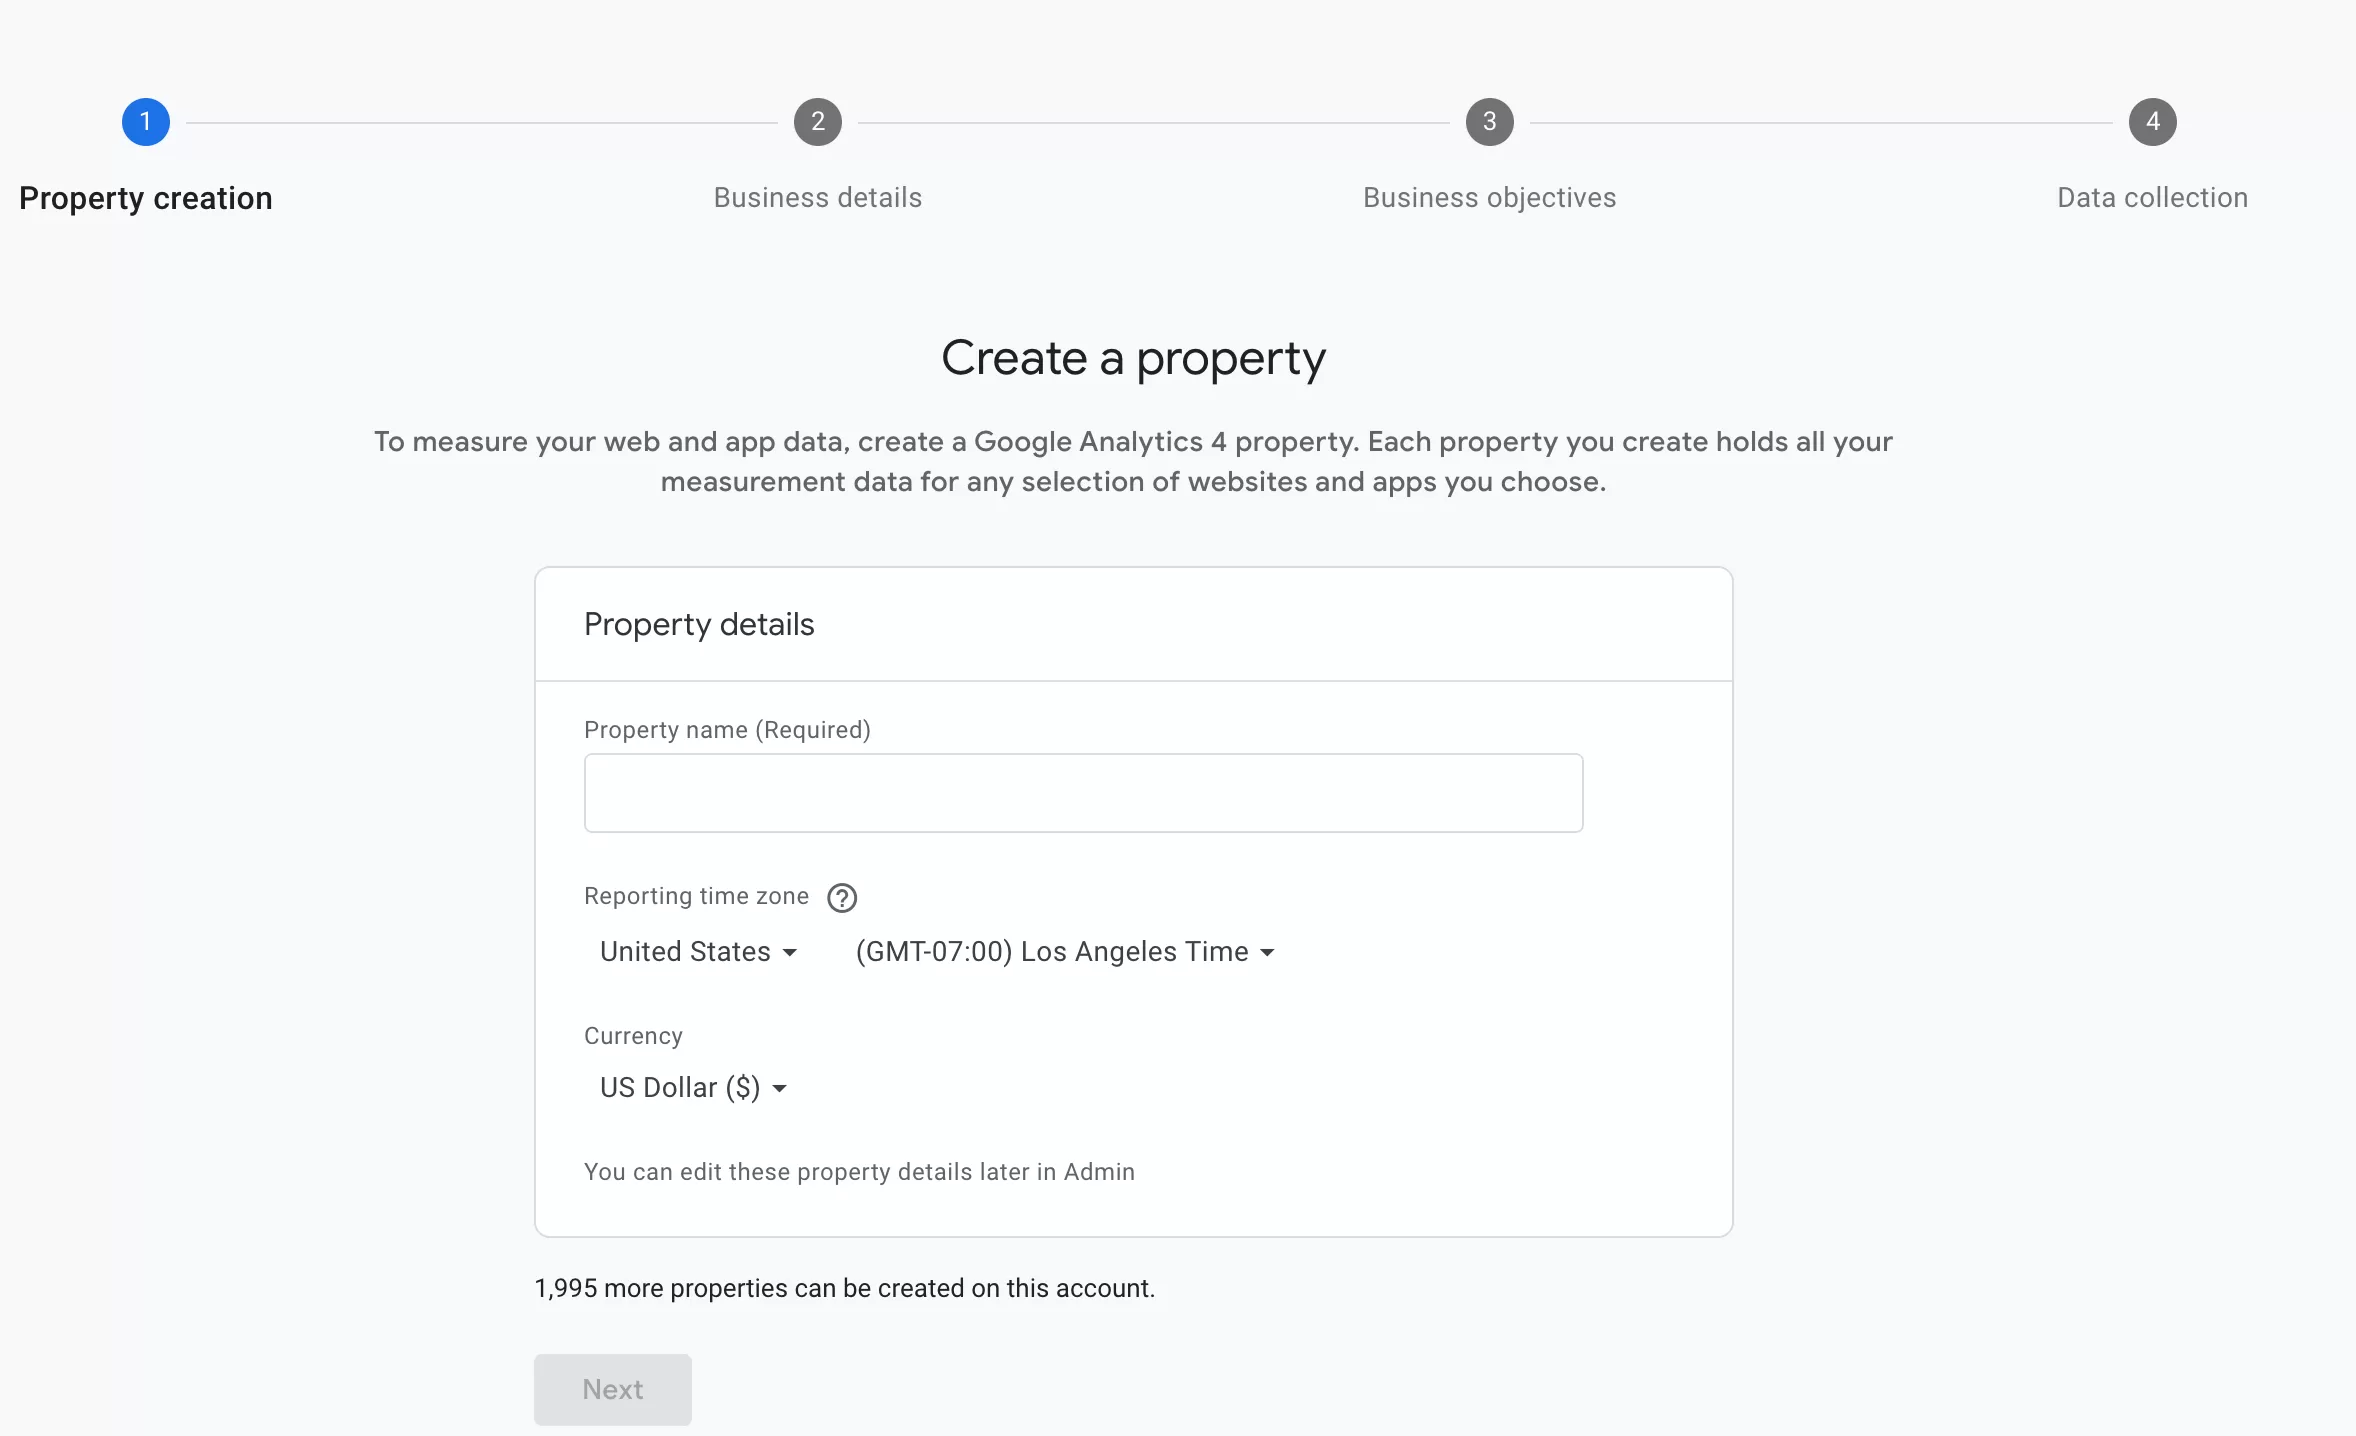
Create Property
Then configure the basic property settings: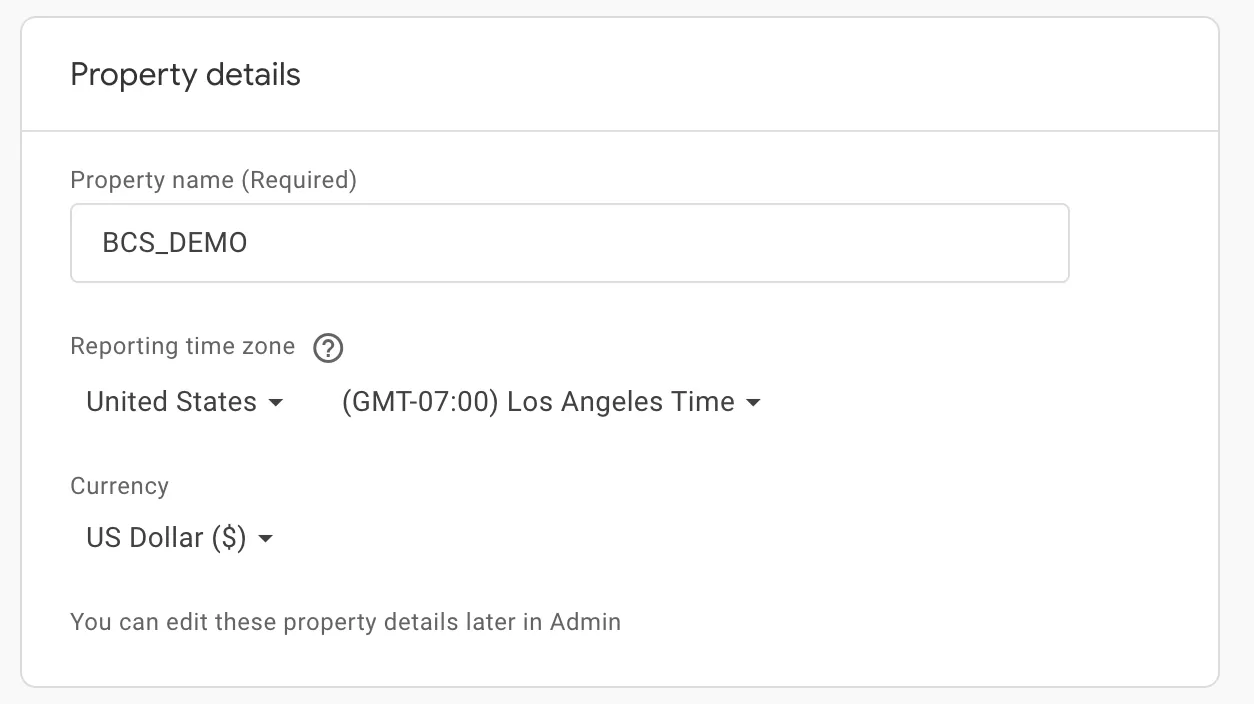
Fill in the basics:
- Property name: Your website domain works well
- Reporting time zone: Your local time zone
- Currency: The currency for your reporting
Click 「Next」to continue.
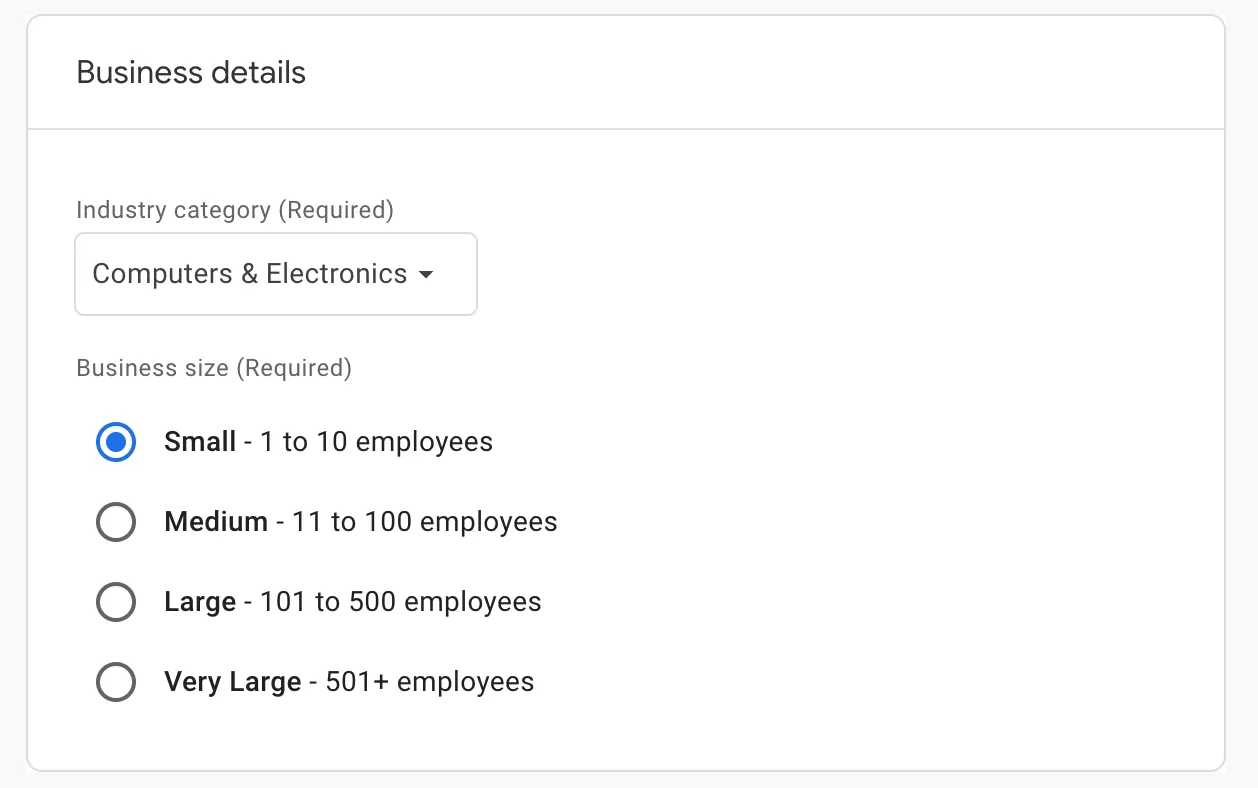
Business Details
GA4 will ask for your industry and business size — these just help customize some default reports.
- Industry category (Required): Select the most relevant industry for your website or business
- Business size (Required): Choose the number of employees in your organization
Business objectives
In this step, GA4 asks for your business goals.
These settings help GA4 customize default reports and insights based on your use case (e.g., lead generation, sales, traffic acquisition).
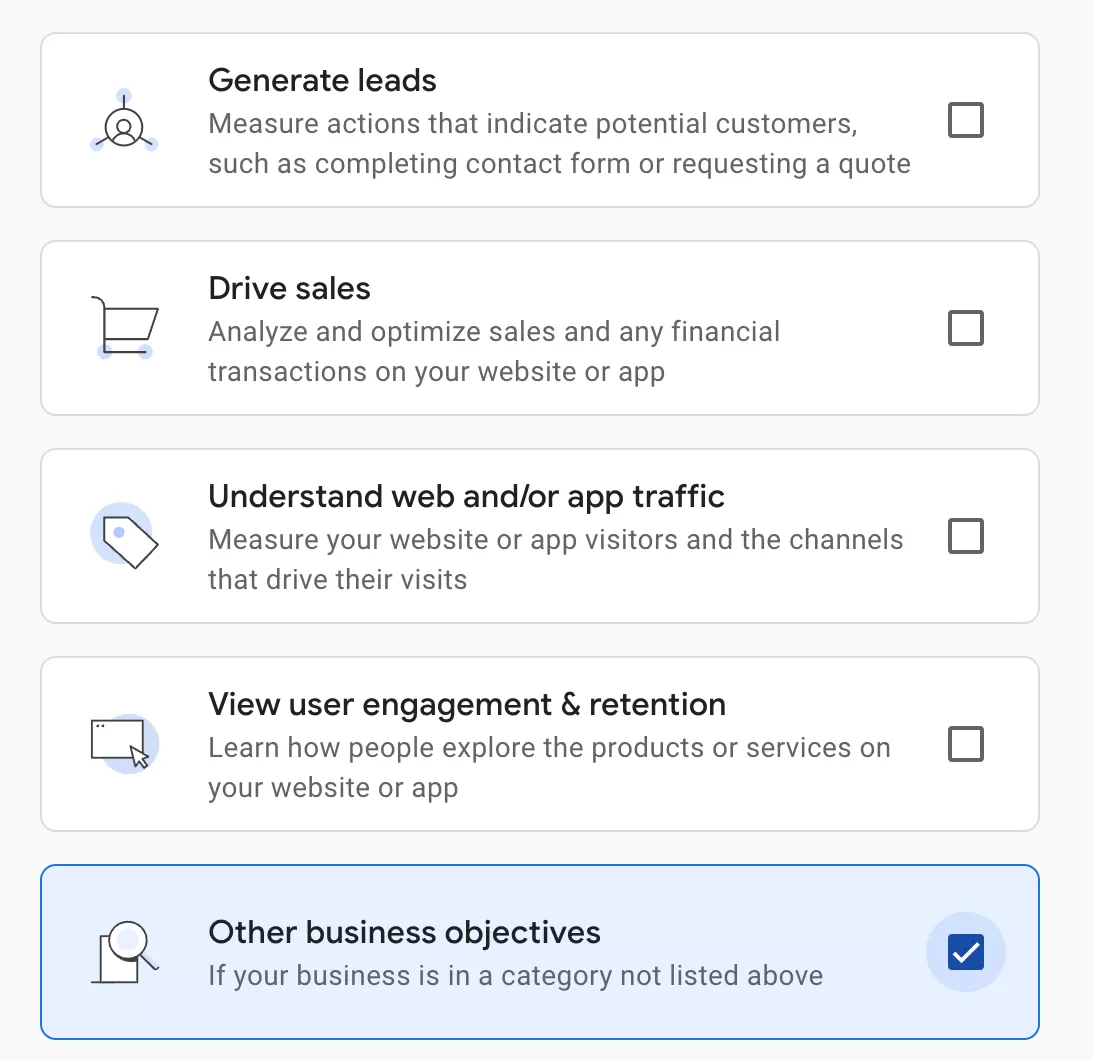
Select the options that best match your objectives, then click「Create」.
Data collection
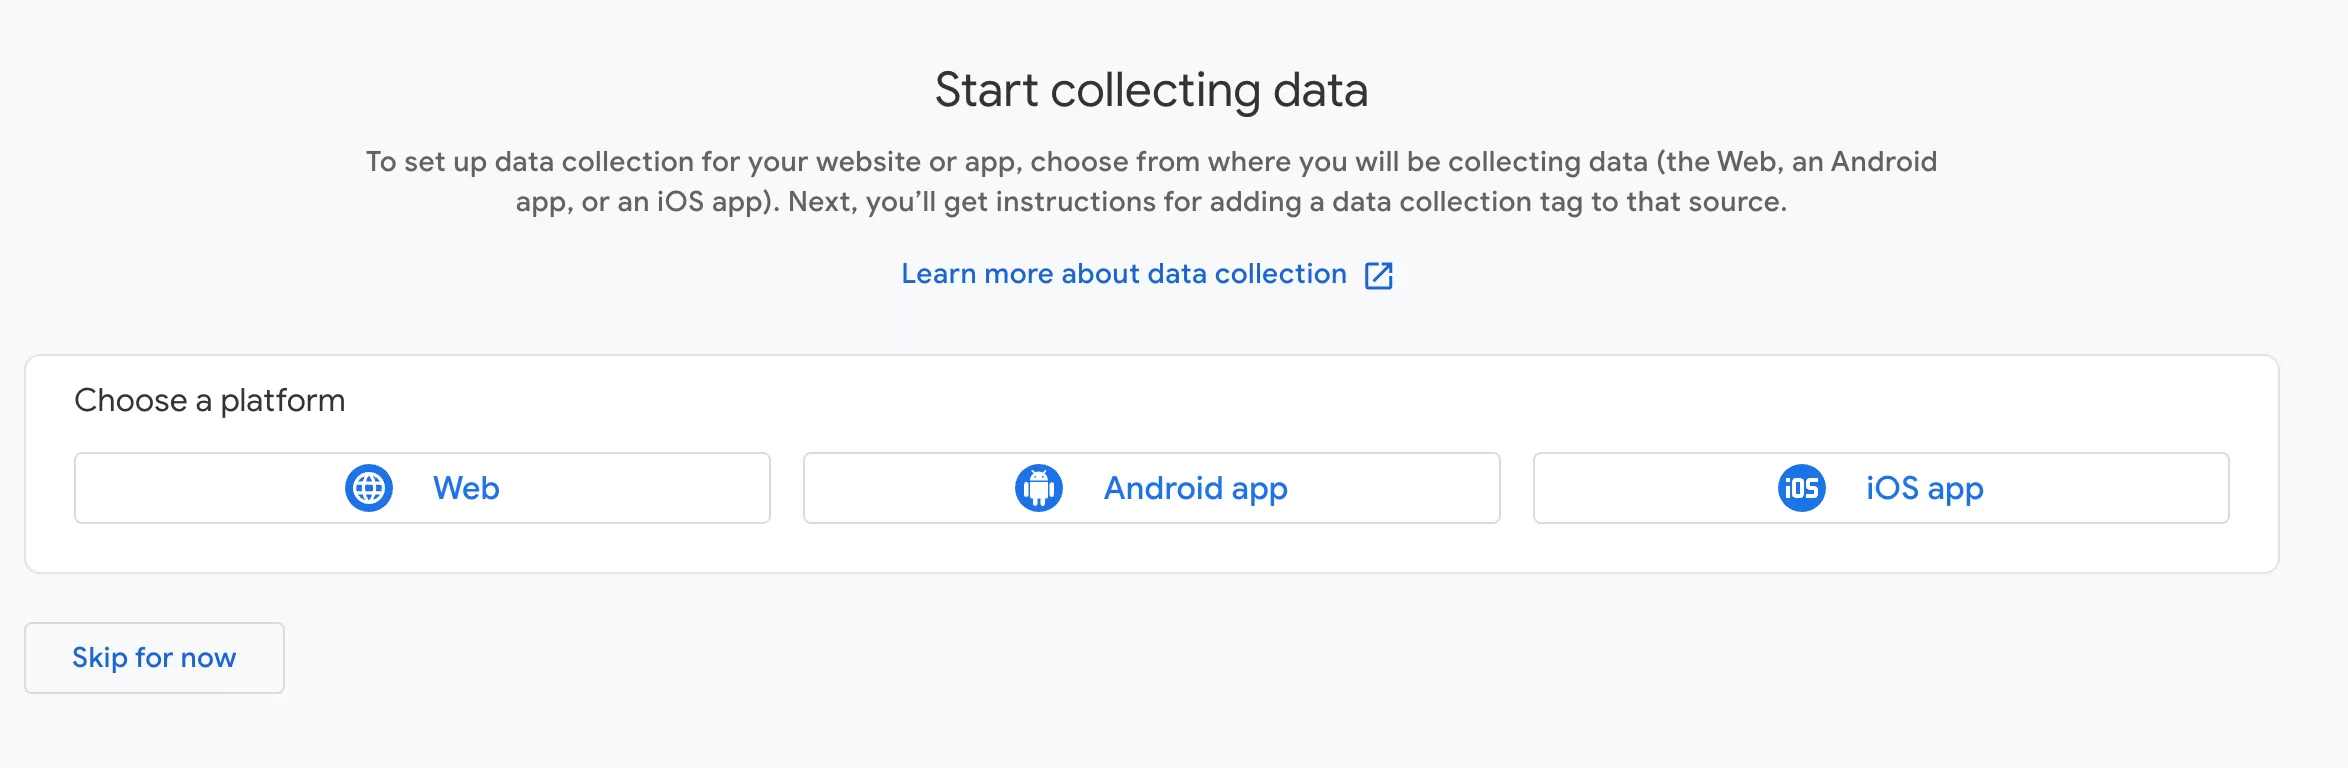
Step 2:Configure the Web Data Stream
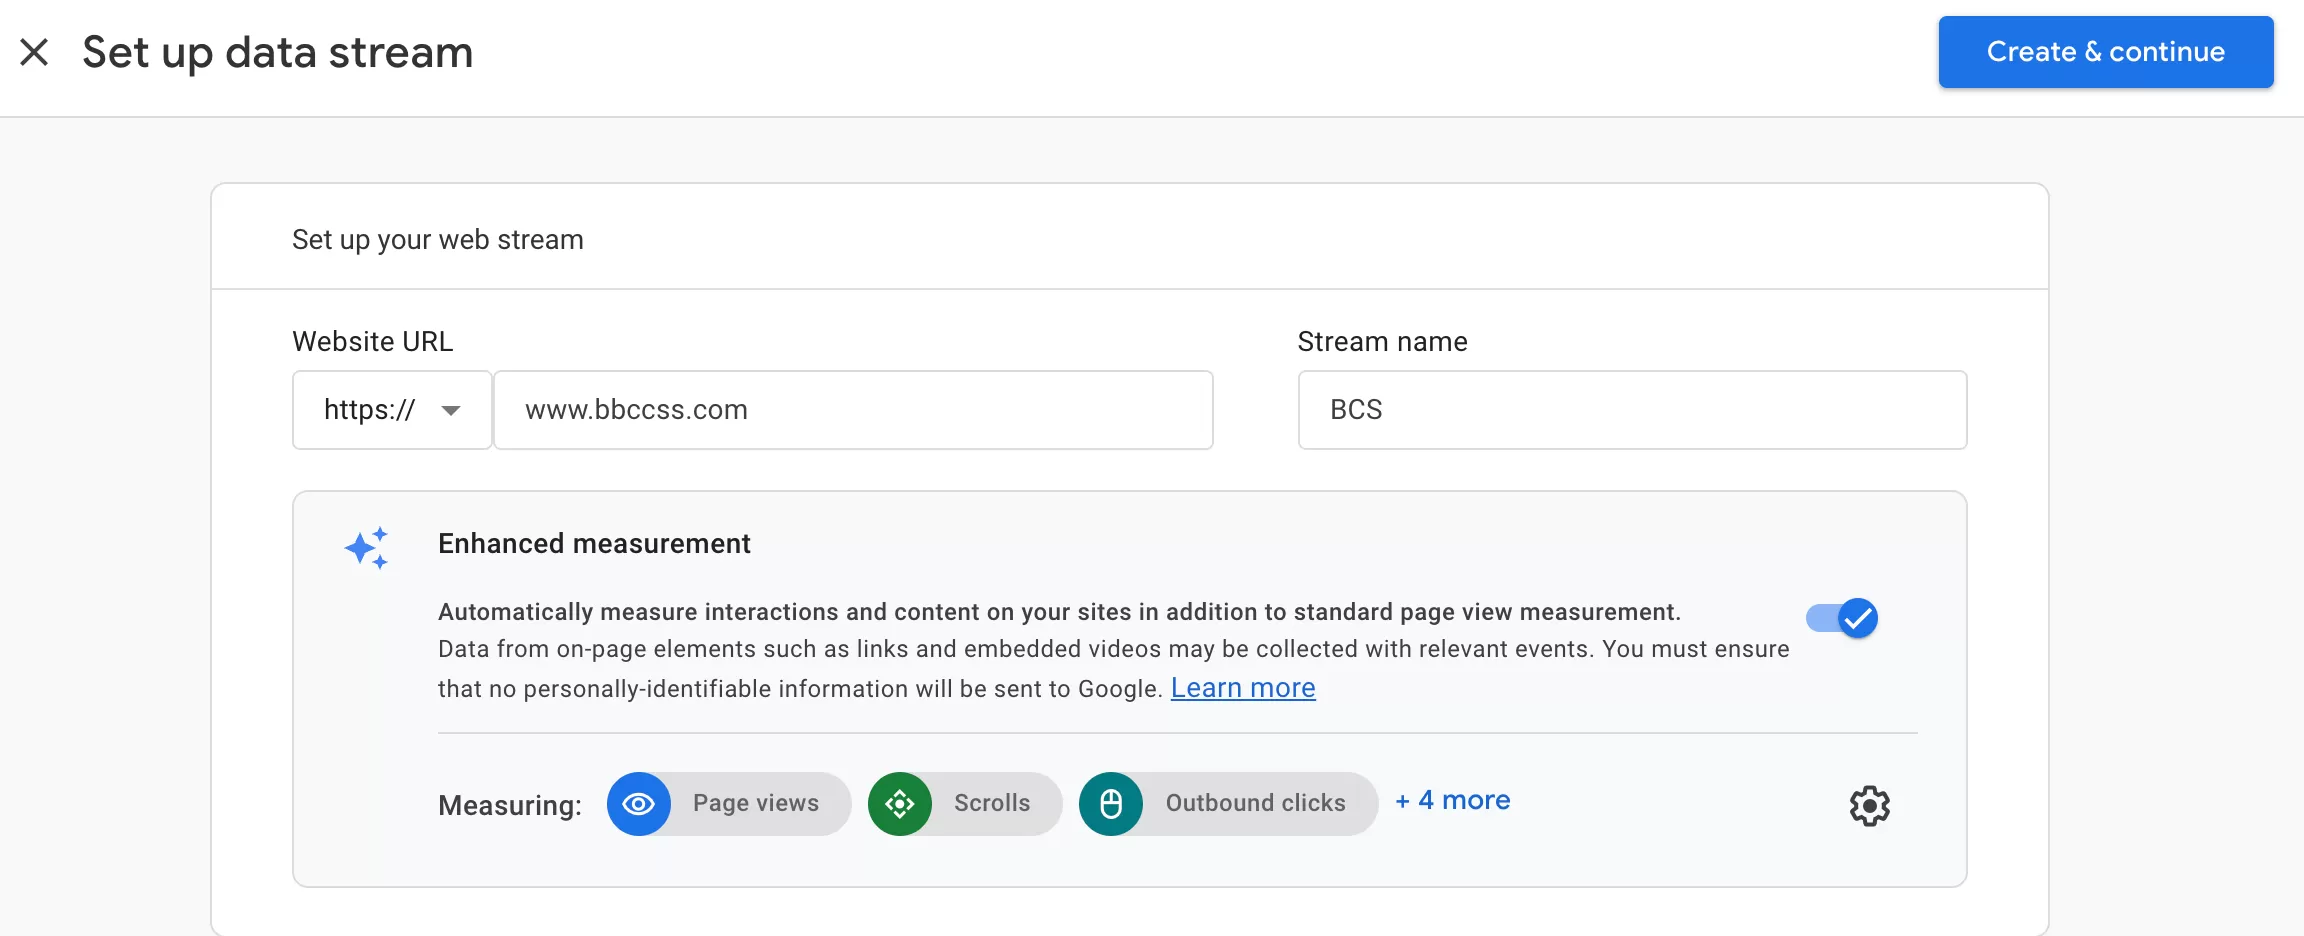
- Website URL: Enter the homepage URL of your website.
- Stream name: Provide a name for the website or data stream.
- Enhanced measurement: This feature automatically tracks several common interactions (such as page views, scrolls, and outbound clicks). By default, all options are enabled. You can disable any that you do not need.
After completing the setup, click「 Create & Continue」to create Data Stream.
Once the Data Stream is created, you will see its details:
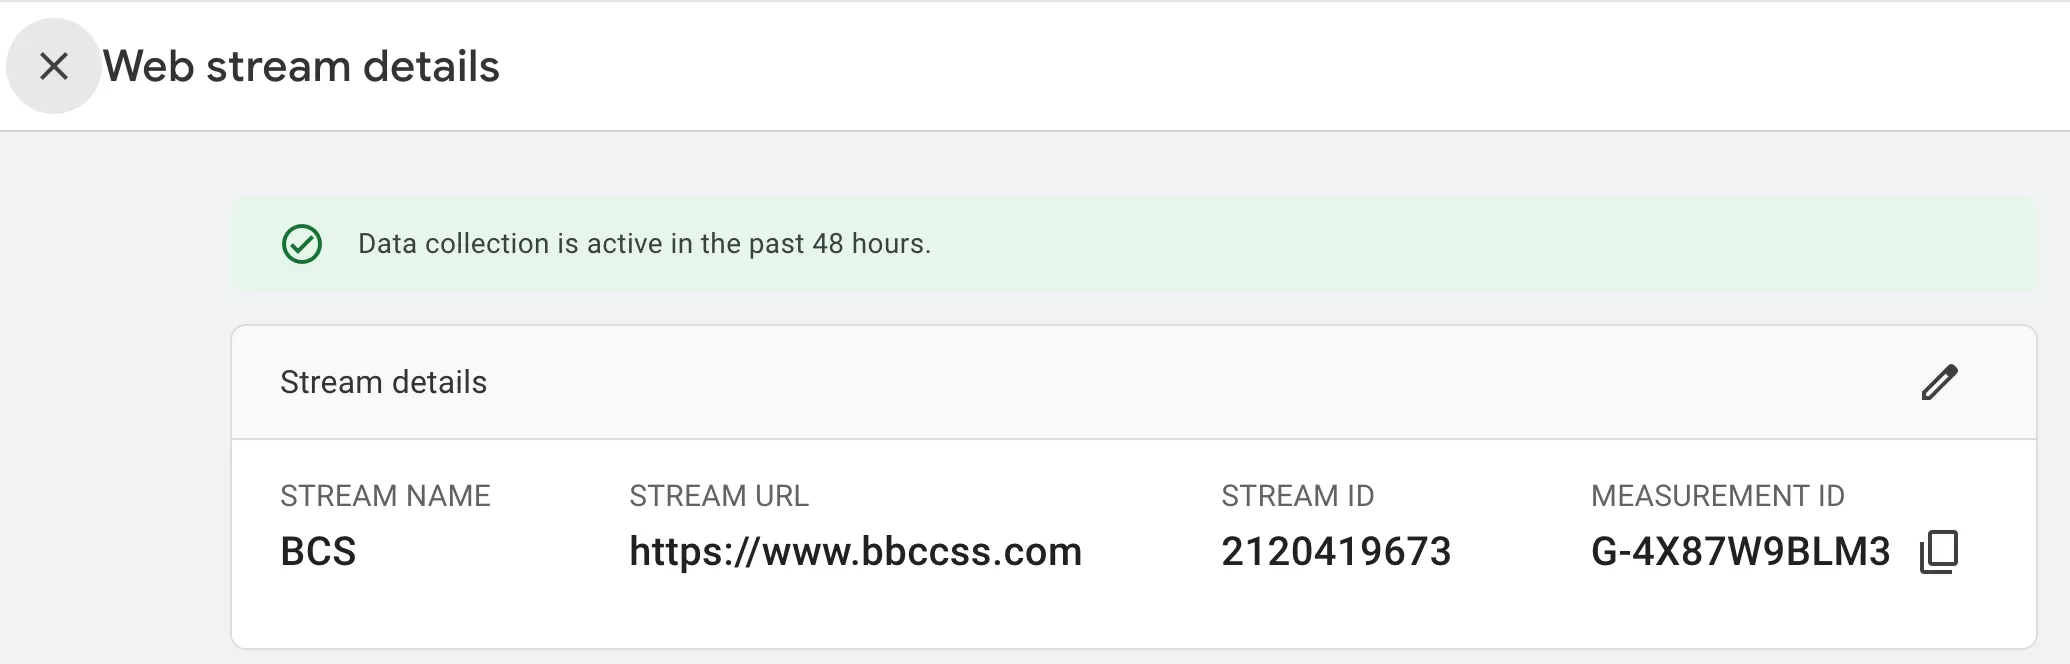
- STREAM URL: Your configured website URL
- STREAM NAME: The name you assigned
- MEASUREMENT ID: Used for web tracking
- STREAM ID: Internal GA4 identifier (mainly used for app configurations)
Step 3:Install gtag on Your Website
In your web stream details ,click「Installation instructions」——「Install manually」
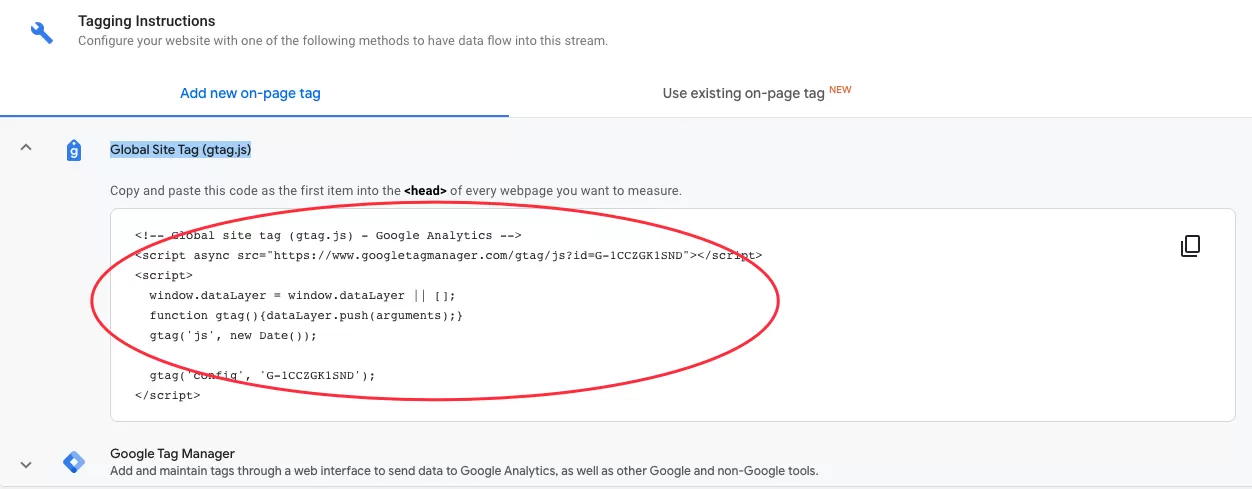
Copy the gtag code snippet provided in GA4, log in to your website server or CMS, paste the code inside the <head> section of your website template.
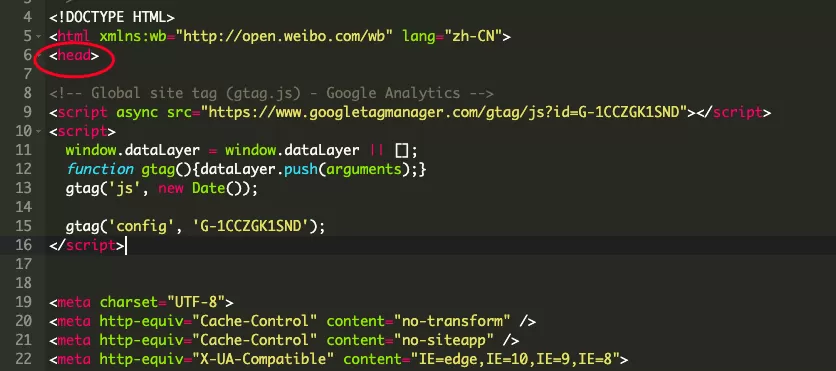
If you do not have server access, send the code snippet to your developer and ask them to add it to the site.
Step 4:Test and Verify the Installation
After installation, you should verify that GA4 is receiving data correctly.
Open Developer Tools in your browser and go to the Network tab. Filter requests using v=2
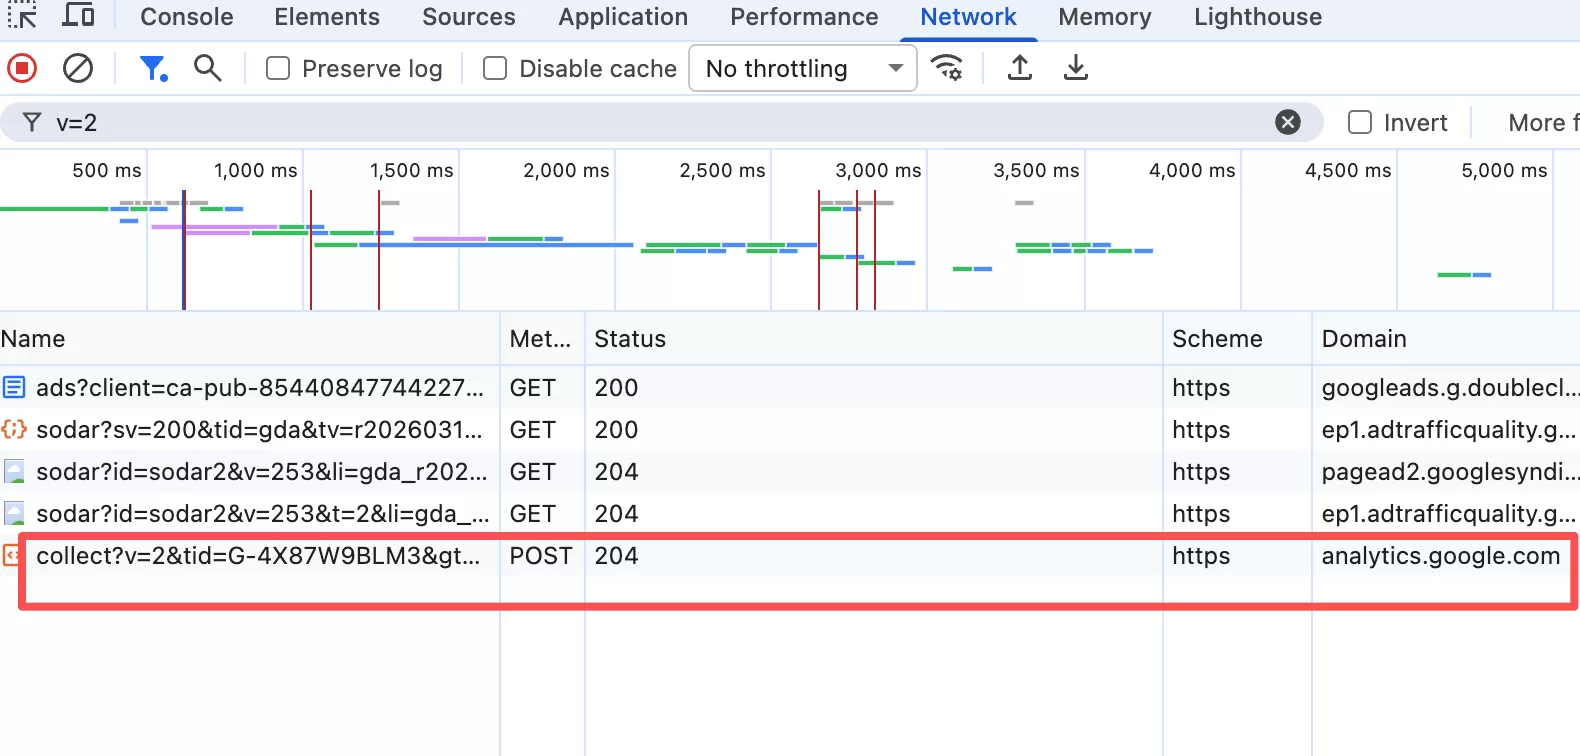 If GA4 is working correctly, you should see requests sent to the GA4 collection endpoint (e.g., google-analytics.com/g/collect).
Section 2:Setting Up User ID
User ID lets GA4 connect user activity across devices and sessions — so the same person on their phone and laptop shows up as one user instead of two.
A standard GA4 installation looks like this:
<!-- Google tag (gtag.js) -->
<script async src="https://www.googletagmanager.com/gtag/js?id=G-12345678"></script>
<script>
  window.dataLayer = window.dataLayer || [];
  function <a href="https://www.bbccss.com/tag/gtag" title="Read more Articles about gtag" target="_blank">gtag</a>(){dataLayer.push(arguments);}
  <a href="https://www.bbccss.com/tag/gtag" title="Read more Articles about gtag" target="_blank">gtag</a>('js', new Date());

  <a href="https://www.bbccss.com/tag/gtag" title="Read more Articles about gtag" target="_blank">gtag</a>('config', 'G-12345678');
</script>
For example, assume your website returns the internal user ID after login:
var userId = "USER_12345";
You can pass it to GA4 using the config command:
<a href="https://www.bbccss.com/tag/gtag" title="Read more Articles about gtag" target="_blank">gtag</a>('config', 'G-12345678', { user_id: userId });
The complete implementation may look like this:
<!-- Google tag (gtag.js) -->
<script async src="https://www.googletagmanager.com/gtag/js?id=G-12345678"></script>
<script>
  window.dataLayer = window.dataLayer || [];
  function <a href="https://www.bbccss.com/tag/gtag" title="Read more Articles about gtag" target="_blank">gtag</a>(){dataLayer.push(arguments);}
  <a href="https://www.bbccss.com/tag/gtag" title="Read more Articles about gtag" target="_blank">gtag</a>('js', new Date());

  // Set User ID after login
  var userId = "USER_12345";
  <a href="https://www.bbccss.com/tag/gtag" title="Read more Articles about gtag" target="_blank">gtag</a>('config', 'G-12345678', {
    user_id: userId });
</script>
Section 3:Setting User Properties
User properties let you attach extra attributes to a user — membership tier, signup source, whatever matters to your business.
A standard GA4 installation looks like this:
<!-- Google tag (gtag.js) -->
<script src="https://www.googletagmanager.com/gtag/js?id=G-12345678" async=""></script><script>
  window.dataLayer = window.dataLayer || [];
  function <a href="https://www.bbccss.com/tag/gtag" title="Read more Articles about gtag" target="_blank">gtag</a>(){dataLayer.push(arguments);}
  <a href="https://www.bbccss.com/tag/gtag" title="Read more Articles about gtag" target="_blank">gtag</a>('js', new Date());

  <a href="https://www.bbccss.com/tag/gtag" title="Read more Articles about gtag" target="_blank">gtag</a>('config', 'G-12345678');
</script>
For example, after a user logs in, your website may know the user’s membership status:
var customerType = "premium";
You can pass it to GA4 using the set command:
<a href="https://www.bbccss.com/tag/gtag" title="Read more Articles about gtag" target="_blank">gtag</a>('set', 'user_properties', { customer_type: customerType });
The complete implementation may look like this:
<!-- Google tag (gtag.js) -->
<script async src="https://www.googletagmanager.com/gtag/js?id=G-12345678"></script>
<script>
  window.dataLayer = window.dataLayer || [];
  function <a href="https://www.bbccss.com/tag/gtag" title="Read more Articles about gtag" target="_blank">gtag</a>(){dataLayer.push(arguments);}
  <a href="https://www.bbccss.com/tag/gtag" title="Read more Articles about gtag" target="_blank">gtag</a>('js', new Date());

  <a href="https://www.bbccss.com/tag/gtag" title="Read more Articles about gtag" target="_blank">gtag</a>('config', 'G-12345678');

  // Set User Properties after login
  <a href="https://www.bbccss.com/tag/gtag" title="Read more Articles about gtag" target="_blank">gtag</a>('set', 'user_properties', {
   customer_type: 'premium'
   });
</script>
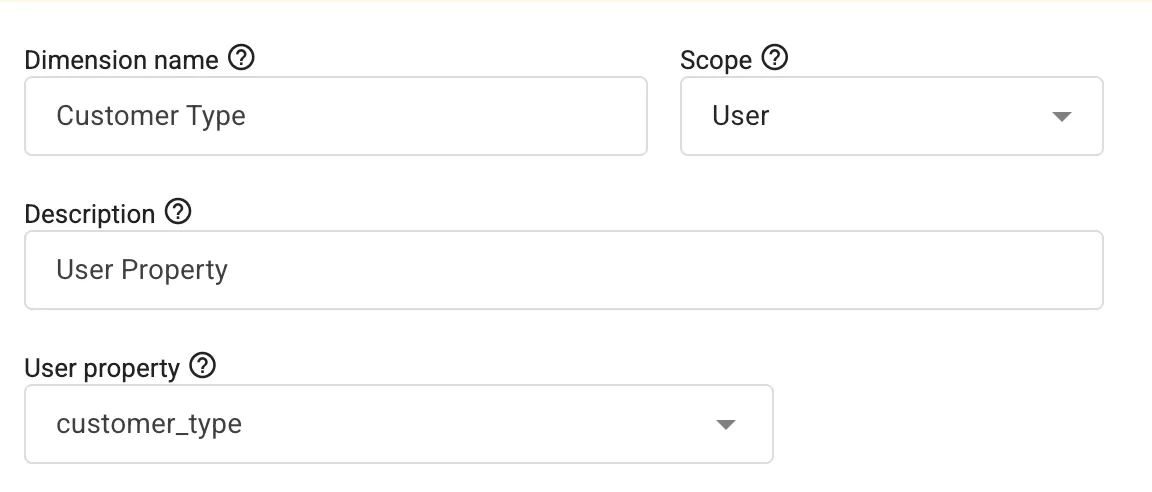
Finally, register it as an User-scoped Custom Dimension.
In GA4,click「Admin」——「Custom definitions」——「Create custom dimension」, then do the following configuration:
Section 4:Sending GA4 Custom Events
The Custom Events syntax is simple:
<a href="https://www.bbccss.com/tag/gtag" title="Read more Articles about gtag" target="_blank">gtag</a>('event', '<event_name>', {
<event_parameters>
});
Where:
- event_name is the name of the event.
- event_parameters contains any additional information you want to send.
Here’s a real example:
<a href="https://www.bbccss.com/tag/gtag" title="Read more Articles about gtag" target="_blank">gtag</a>('event', '<a href="https://www.bbccss.com/tag/gtag" title="Read more Articles about gtag" target="_blank">gtag</a>_method', {
  label: 'test'
});
That’s the entire syntax. One function call, and the event is sent to GA4.
Step 1 :Add gtag Tracking Code
Let me show you this with a concrete example. Suppose I want to track clicks on this link using the `gtag` method:

Original HTML looks like this::
<a href="/" >gtag method demo test</a>
After adding the `gtag()` call as an `onclick` handler:
<a href="/" onclick="gtag('event', 'gtag_method', {'label':'test'});">gtag method demo test</a>
That’s it. Now whenever a visitor clicks this link, GA4 receives the `gtag_method` event with the `label` parameter.
Step 2: Test the Event
Before publishing your changes to production, you’ll want to verify that the event is actually being sent correctly.
The easiest way to do this is with GA4 DebugView:
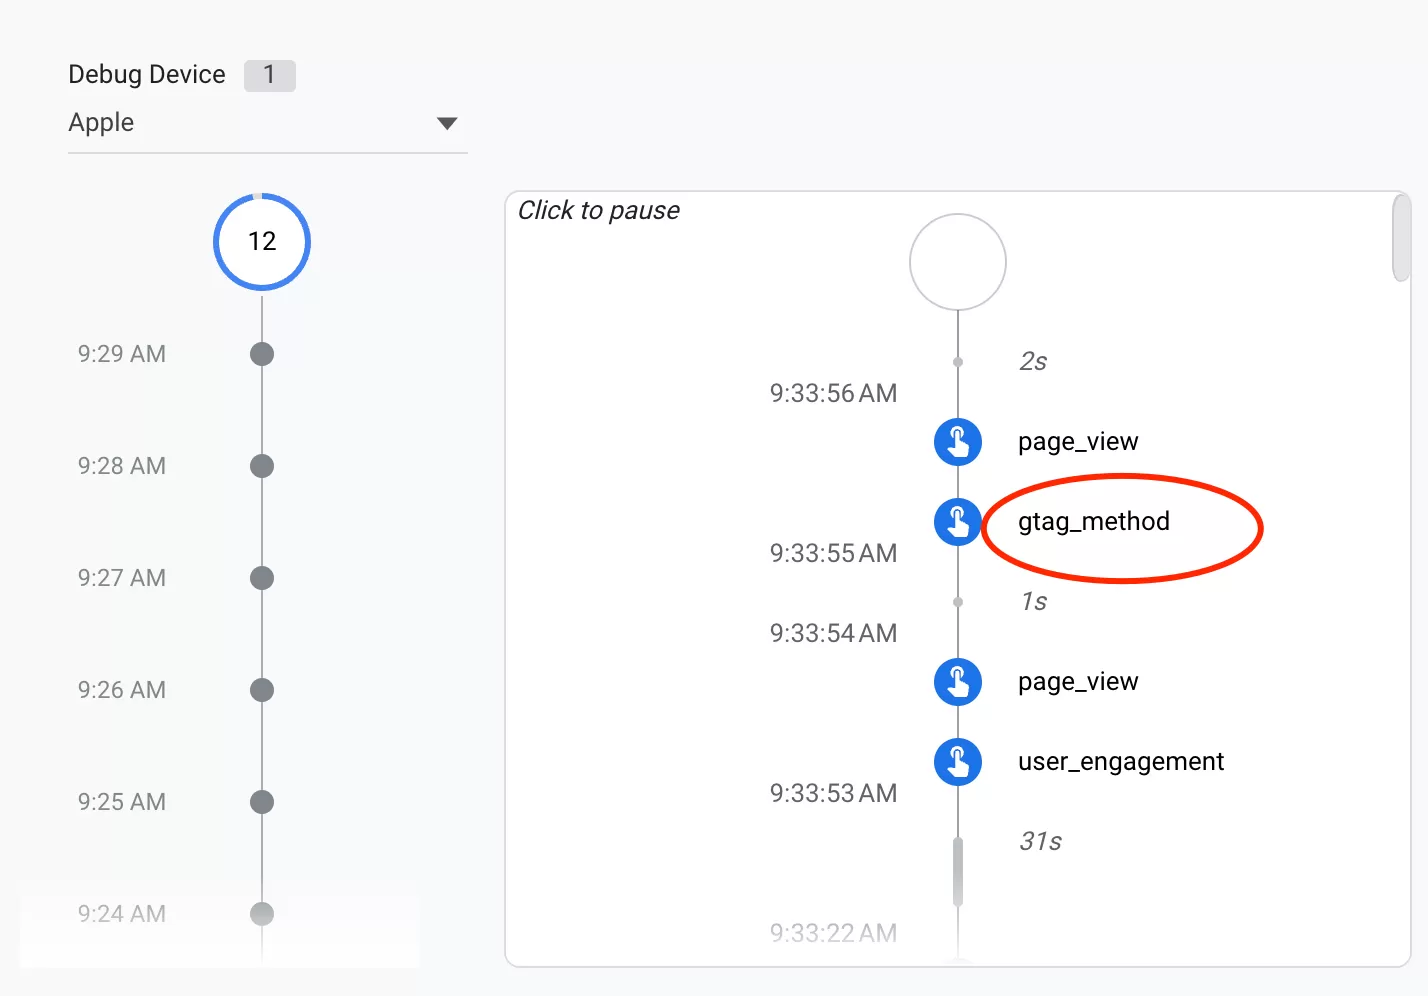
f you see the `gtag_method` event appear, click on it to inspect the parameters. You should see `label = test`.
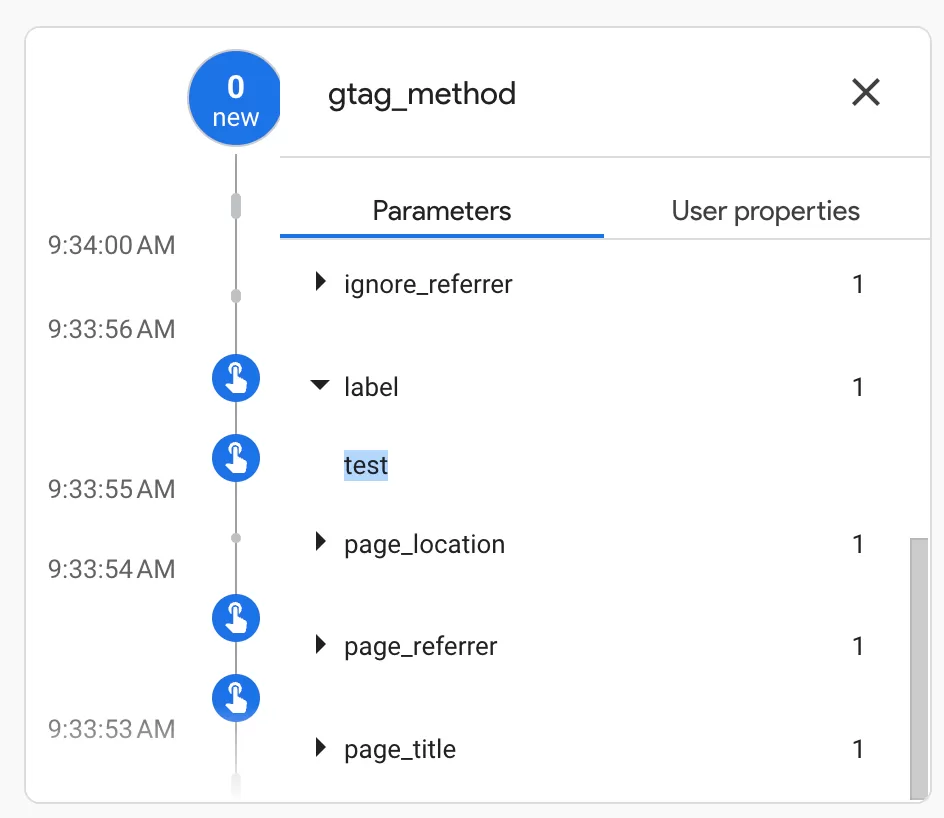
When the event and parameters look correct, you’re ready to publish.
Step 3: Register Custom Dimension in GA4
In this example, our event includes a `label` parameter. If you want `label` to appear in your standard GA4 reports or Explorations, you need to register it as an Event-scoped Custom Dimension.
In GA4,click「Admin」——「Custom definitions」——「Create custom dimension」, then do the following configuration:
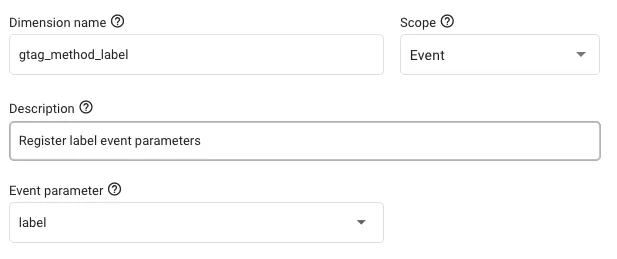
I covered this in more detail in my GA4 Event Parameters guide , but the short version is: if you don’t register a parameter, GA4 won’t store it as a dimension you can use in reports.
Step 4:Verify Data in GA4 Reports
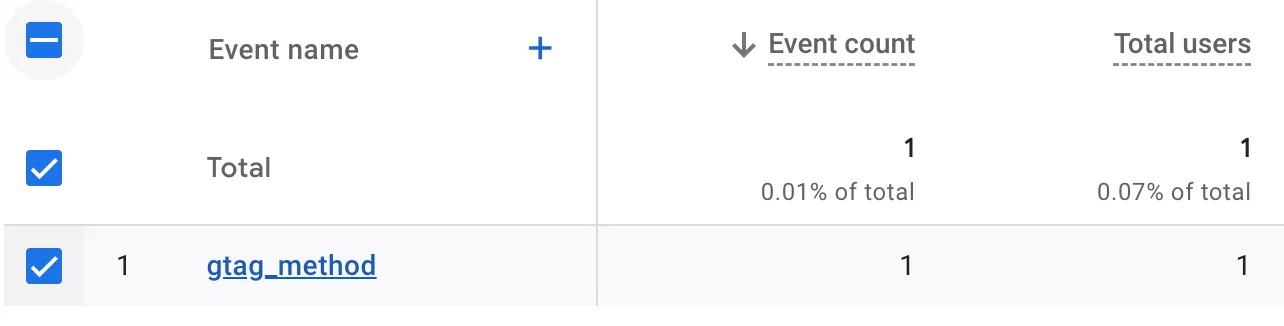
After publishing, it typically takes up to 24 hours before the event appears in your GA4 reports. Once it does, look for `contact_me_attribute_method` in your events list under Event Reports:
Section 5:Implementing GA4 Ecommerce tracking
GA4 includes a built-in e-commerce measurement model for the full user journey — product discovery to purchase to refund.
Product Views
These events track how users discover and interact with products on your site. Think of them as the “top of the funnel” for your e-commerce data.
view_item_list
Fires when a user sees a list of products — category pages, search results, recommended products, you name it. This event helps you understand which product lists are driving engagement.
view_item
Fires when a user opens a product detail page. This is one of the most important events because it tells you which products are getting serious consideration.
select_item
Fires when a user clicks on a product from a list (but hasn’t yet landed on the detail page). This is the bridge between browsing and considering.
Internal Promotion
These events track internal marketing promotions — banners, featured products, or seasonal campaigns displayed on your own site. Not to be confused with external ad campaigns.
view_promotion
Fires when a user sees a promotion on your site.
select_promotion
Fires when a user clicks on a promotion.
Shopping Cart
These events track the critical moment when a user moves from browsing to intent.
add_to_cart
Fires when a user adds a product to their shopping cart.
remove_from_cart
Fires when a user removes a product from their shopping cart. This event is often overlooked, but it’s gold for identifying friction points in your checkout flow.
Checkout
Here’s where the checkout funnel events live. These are the events that help you figure out exactly where people are dropping off in the purchase process.
Important: Whenever you send revenue-related data (the value parameter), always include the currency parameter too. Without it, GA4 won’t know how to interpret the number, and your revenue metrics will be meaningless.
begin_checkout
Fires when a user starts the checkout process.
add_payment_info
Fires when a user submits their payment information.
add_shipping_info
Fires when a user selects their shipping method.
purchase
This is the big one — fires when a user completes a purchase. Make sure your transaction_id is unique; sending a duplicate will cause GA4 to ignore the event.
refund
The refund event lets you send refund data back to GA4 so your revenue numbers stay accurate. You can send either a partial refund (with specific items) or a full refund (just the transaction ID and total value).
Partial refund
Full refund
Section 6:Debugging and Validation
A few quick ways to check your gtag.js implementation:
- GA4 DebugView — open it in GA4, enable debug mode on your site, and watch events appear in real time. My DebugView guide covers this in detail.
- Network tab — filter by
v=2orcollectand inspect the request payload. You’ll see event names and parameters in the query string. - GA4 Debugger — install the Google Analytics Debugger Chrome extension to get verbose console logs.
If events don’t show up, check the most common culprits: ad blockers, the gtag snippet not loading, or the event name not matching the GA4 specification.
Final Words
This should give you a solid foundation for implementing GA4 with gtag.js — from the initial property setup all the way to e-commerce tracking. The approach has its tradeoffs: you get more direct control than GTM, but you also need developer access to make changes.
If you have questions or run into something unexpected, feel free to comment.