Updated: March 26, 2026
UTM parameters are a widely used industry standard for tracking traffic sources. Most websites use parameters such as utm_source, utm_medium, and utm_campaign to tag advertising and marketing channels.
However, in Adobe Analytics, the default field used for marketing attribution is cid (Campaign ID). UTM parameters are not automatically parsed. Therefore, if you want to leverage UTM data in Adobe Analytics, additional configuration is required.
Implementation Overview
The setup involves three key steps:
- Capture UTM parameters and store them in s.campaign (s.campaign corresponds to cid, typically mapped to eVar0)
- Use Classification Sets to split s.campaign into individual UTM dimensions
Step 1: Convert UTM Parameters into cid
n Adobe Analytics, you can use custom code within the Adobe Analytics extension (Configure Tracker Custom Code) to transform UTM parameters into the cid format.
Paste this code here: Adobe Launch → Adobe Analytics Extension → Configure Tracker Custom Code

This will combine all UTM fields (e.g., utm_source, utm_medium, utm_campaign, etc.) into a single string separated by |, and store it in s.campaign.
Step 2: Create a Classification Set
Next, go to Adobe Analytics 「Components」——「Classification sets」——「New」:
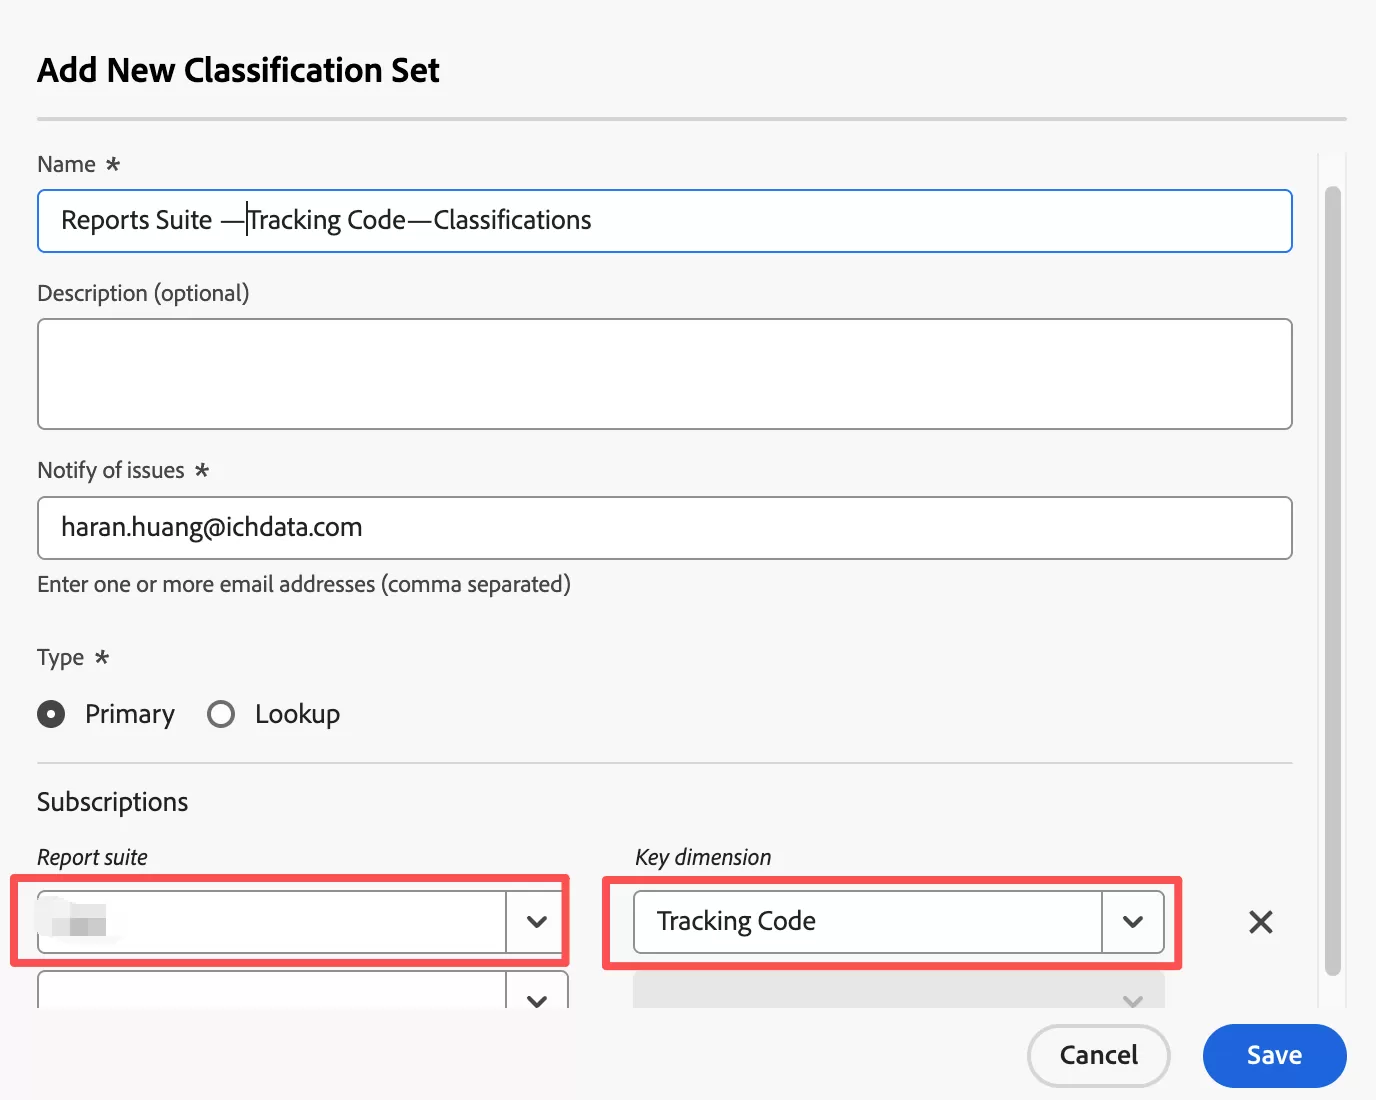
Key Fields
- Name:Typically follows: Report Suite + Variable + Classifications
- Notify of issues:The owner responsible for managing the set
- Subscriptions:Select at least one report suite and the classification variable
Save after configuration.
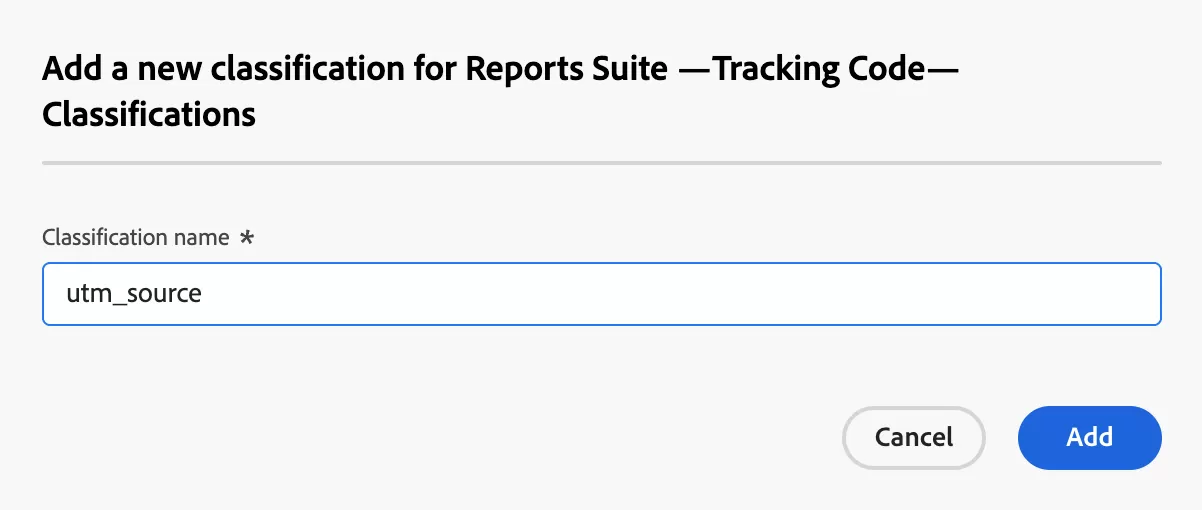
Step 3: Add Classification Fields (Schema Setup)
Split s.campaign into utm_source、utm_medium、utm_campaign、utm_content、utm_term
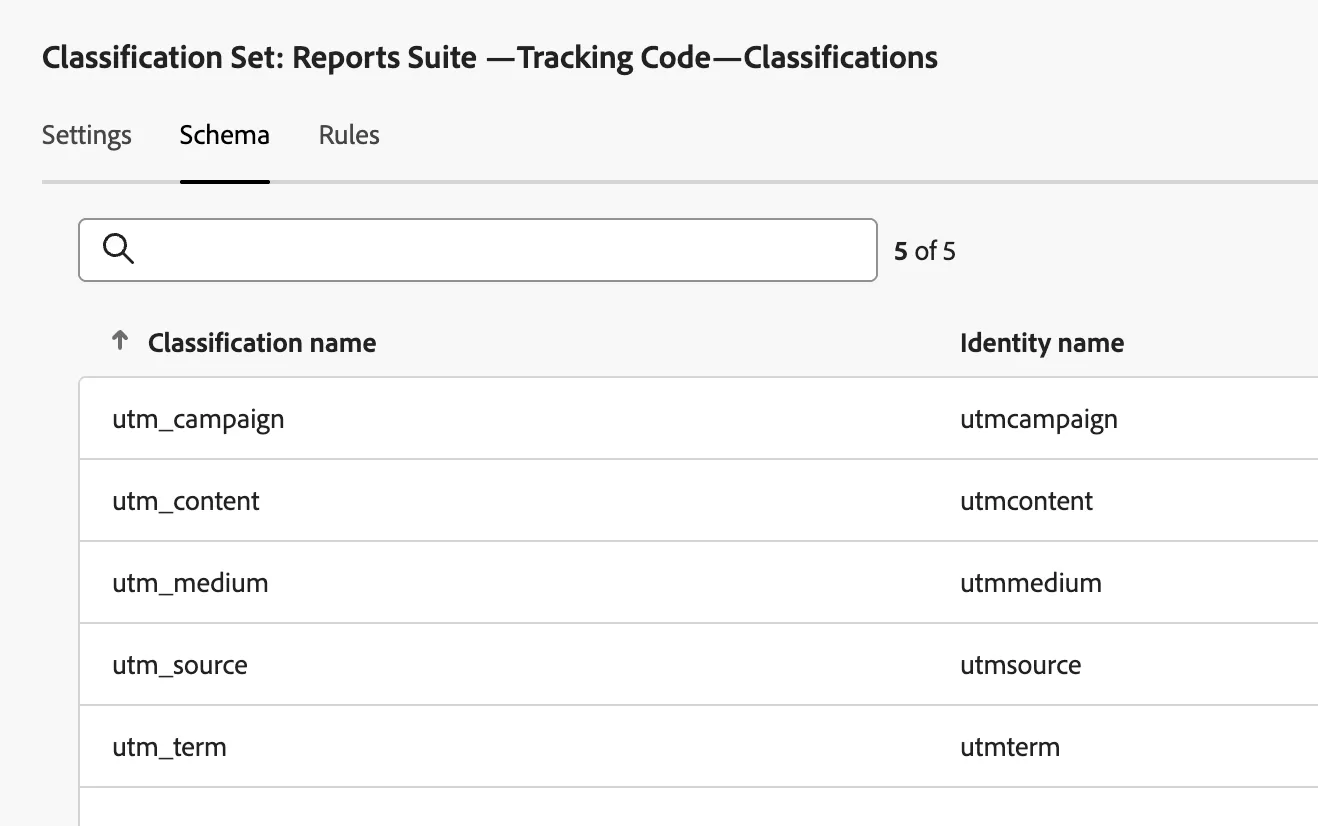
Open the Classification Set,click「Schema」——「Add」,and create each UTM field:
Repeat until all required UTM dimensions are added,final effects:
Step 5: Configure Classification Rules
Click 「Rules」,Drag Regular Expression into the workspace,set as follows::
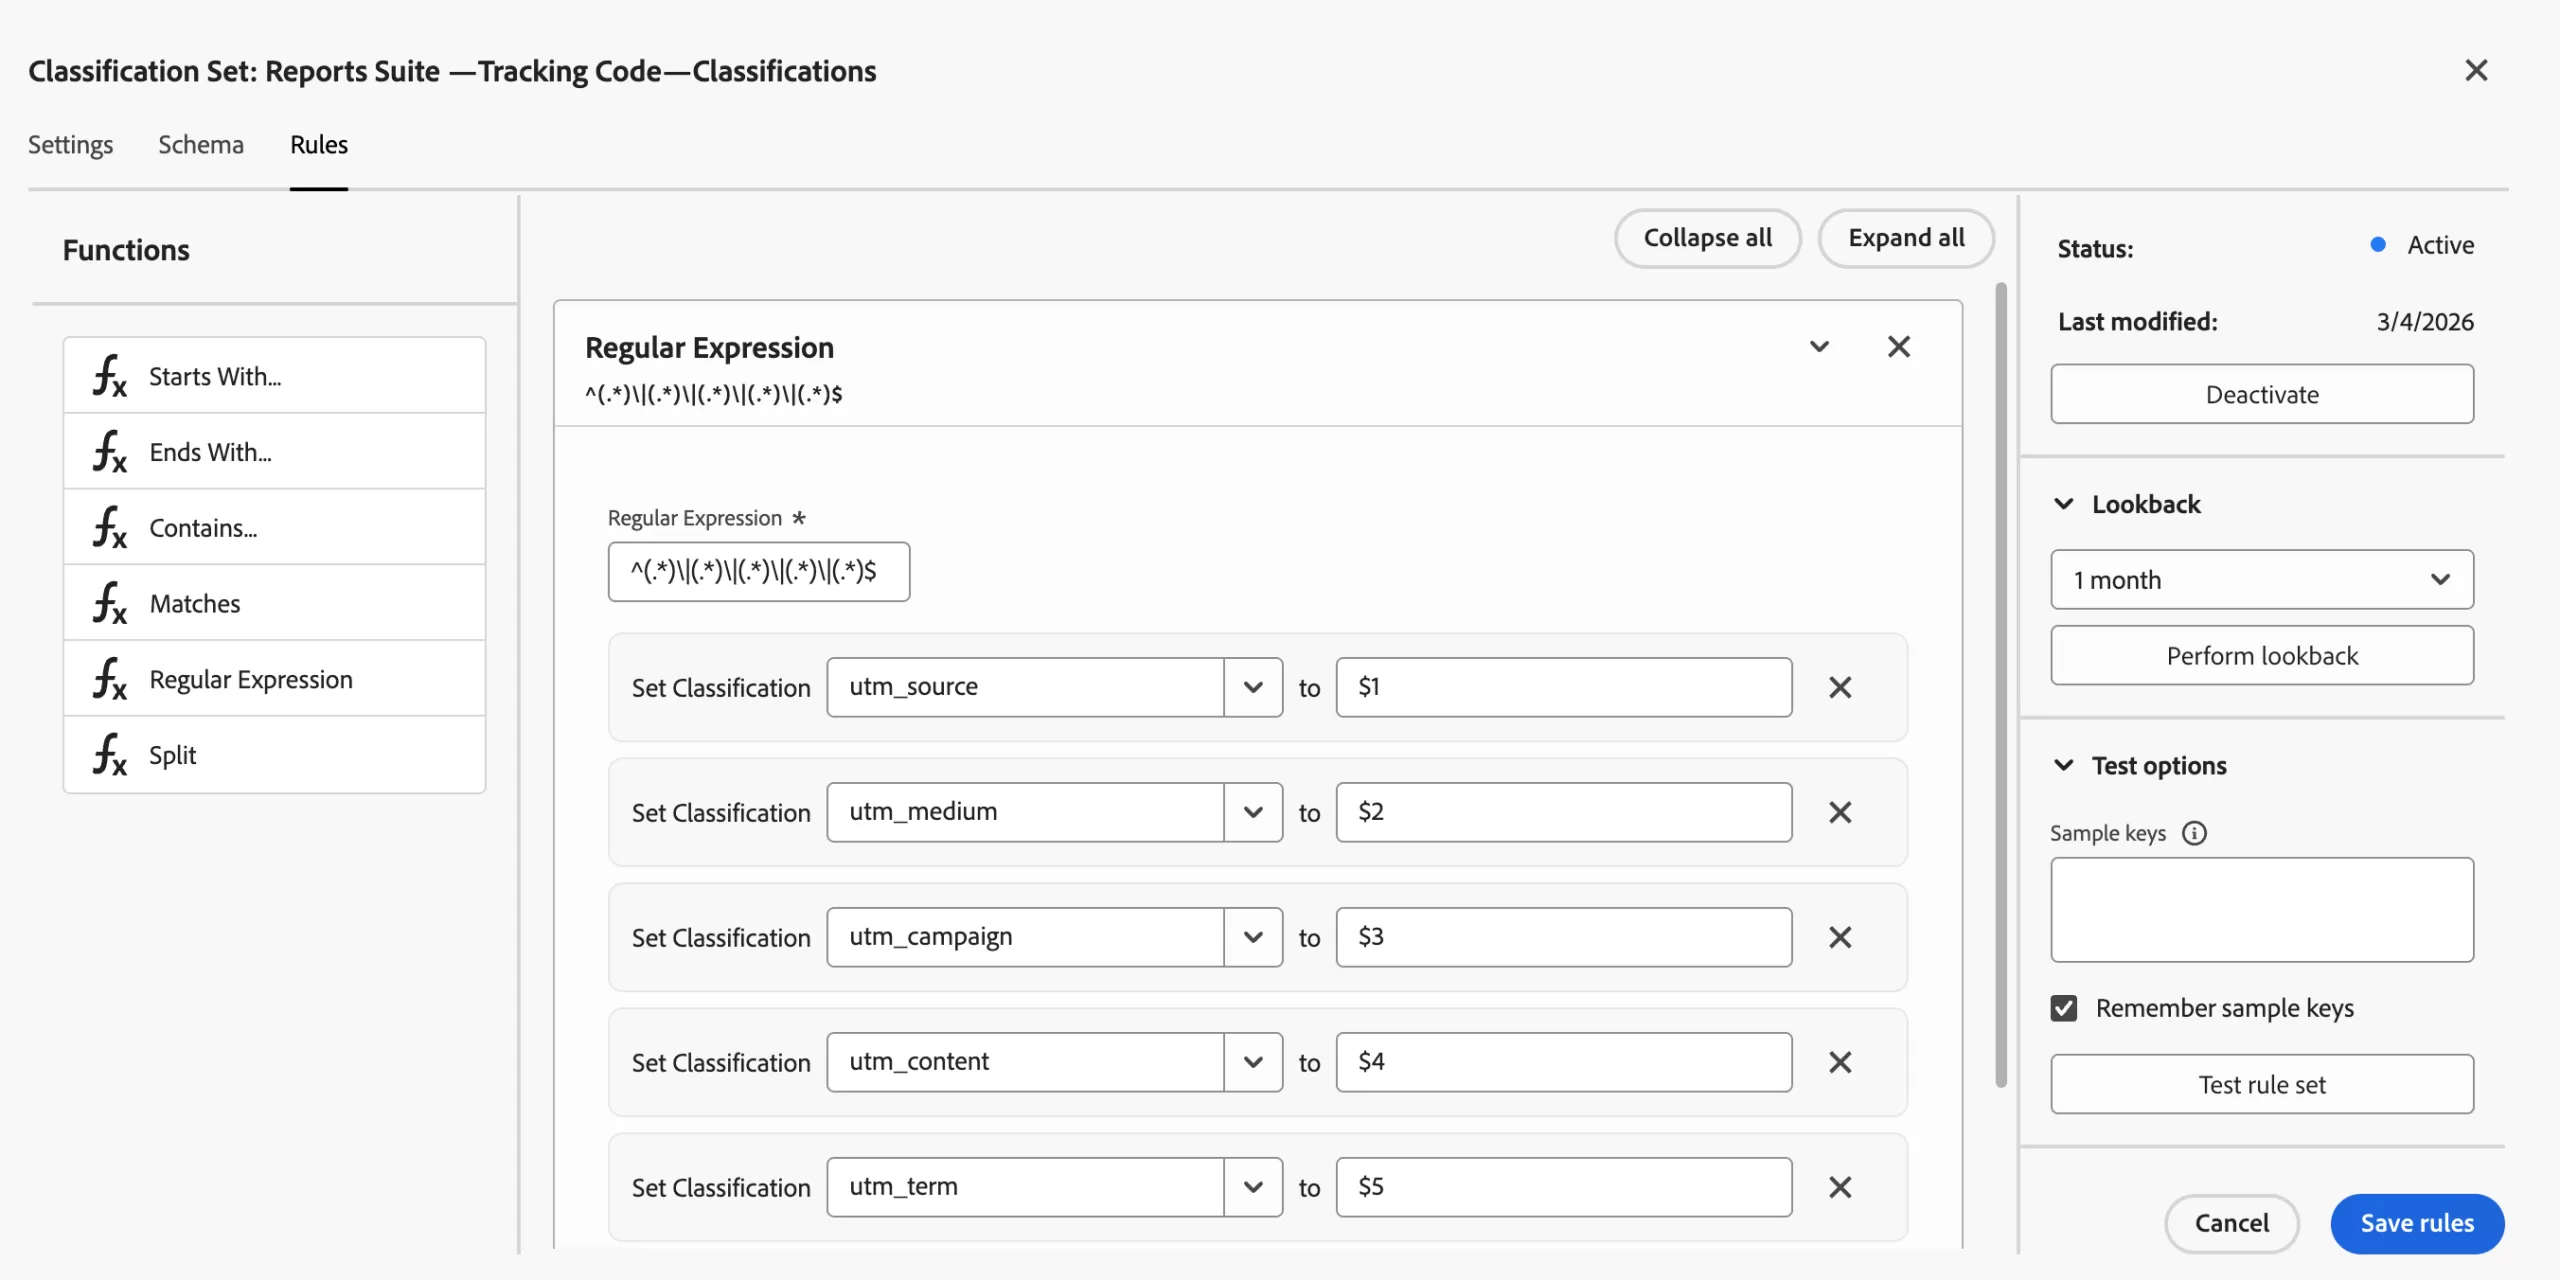
These rules use regex to split the pipe-delimited string and assign values to each classification.
Click Save Rules after setup.
Step 5: Test the Rules
Use a sample key such as:google|cpc|summer_sale|holidy|shoe,Click Test Rule Set.
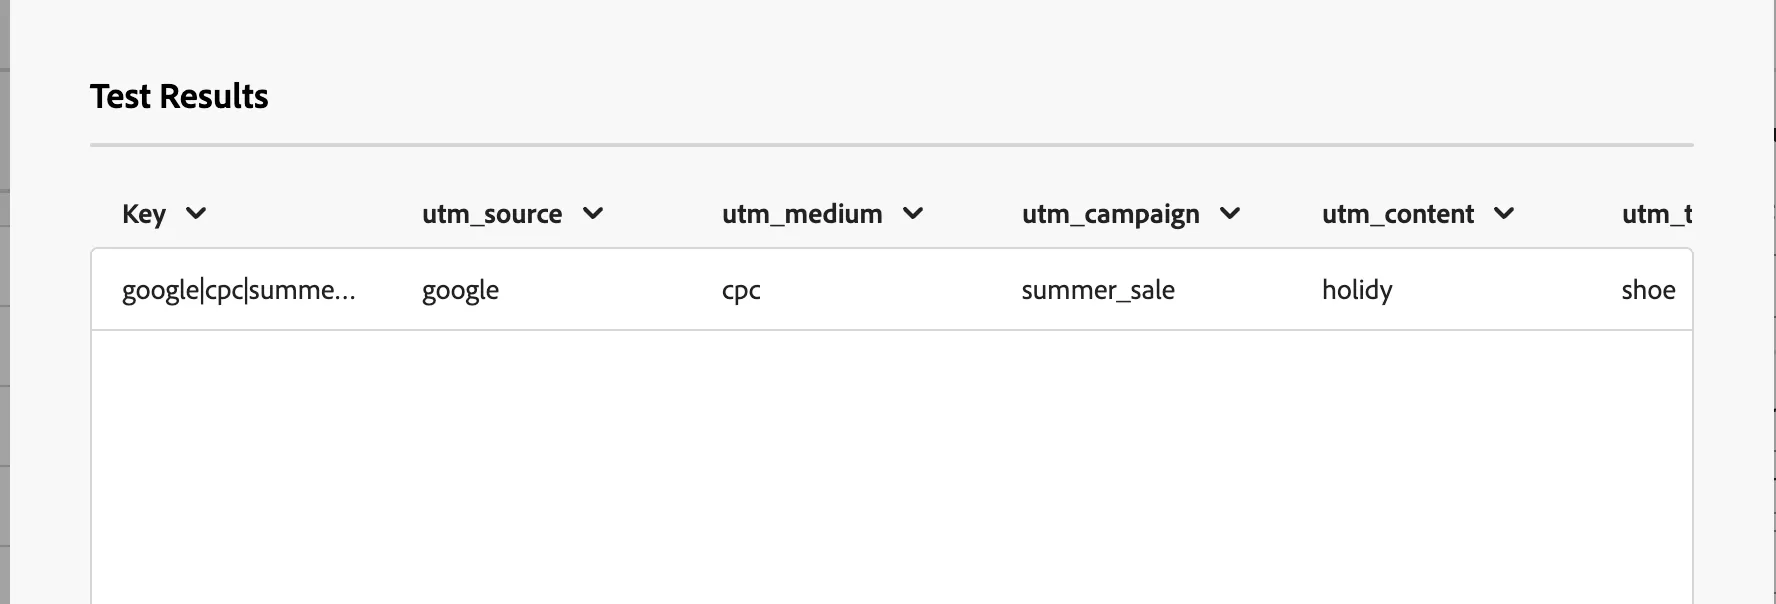
If configured correctly, each value will mapping correct.
Step 5: Data Validation
Once the rules are activated, Data should become available in Adobe Analytics within 24 hours.