You have installed Adobe Target, but no experiment appears on the website. Or perhaps the experiment works, but visitors briefly see the original page before the modified content appears.
These problems usually happen when the Adobe Target extension, prehiding snippet or page-load request is not configured correctly.
In this guide, I will show you how to implement Adobe Target at.js 2.x through Adobe Experience Platform Tags—formerly Adobe Launch—and create a basic A/B test.
Before You Start
Make sure you have access to Adobe Experience Platform Data Collection and Adobe Target. You also need permission to build and publish a Tags library.
If your Tags library loads asynchronously, you may need website source-code access because the prehiding snippet must be placed before the Tags embed code.
Step 1: Install the Adobe Target v2 Extension
In Adobe Experience Platform Data Collection, open your Tags property and go to 「Extensions」→「Catalog」. Search for Adobe Target v2, select the extension and click 「Install」.
After the extension is installed, you will see the following configuration interface: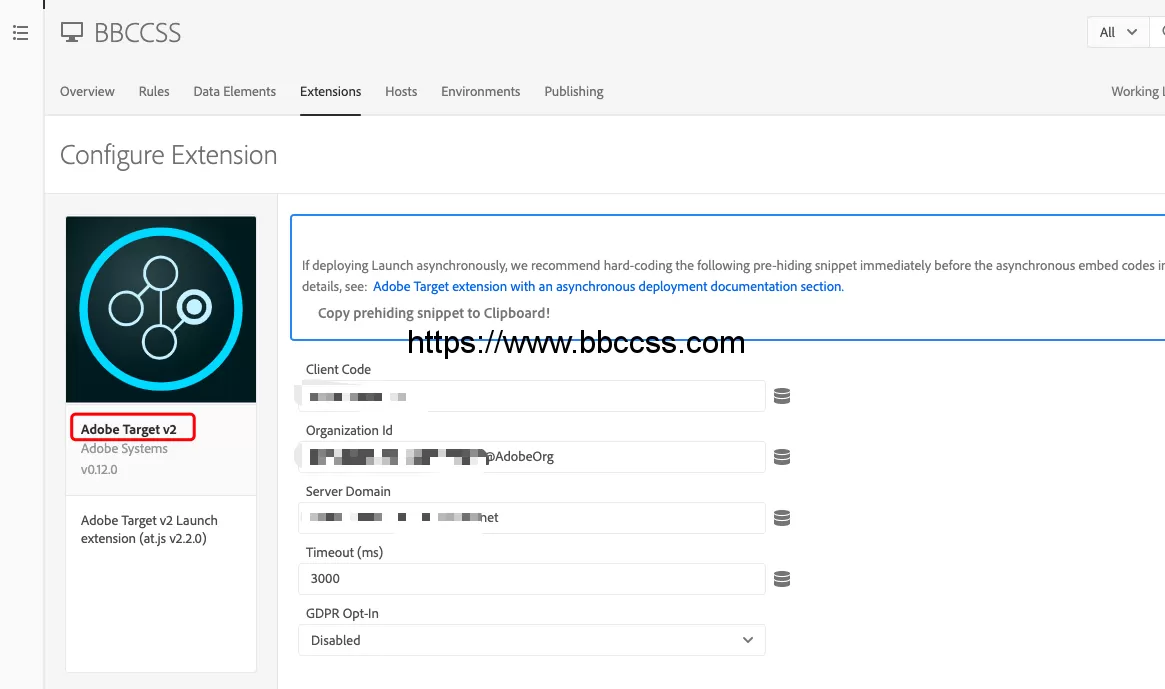
The extension automatically populates several values:
- Client Code: The unique Target client code assigned to your organization
- Organization ID: Your Adobe Experience Cloud organization ID
- Server Domain: The domain used to send requests to Adobe Target
In most cases, you do not need to change these values.
Do not save the extension yet. There is one more setting that requires your attention: the prehiding snippet.
Step 2: Add the Prehiding Snippet
When Adobe Target is deployed through an asynchronous Tags library, the original page may appear before Target applies the experimental content. This is known as flicker.
The prehiding snippet temporarily hides the page while Adobe Target retrieves and applies the experience.
In the Adobe Target v2 extension configuration, click 「Copy Prehiding Snippet to Clipboard」. Then place the copied snippet immediately before the asynchronous Tags embed code in the website source.
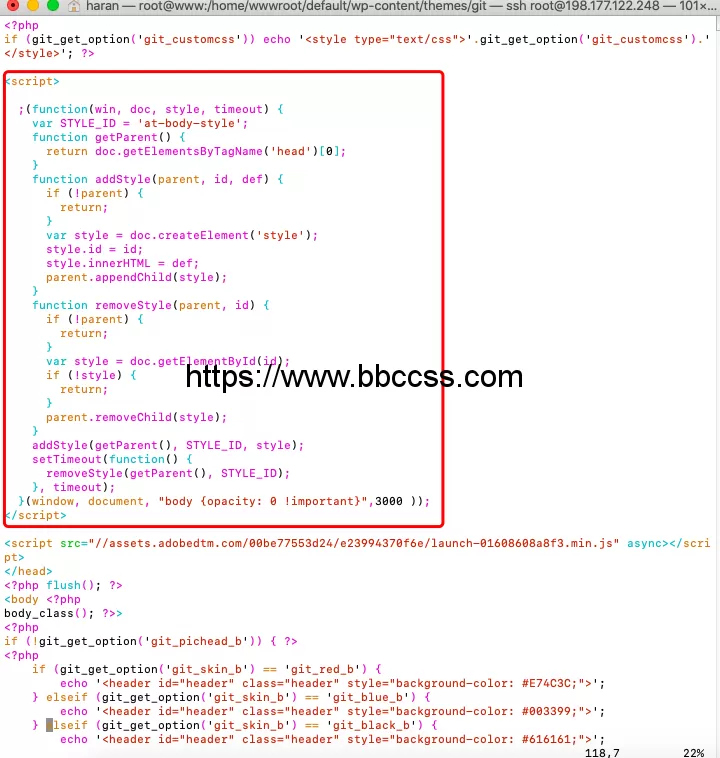
Use the complete snippet exactly as Adobe provides it. Do not automatically add another <script> wrapper because the copied code format can vary between extension versions.
After adding the snippet to the website, return to the extension configuration and save it.
Step 3: Create an Adobe Target Rule
Installing the extension only makes at.js available in the Tags property. You still need a rule that loads the library and sends a page-load request to Adobe Target.
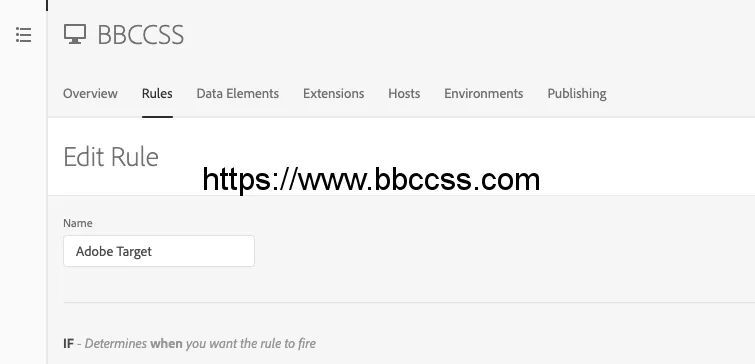
In your Tags property, go to 「Rules」 and create a new rule. I named mine Adobe Target, but you can use another name as long as it clearly describes the purpose of the rule.
Configure the Event
Let’s start with the event.
Under 「Events」, click the plus icon and enter the following configuration:
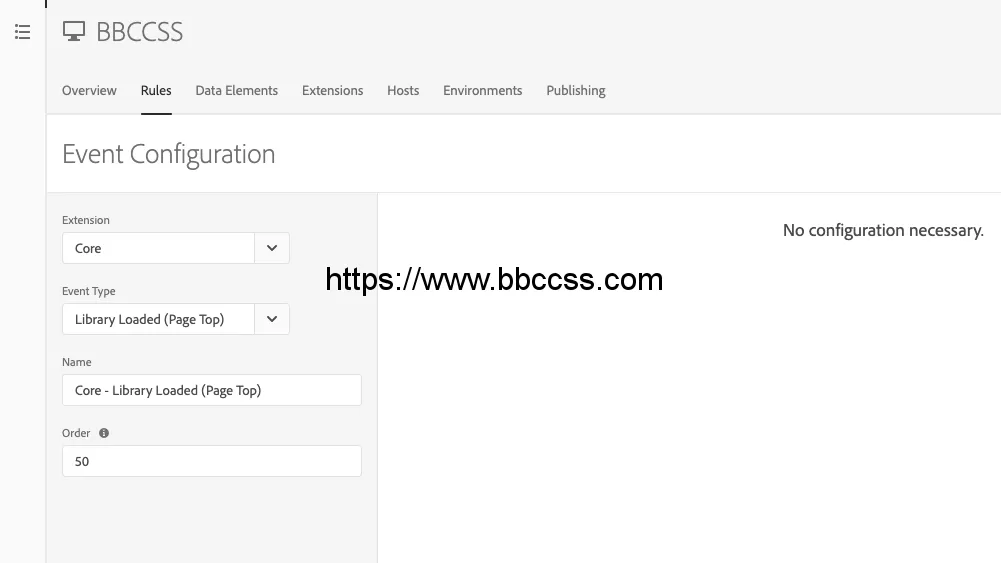
Once the event is configured, click 「Keep Changes」.
ACTIONS
Load Adobe Target
Now, let’s add the first action.
Under 「Actions」, click the plus icon, select Adobe Target v2 as the extension and choose 「Load Target」 as the action type.
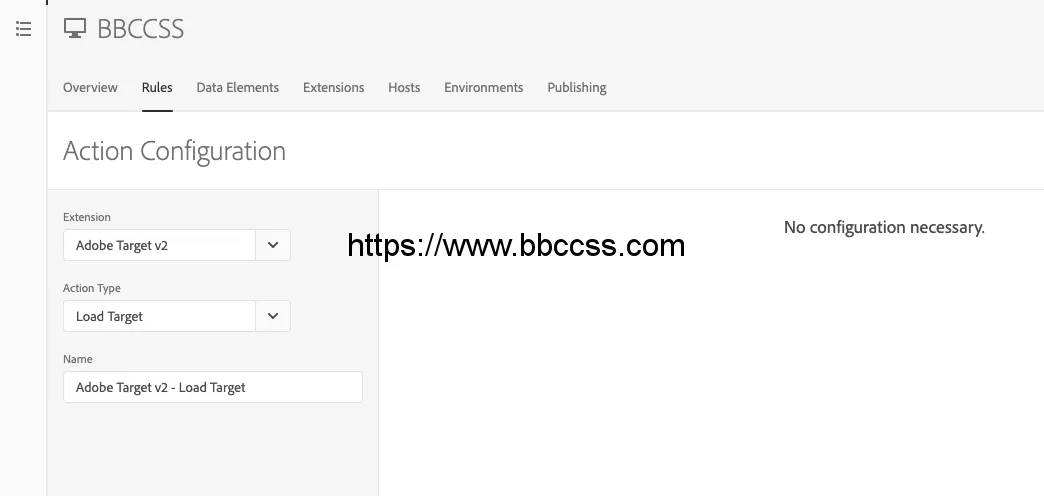
This action loads and initializes at.js. However, it does not send a Target request yet.
Click 「Keep Changes」 when you are done.
Add Parameters to the Page-Load Request
The second action is optional.
If you want to send additional information to Adobe Target, add another action and select 「Add Params to Page Load Request」.
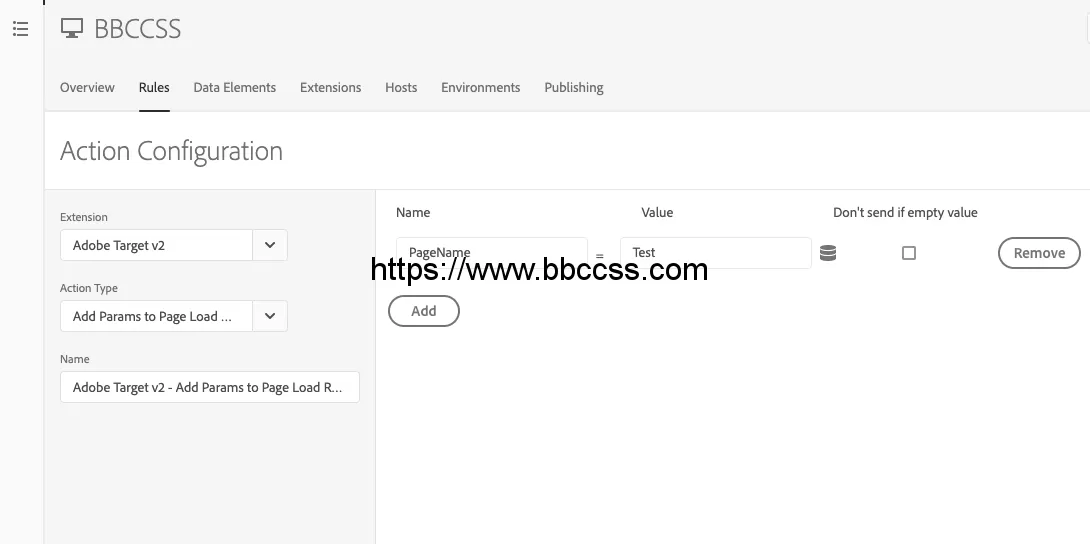
These parameters can later be used to create audiences or activity conditions in Adobe Target.
After adding the required parameters, click 「Keep Changes」.
Fire the Page-Load Request
Finally, add another action and select 「Fire Page Load Request」.
This action sends the page-load request to Adobe Target. Without it, at.js can load successfully while no activity is requested.
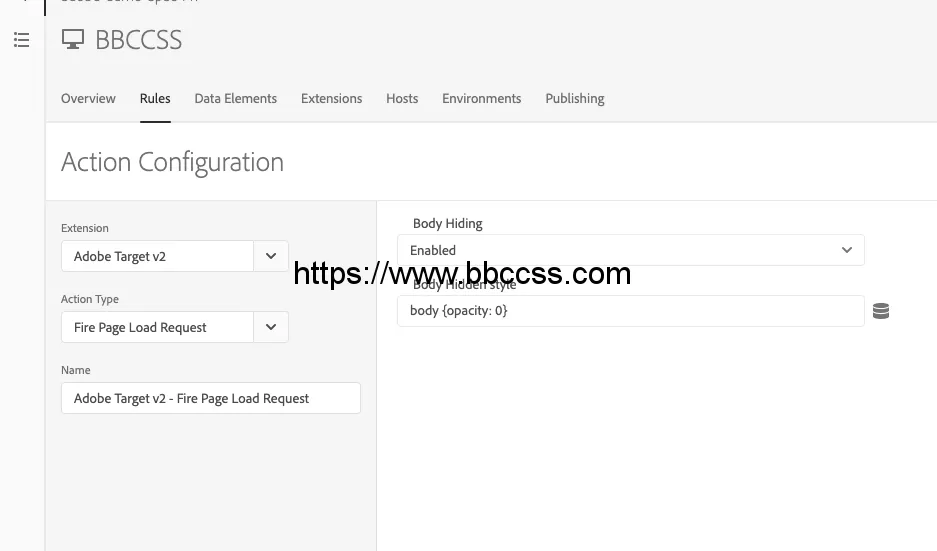
Your final action order should look like this:
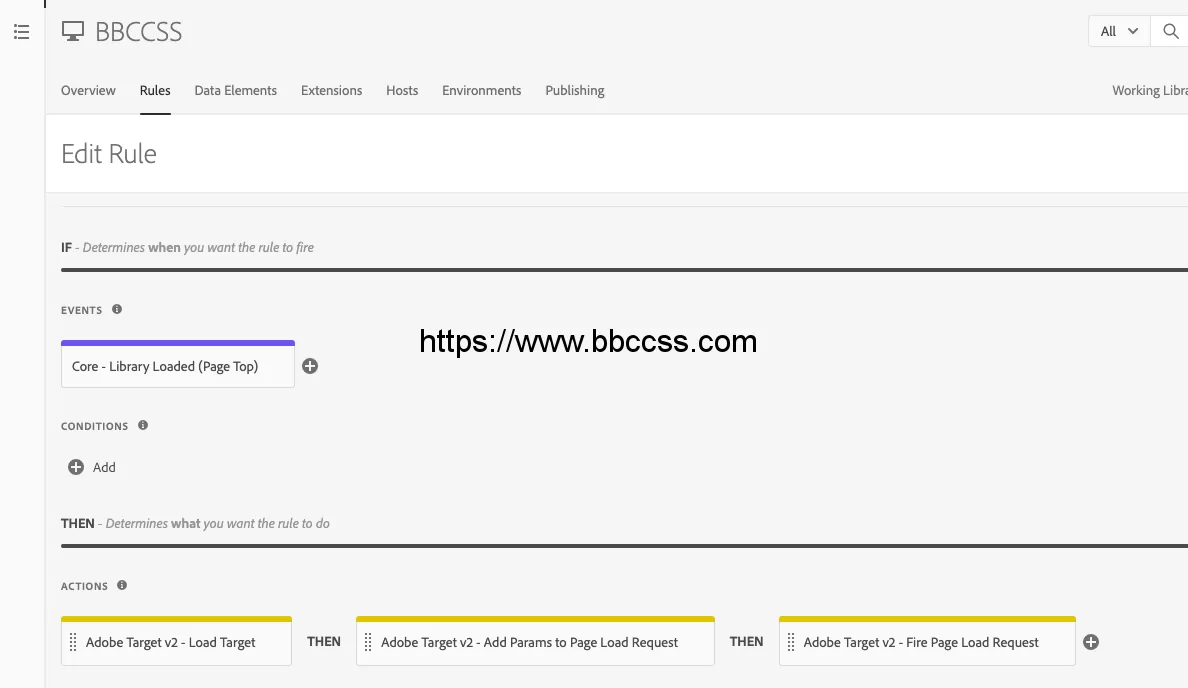
The parameter action is optional, but 「Load Target」 must run before 「Fire Page Load Request」.
Save the rule after completing the configuration.
Step 4: Publish and Test the Adobe Target Implementation
The extension and rule will not run on the website until you add the changes to a library and build it.
Go to 「Publishing Flow」, create or open a development library, and add the Adobe Target extension and rule changes. Select your development environment and build the library.
Now open the test website and launch Adobe Experience Platform Debugger.
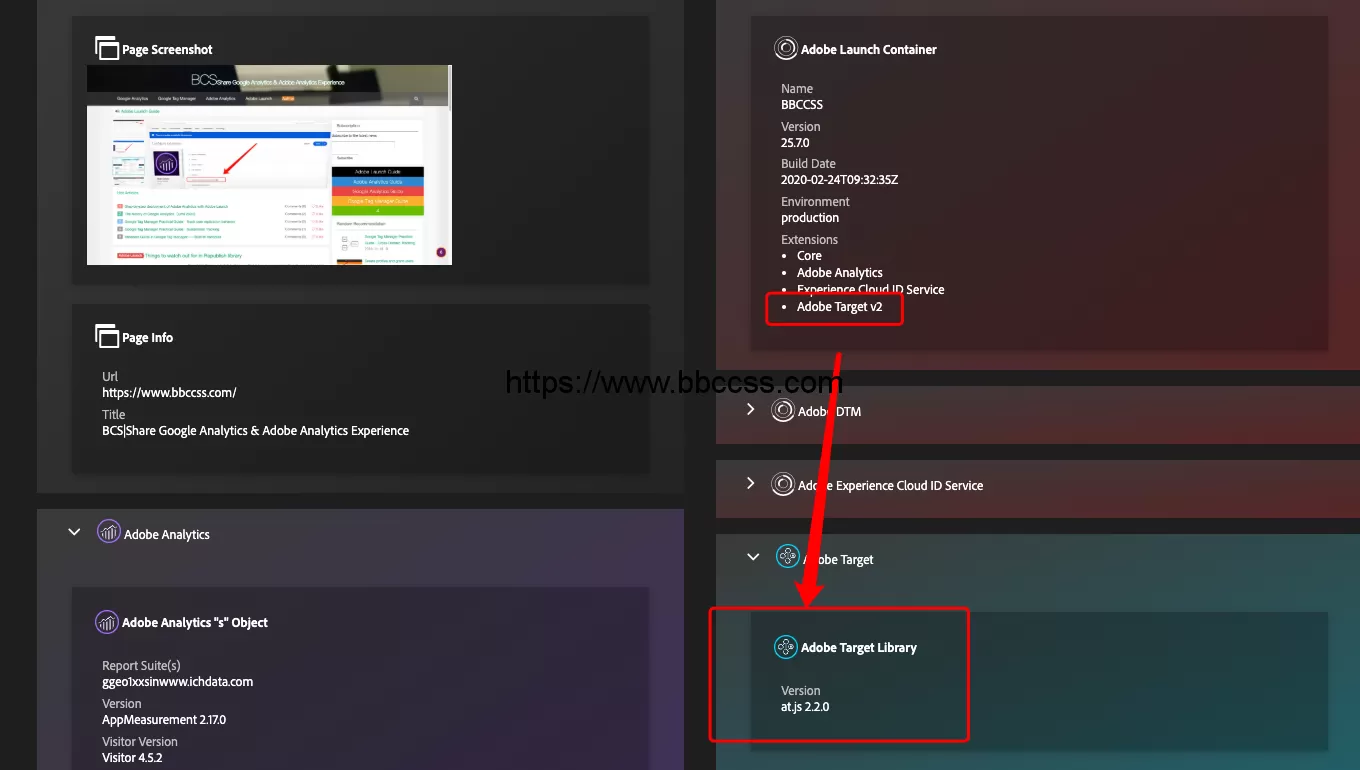
In the Debugger, confirm that:
- The correct Tags property is loaded
- Adobe Target v2 appears under the installed extensions
- The at.js version is detected
- A Target page-load request is sent
Seeing Adobe Target v2 in the Debugger does not prove that the entire implementation is working. You must also confirm that the website sends a Target request.
Step 5: Configure an Adobe Target Property
I use Adobe Target Premium. After logging in to Adobe Target, click Setup directly,Mainly set the Preferences 、Properties and Hosts.
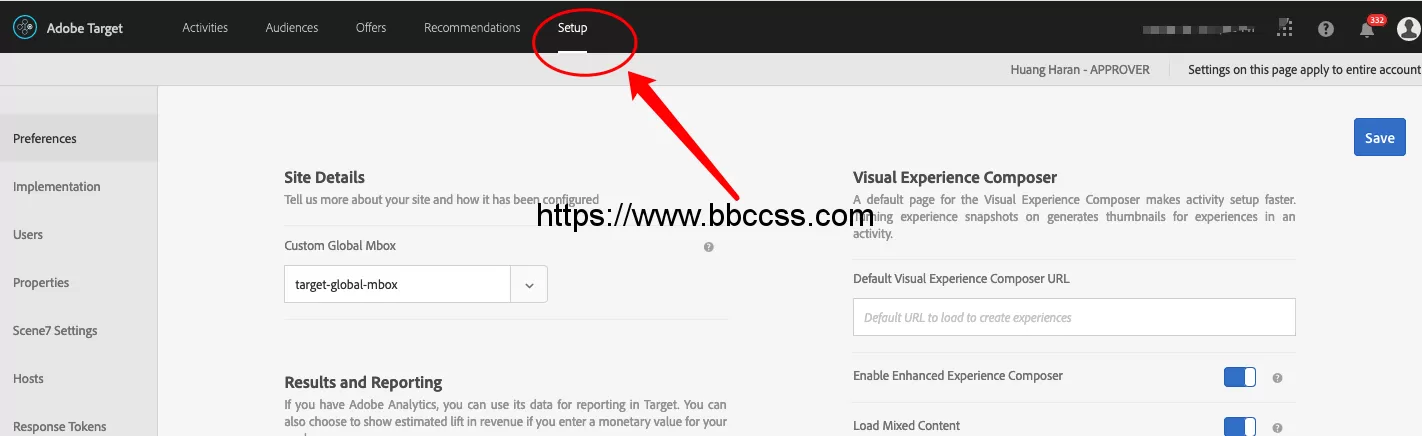
It should be noted here that Adobe Target Premium only has Preferences and Properties. If it is Adobe Target Classic, you do not need to set these.
Preferences
Set your account preferences to configure Target Standard or Target Premium to work correctly with your account. The following illustration shows the available settings on the Account Preferences page.
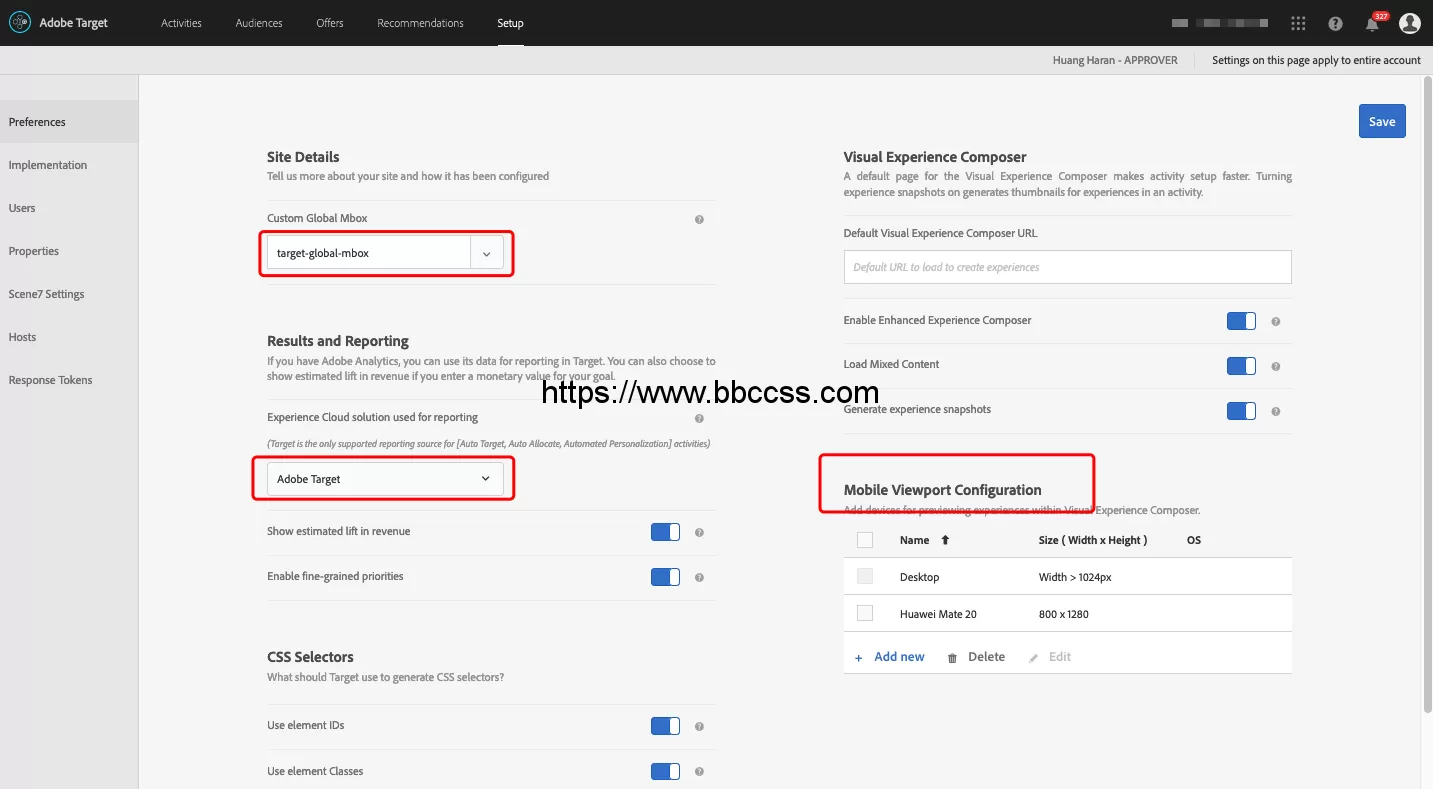
These four places are mainly set up:
- Custom Global Mbox is set to target-global-mbox, When there are no activities, it is empty by default, but when there is activity, it needs to be set to target-global-mbox. Remember that when the first ACTIONS was set earlier, this is to initialize target-global-mbox.
- Results and Reporting:Set options that determine what data is used for your results and reports.
- Mobile Viewport Configuration is to configure a mobile environment.(This is only available in Premium.)
Configure your preferences as desired, then click Save .
Properties
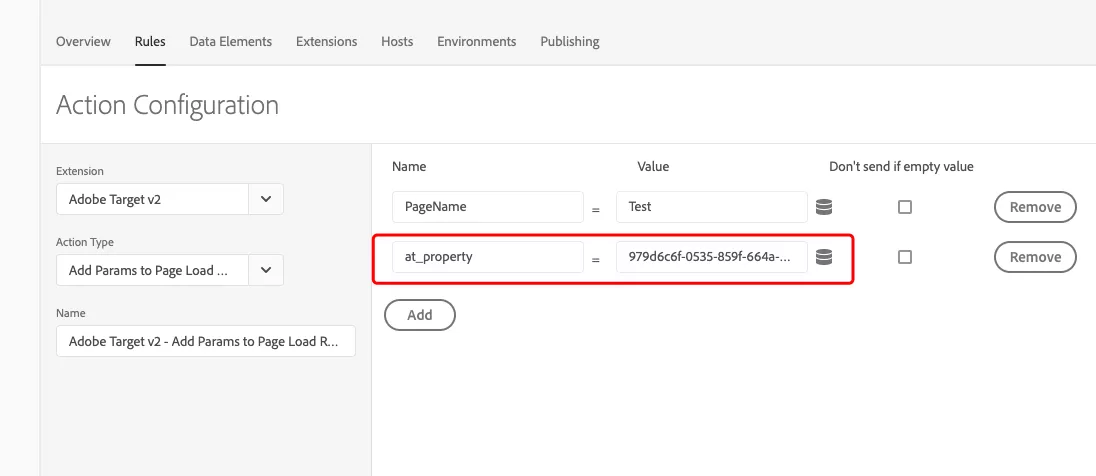
Property functions like a report suite, indicating where data is sent and which activity it belongs to.
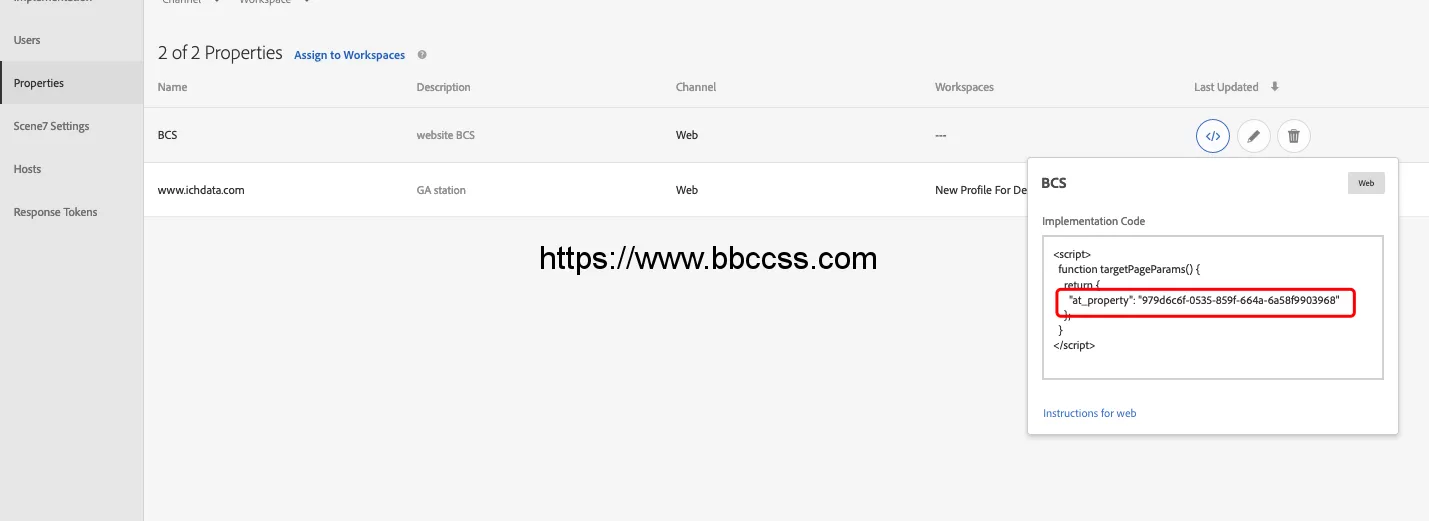
Create an at_property, there are two deployment methods, one is hard-coded, directly the same as the previous anti-flicker, and one is to Add Params to Page Load Request in Rules:
Hosts
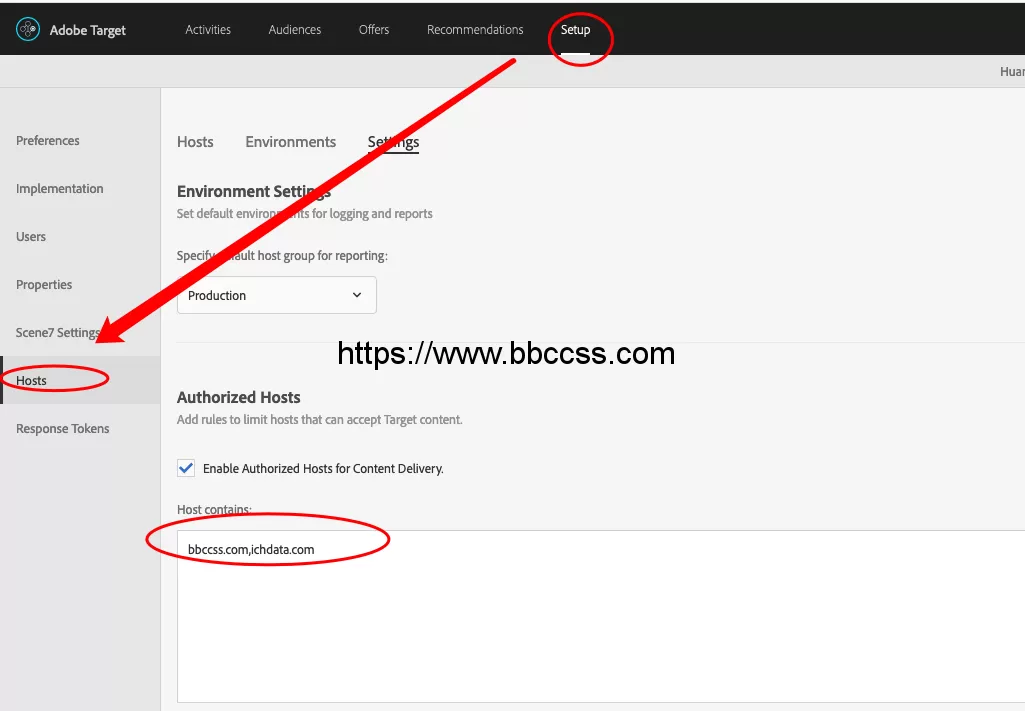
Data needs to be set to send to the Adobe target normally. If it is not set, there will be an error of Unauthorized mbox host. Unable to load experimental resources.
Step 6: Create an A/B Test
Now that Adobe Target is working on the website, you can create your first experiment.
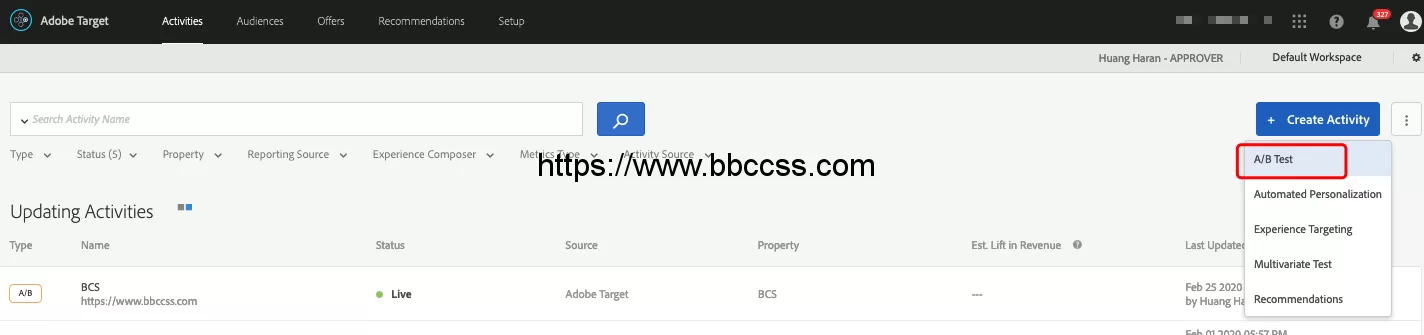
In Adobe Target, go to 「Activities」, click 「Create Activity」 and select 「A/B Test」. Choose the visual editing option and enter the URL of the page you want to test.
Adobe Target divides the activity configuration into three parts:
Configure the Experiences
This step mainly sets up different versions of the experiment.
The first is to modify the name of the activity in the upper left corner. Move the mouse to the vicinity to see the rename, and then modify:
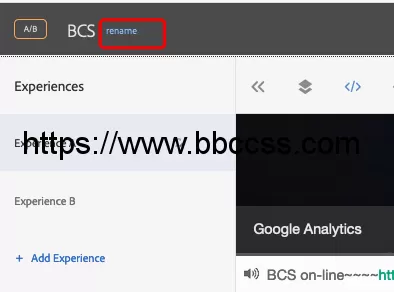
The second part is to add Properties, located here:
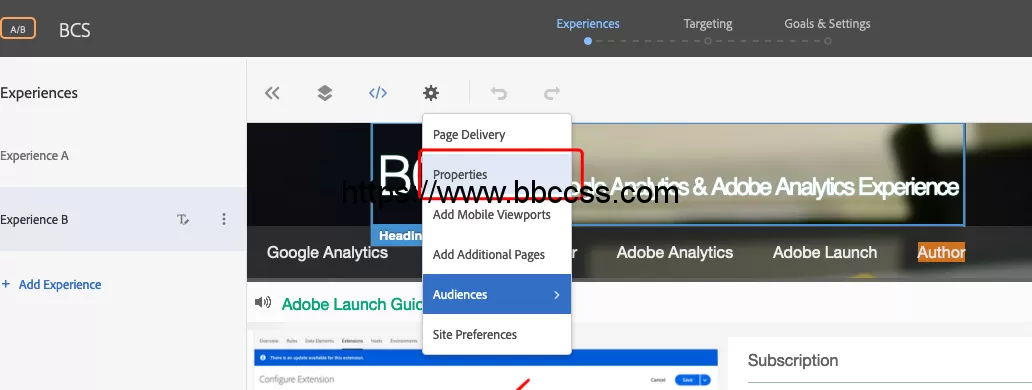
Select the corresponding Properties:
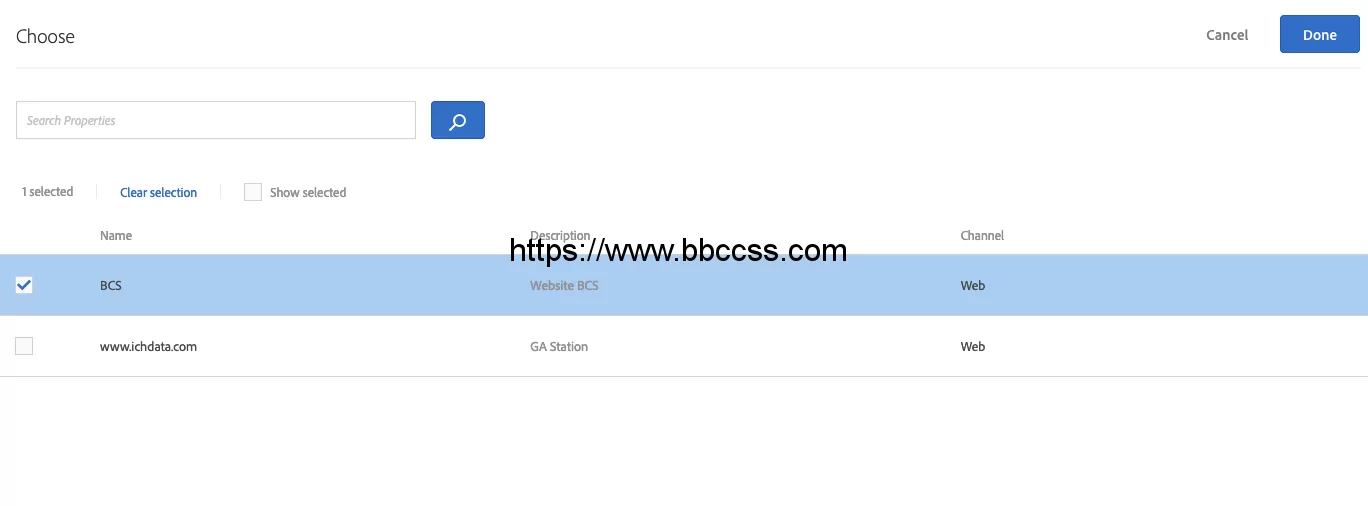
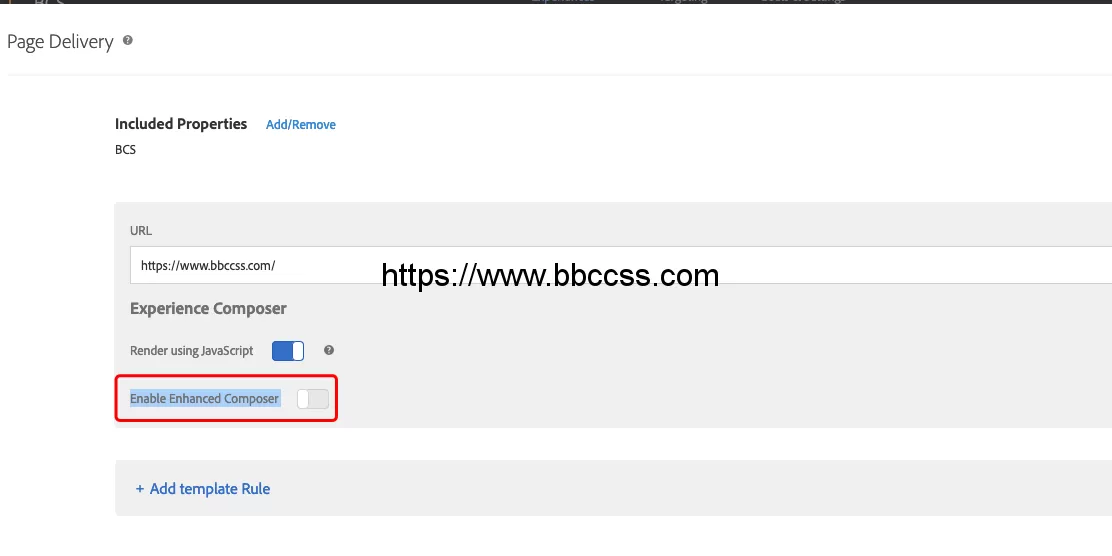
Finally, select the editing mode, in Page Delivery:
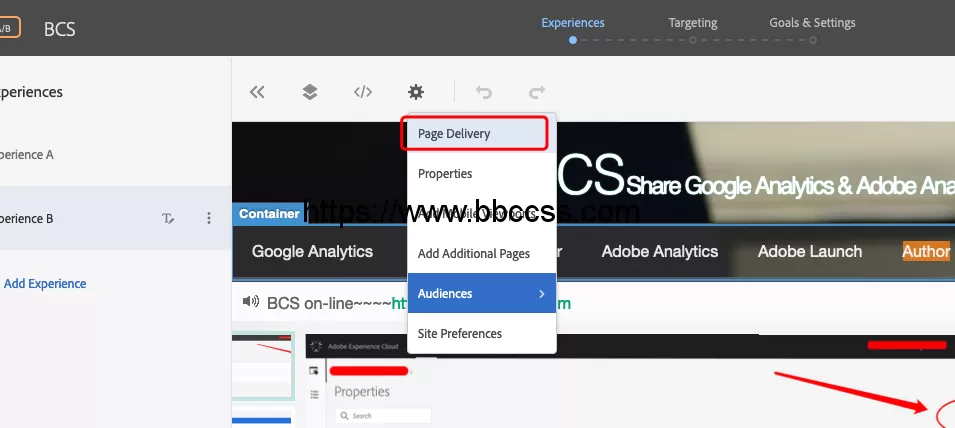
There are two editing modes, one is Visual Experience Composer (VEC), one is Enhanced Composer, and the default is to use Enhanced Composer. Generally, VEC is recommended. This is interactive visual editing. It is more convenient, so we need to use Enhanced Composer shut down:
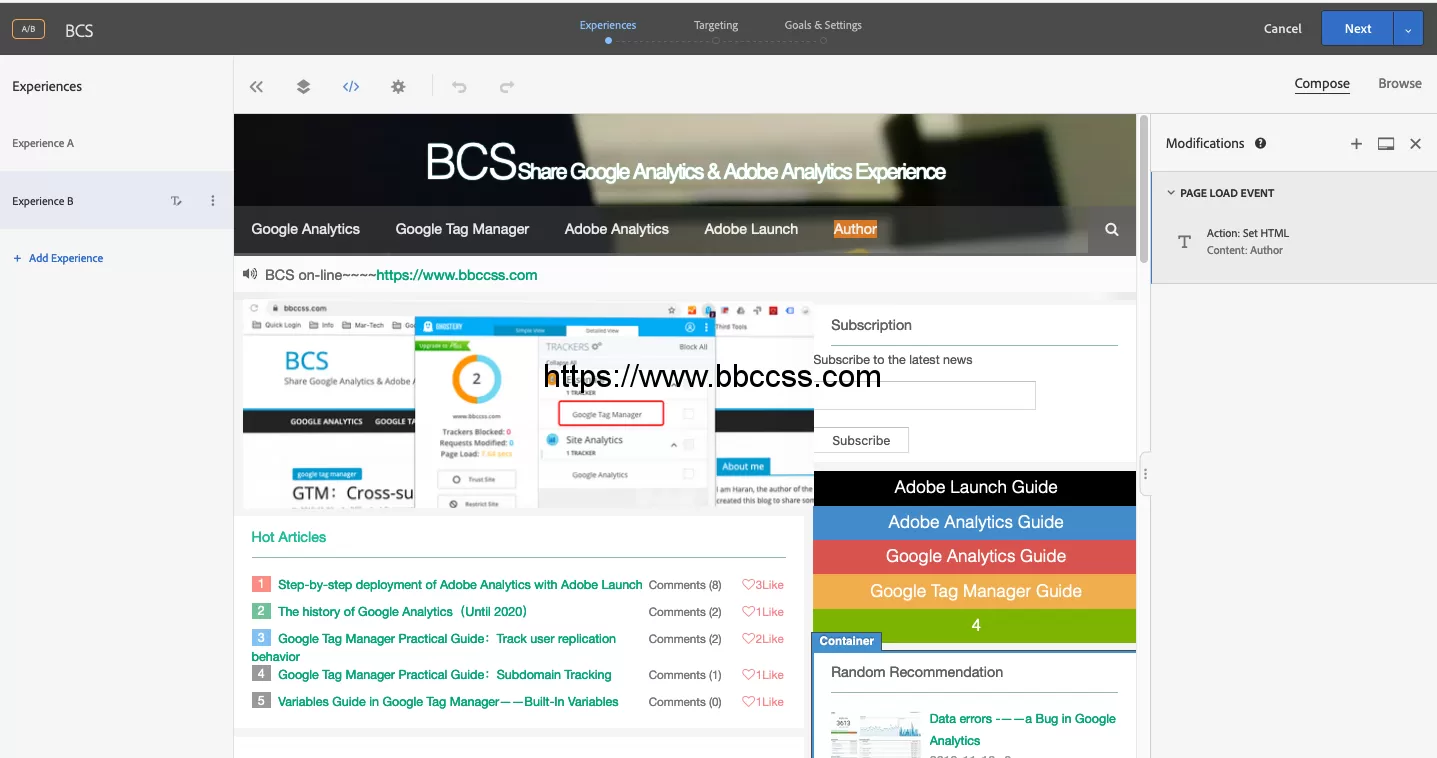
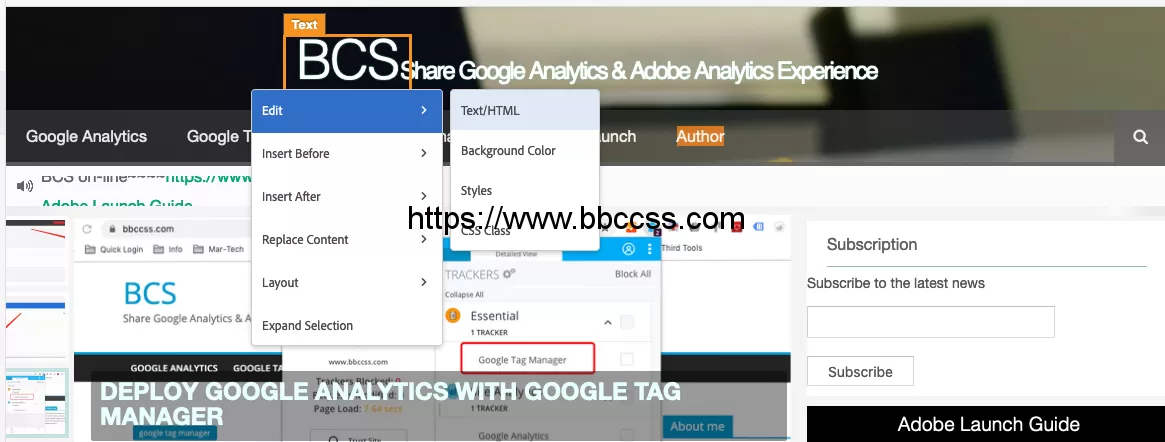
Click anywhere to edit it:
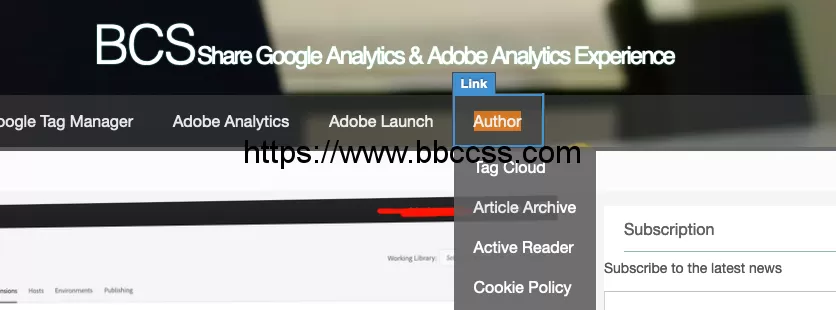
Finally, I changed Contact me to author and added a background color:
This step of Experience is complete, click Next:
Configure Targeting
This part is mainly the algorithm for setting the audience and distribution of the experiment:
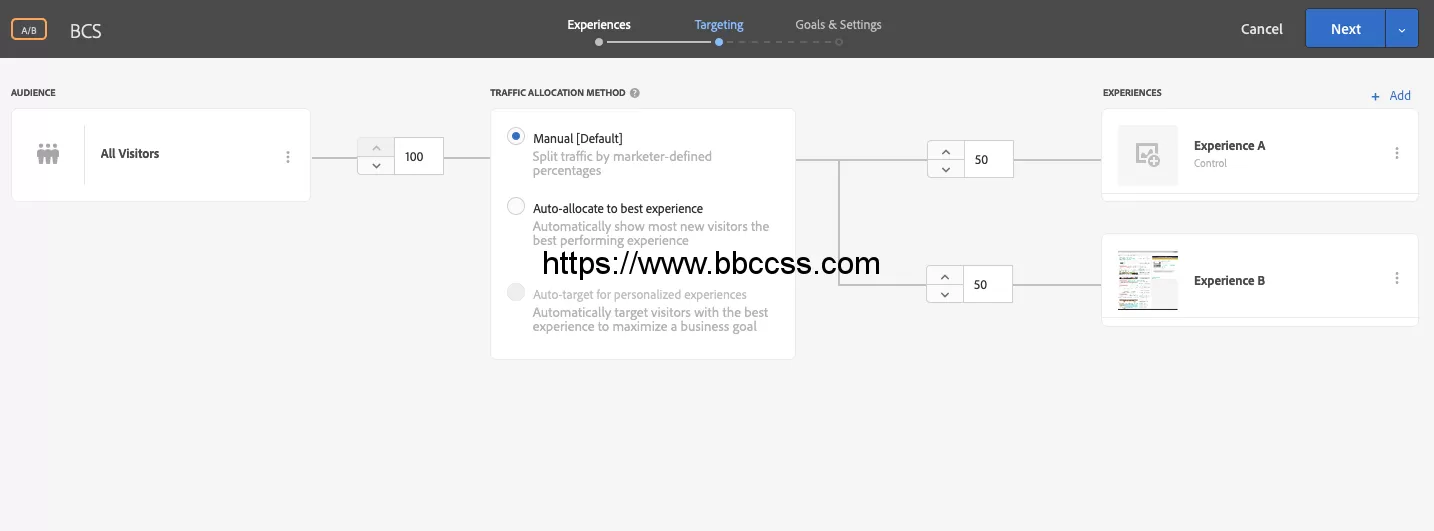
- Audience is who participated in this experiment.
- The algorithm is TRAFFIC ALLOCATION METHOD
Configure Goals and Settings
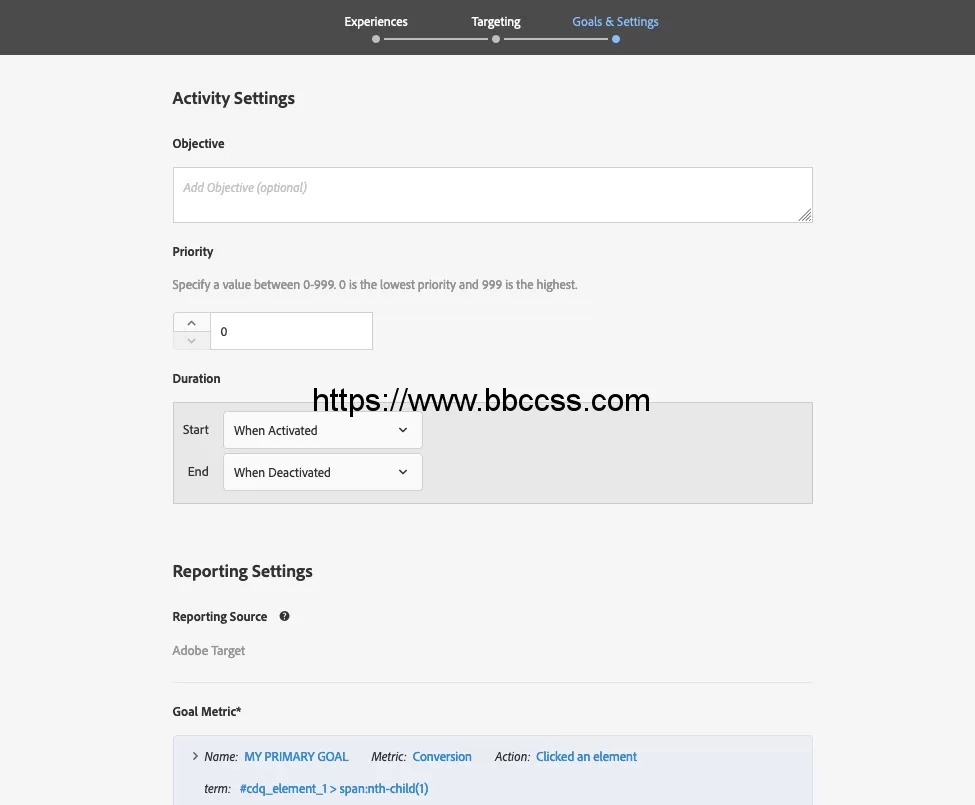
This step is mainly the setting of the experimental goal, as well as the setting of other experimental time, description and other information.
Step 7: Test the Activity with Activity QA
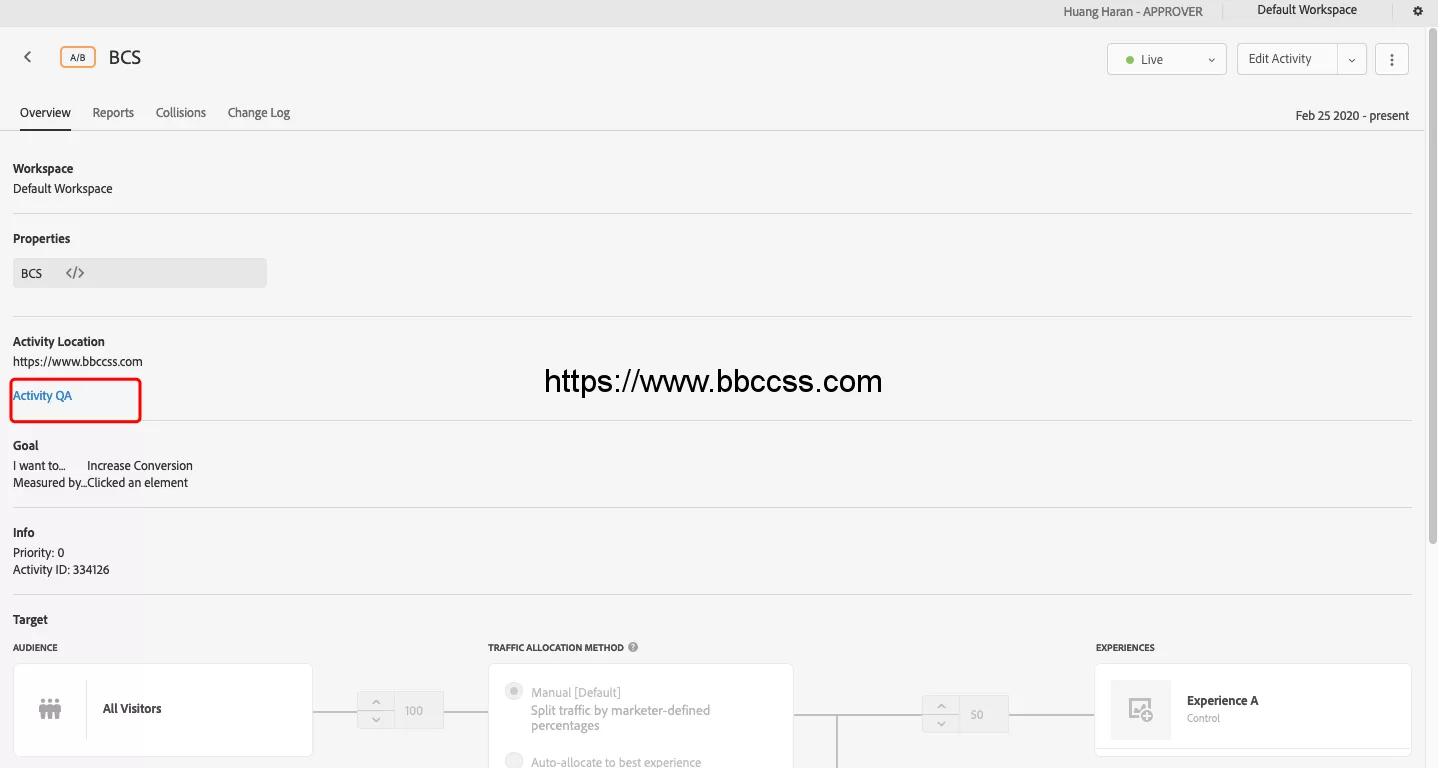
Save after setting.After saving, you will come to this page. This page displays relevant information about this experiment. We need to click Activity QA:
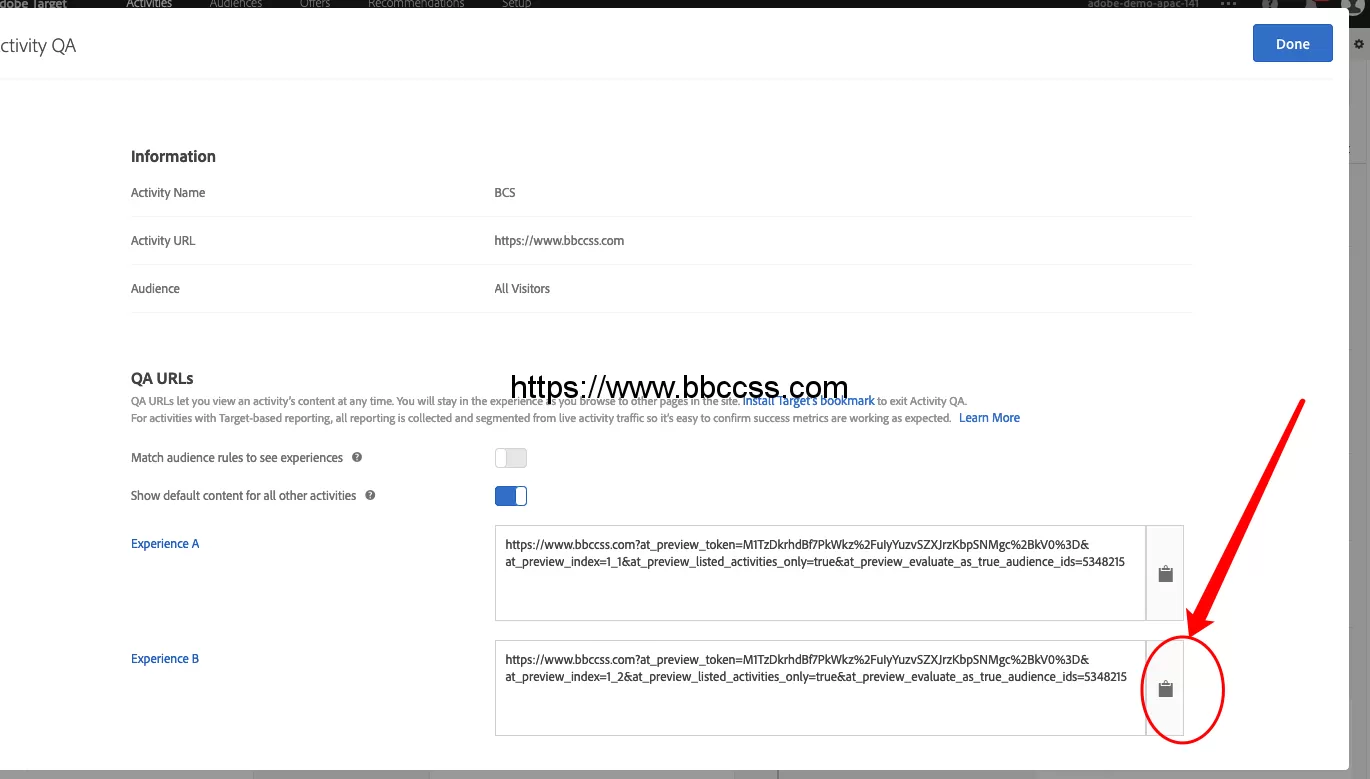
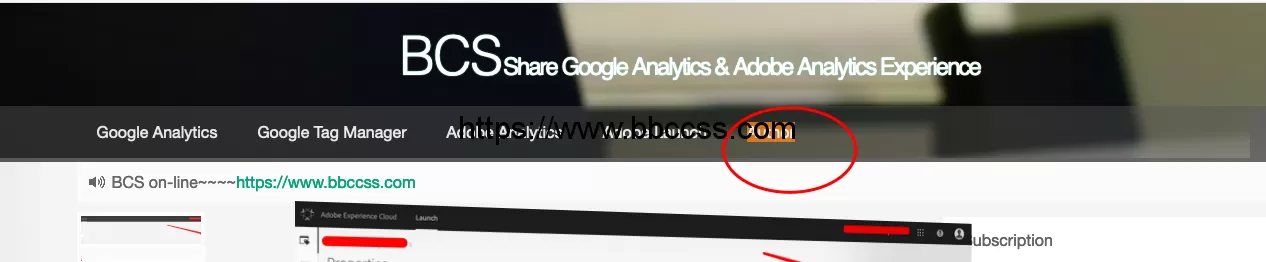
Copy the URL and open it in a browser to preview the effect of our experimental version.
Step 8: Activate and Verify the Activity
Once testing is complete, return to the activity and activate it.
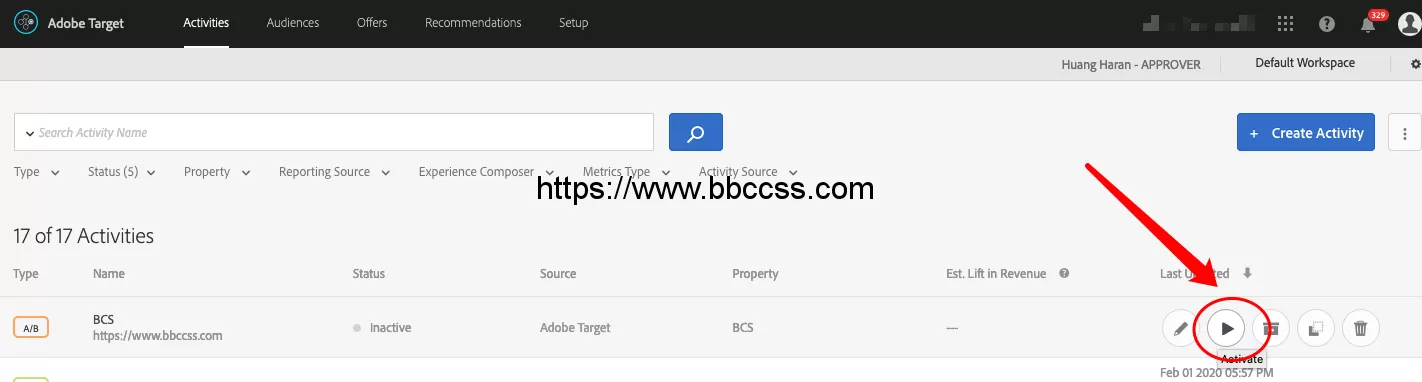
Our experiment is published, now we need to check if the data of the page is passed normally.
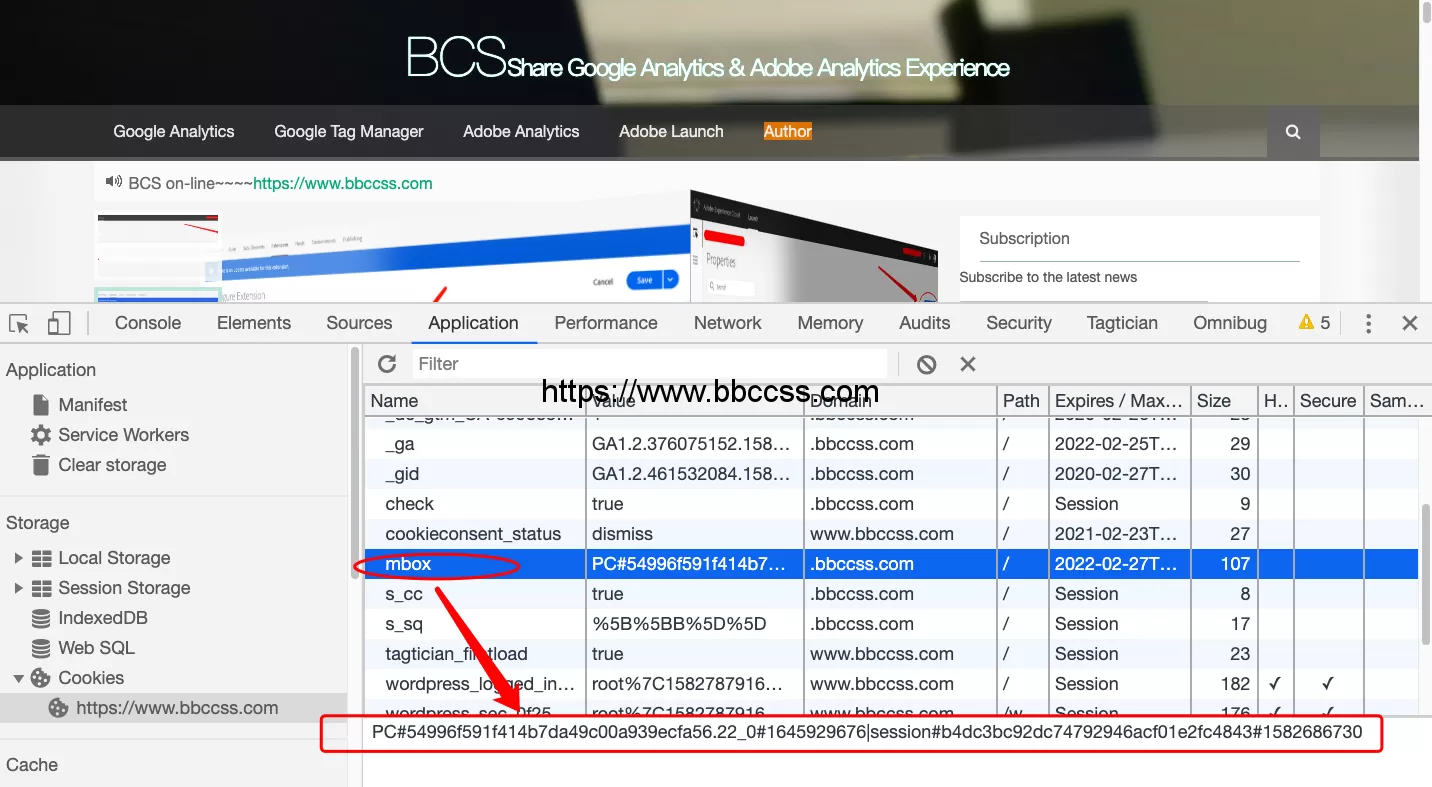
Open the page and find the mbox cookie in the browser tool. If the value of this cookie is long, like the following, it means that there is an experiment running, no experiment is running, only the sessionid, and the data is short:
Under the network, there is a delivery request. This is a request to find the adobe target. You can see the relevant data for the experimental settings.
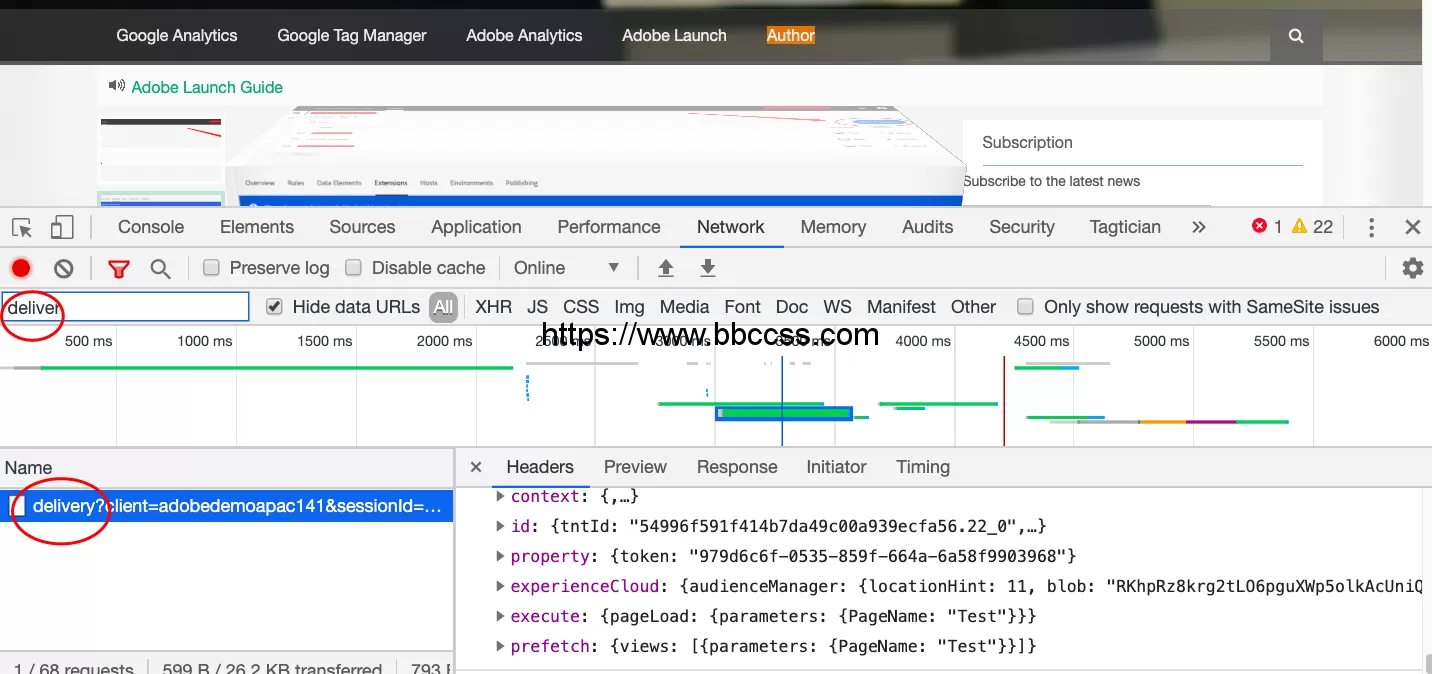
Adobe Target V2 corresponds to delivery; Adobe Target V1 corresponds to json.
At this point, our basic experiments are set up.
Step 9: Review the Report
Click the corresponding Activity directly, and then click Report next to Overview. If you set it to Analytics, then return to Adobe Analytics to see the report:
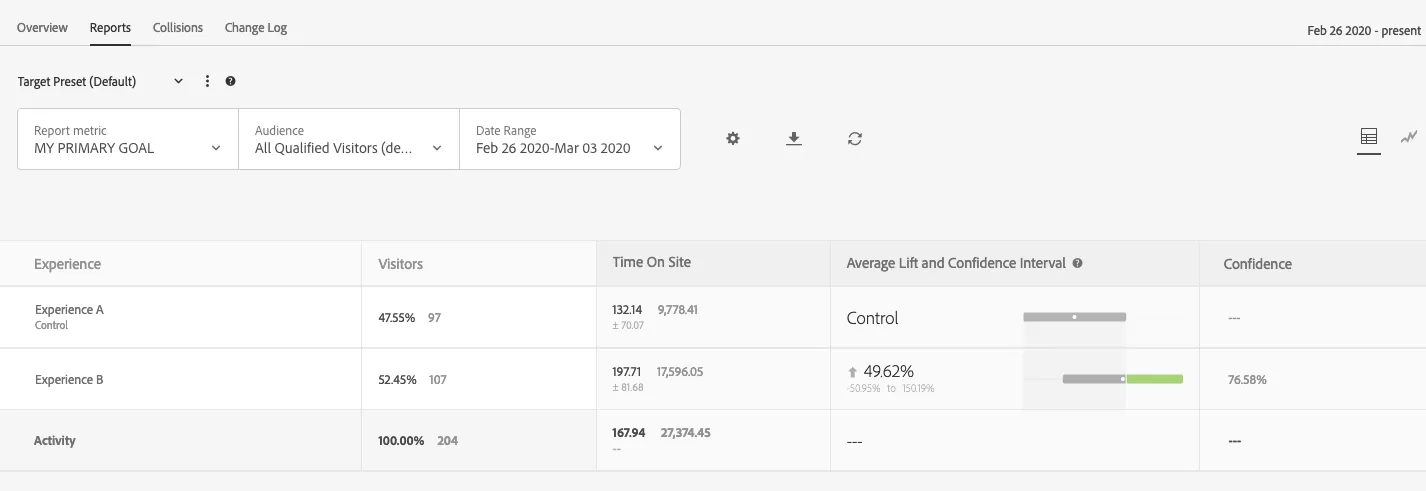
The experimental group has increased by 49.62%, and 76.58% is certain that this adjustment is improved.
The confidence of an experience or offer represents the probability that the lift of the associated experience/offer over the control experience/offer is “real” (not caused by random chance). Typically, 95% is the recommended level of confidence for the lift to be considered significant.
Obviously there is not enough certainty that the improvement is due to adjustment.
Final Words
A successful Adobe Target implementation requires more than installing the extension.
You must load at.js, fire the page-load request and verify that a delivery request reaches Adobe Target. If the activity uses a property, the correct at_property token must also be included.
Only after the implementation has been validated should you create, test and activate the experiment. When reviewing the report, do not make a decision based on lift alone—make sure the activity has collected enough data to support the result.


