Update time: June 9, 2025
If you’re running Google Ads and want to know which clicks actually lead to purchases, you’ve probably realized that out-of-the-box conversion tracking doesn’t always tell the full story. Setting it up properly through GTM is the way to go, but the process involves a few moving parts — Conversion ID, Conversion Linker, triggers, tags — and missing any one of them can break your attribution.
Let’s get into it!
Before You Start
This guide assumes you already have a purchase event (or whatever event you want to track as a conversion) deployed on your website. If you haven’t done that yet, read this guide first: Google Analytics 4: Google Tag Manager Ecommerce Setup Guide
Also, I’ll use a purchase event as the example throughout this article. The same steps apply to any other conversion event — just swap the event name and adjust the settings accordingly.
Step 1: Create a Conversion Action in Google Ads
This is where you tell Google Ads what counts as a conversion. Head over to your Google Ads account.
In Google Ads, click 「Goals」——「Summary」——「+Create conversion action」, and select Website as the source type:
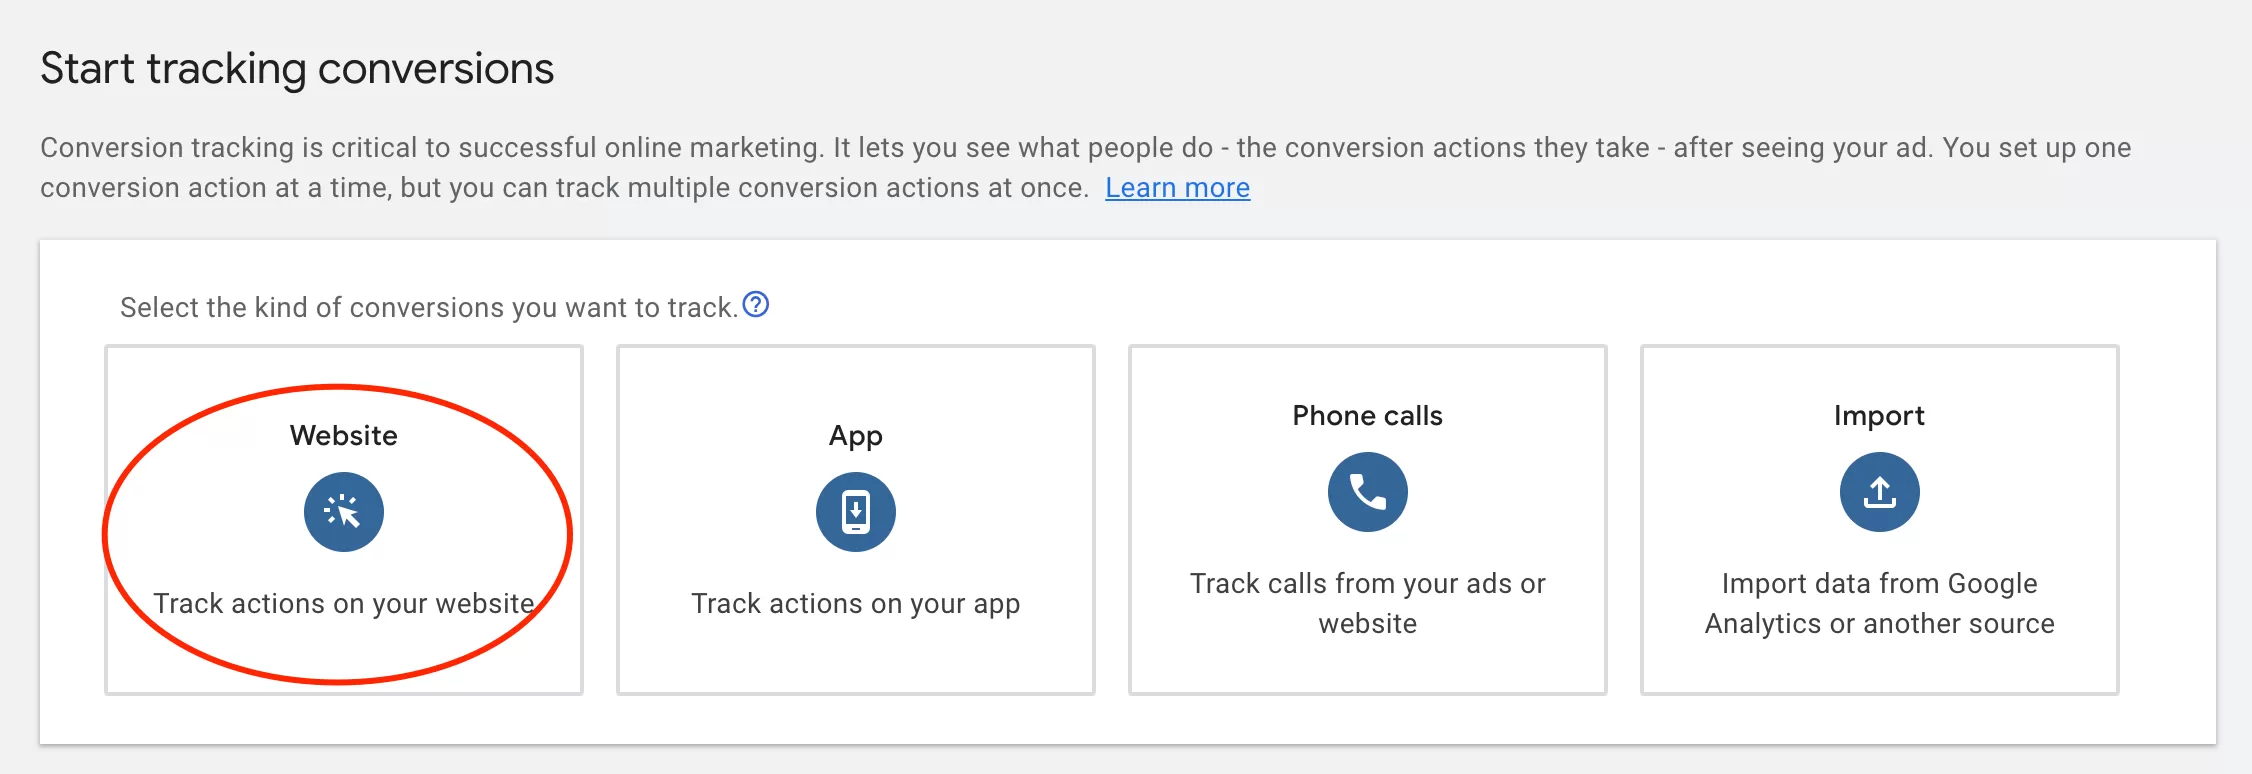
Add Conversion Actions
You’ll first be asked to enter the URL of your website. Don’t overthink this — it’s just Google trying to figure out what kind of site you’re working with. Enter your domain and click「Scan」.
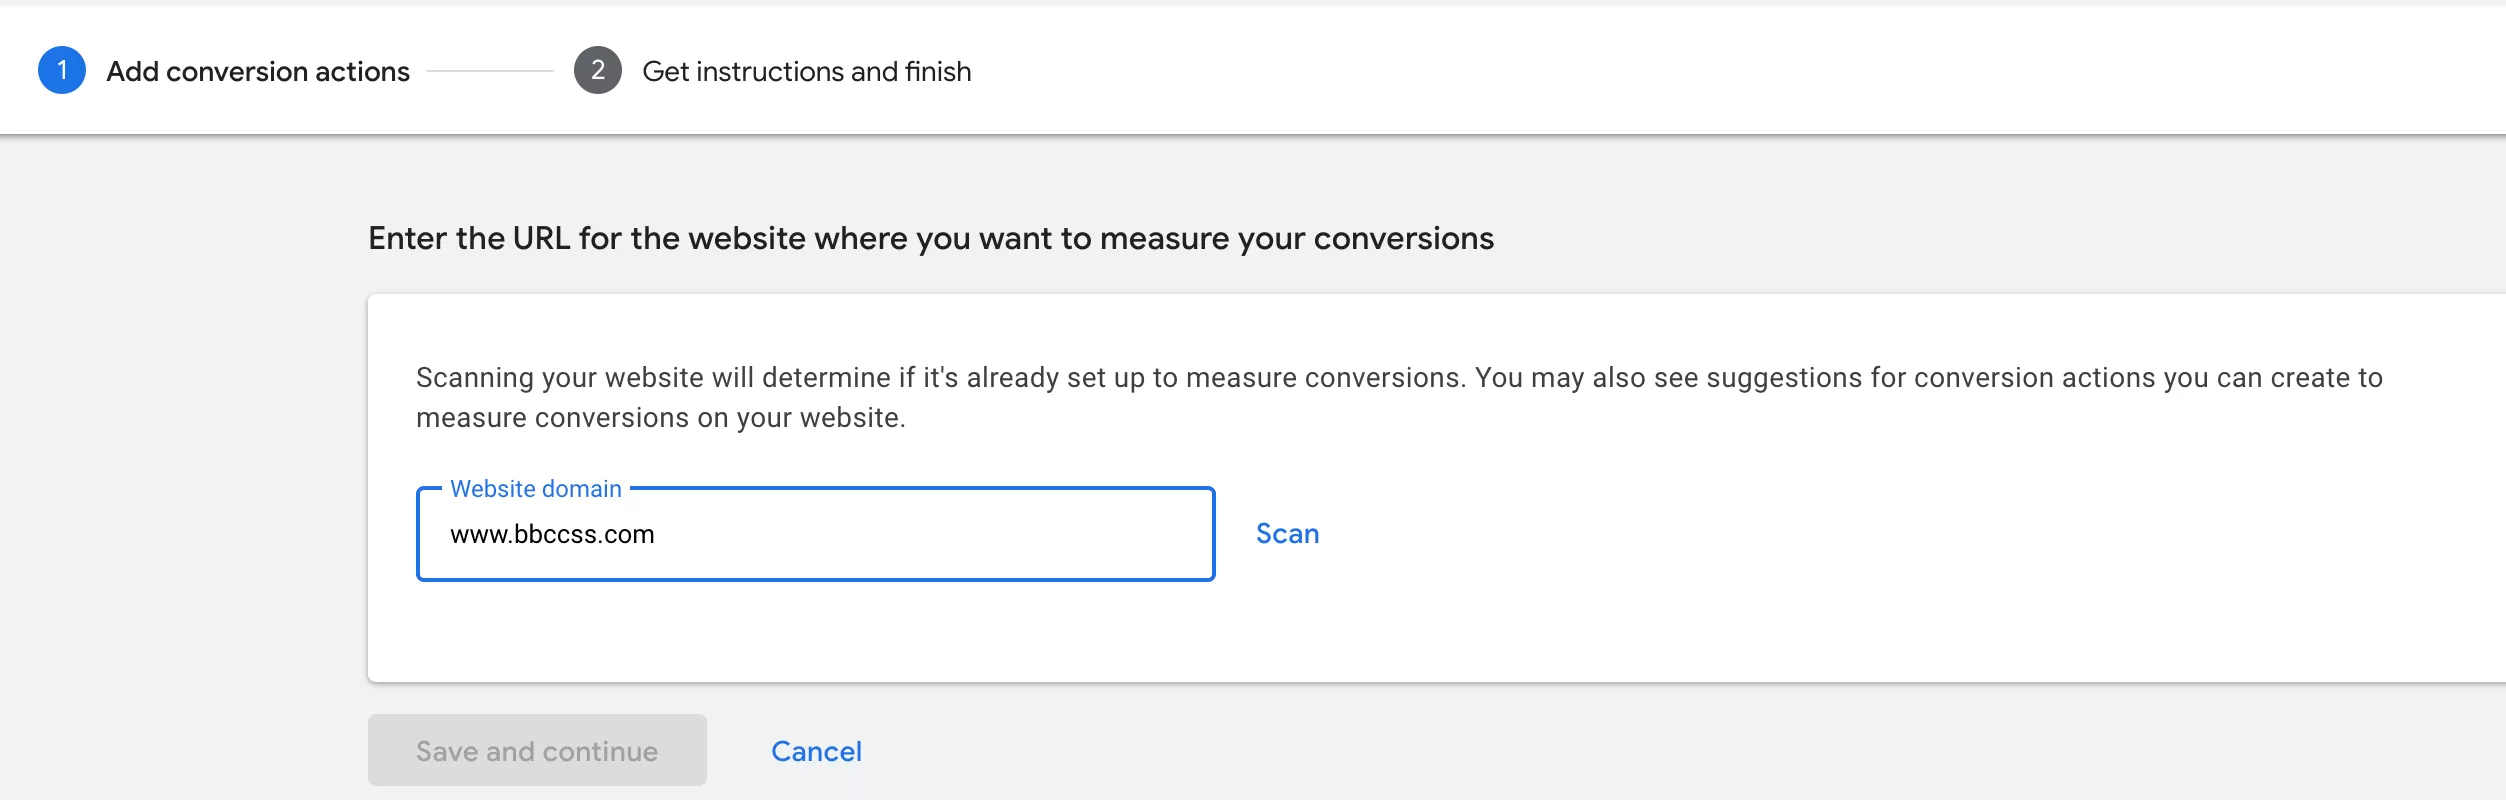
After the scan, you’ll see two options for creating the conversion action:
- Create conversion actions from Web and App events
- Create conversion actions manually using code
Pick the second one , click 「+Add a conversion action manually」
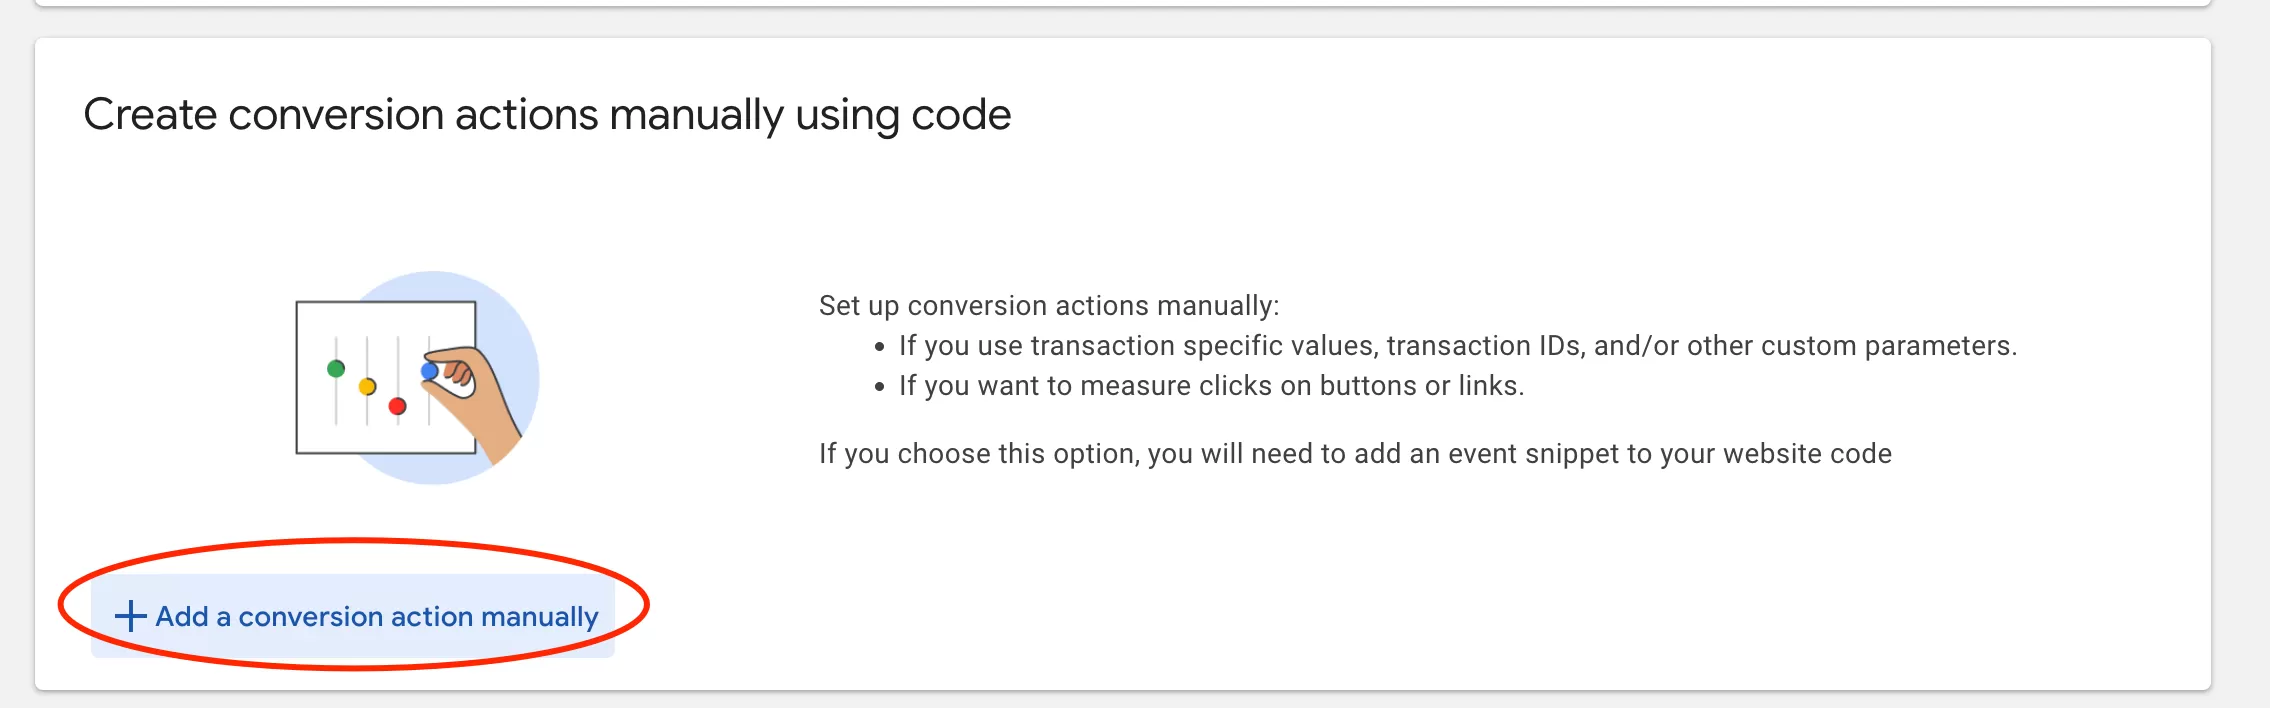
Conversion Action Details
The Conversion action details settings will be displayed:
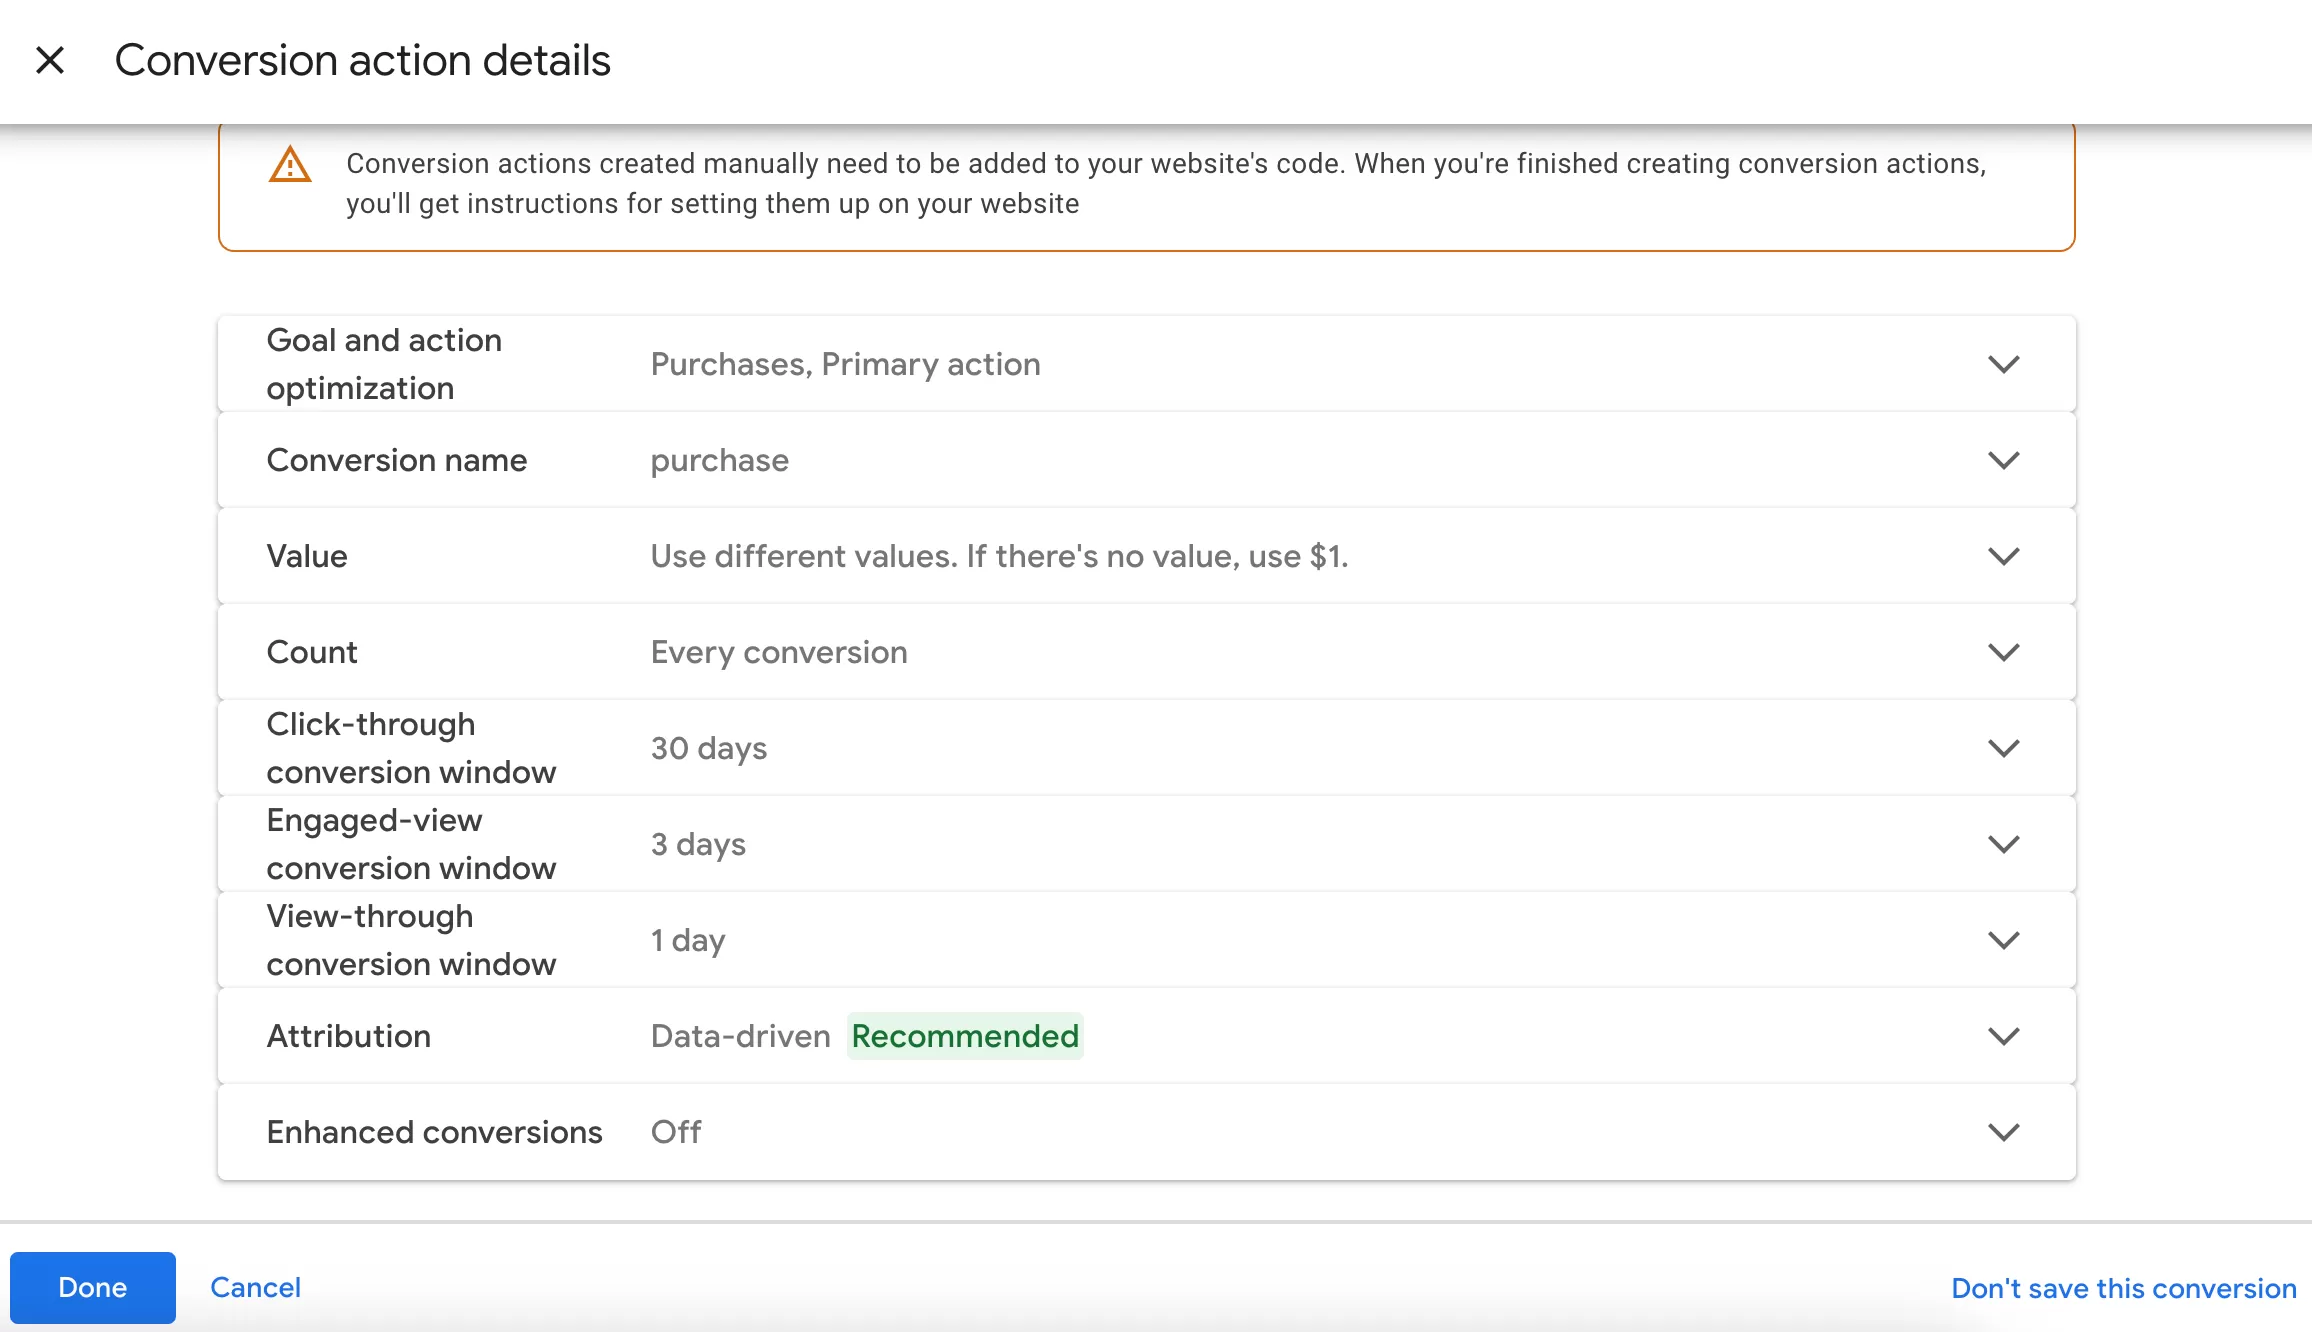
Once everything looks good, click 「Done」——「Save and continue」.
Get Your Conversion ID and Conversion Label
On the next screen, choose 「Use Google Tag Manager」as your setup method,Google will show you the Conversion ID and Conversion Label:
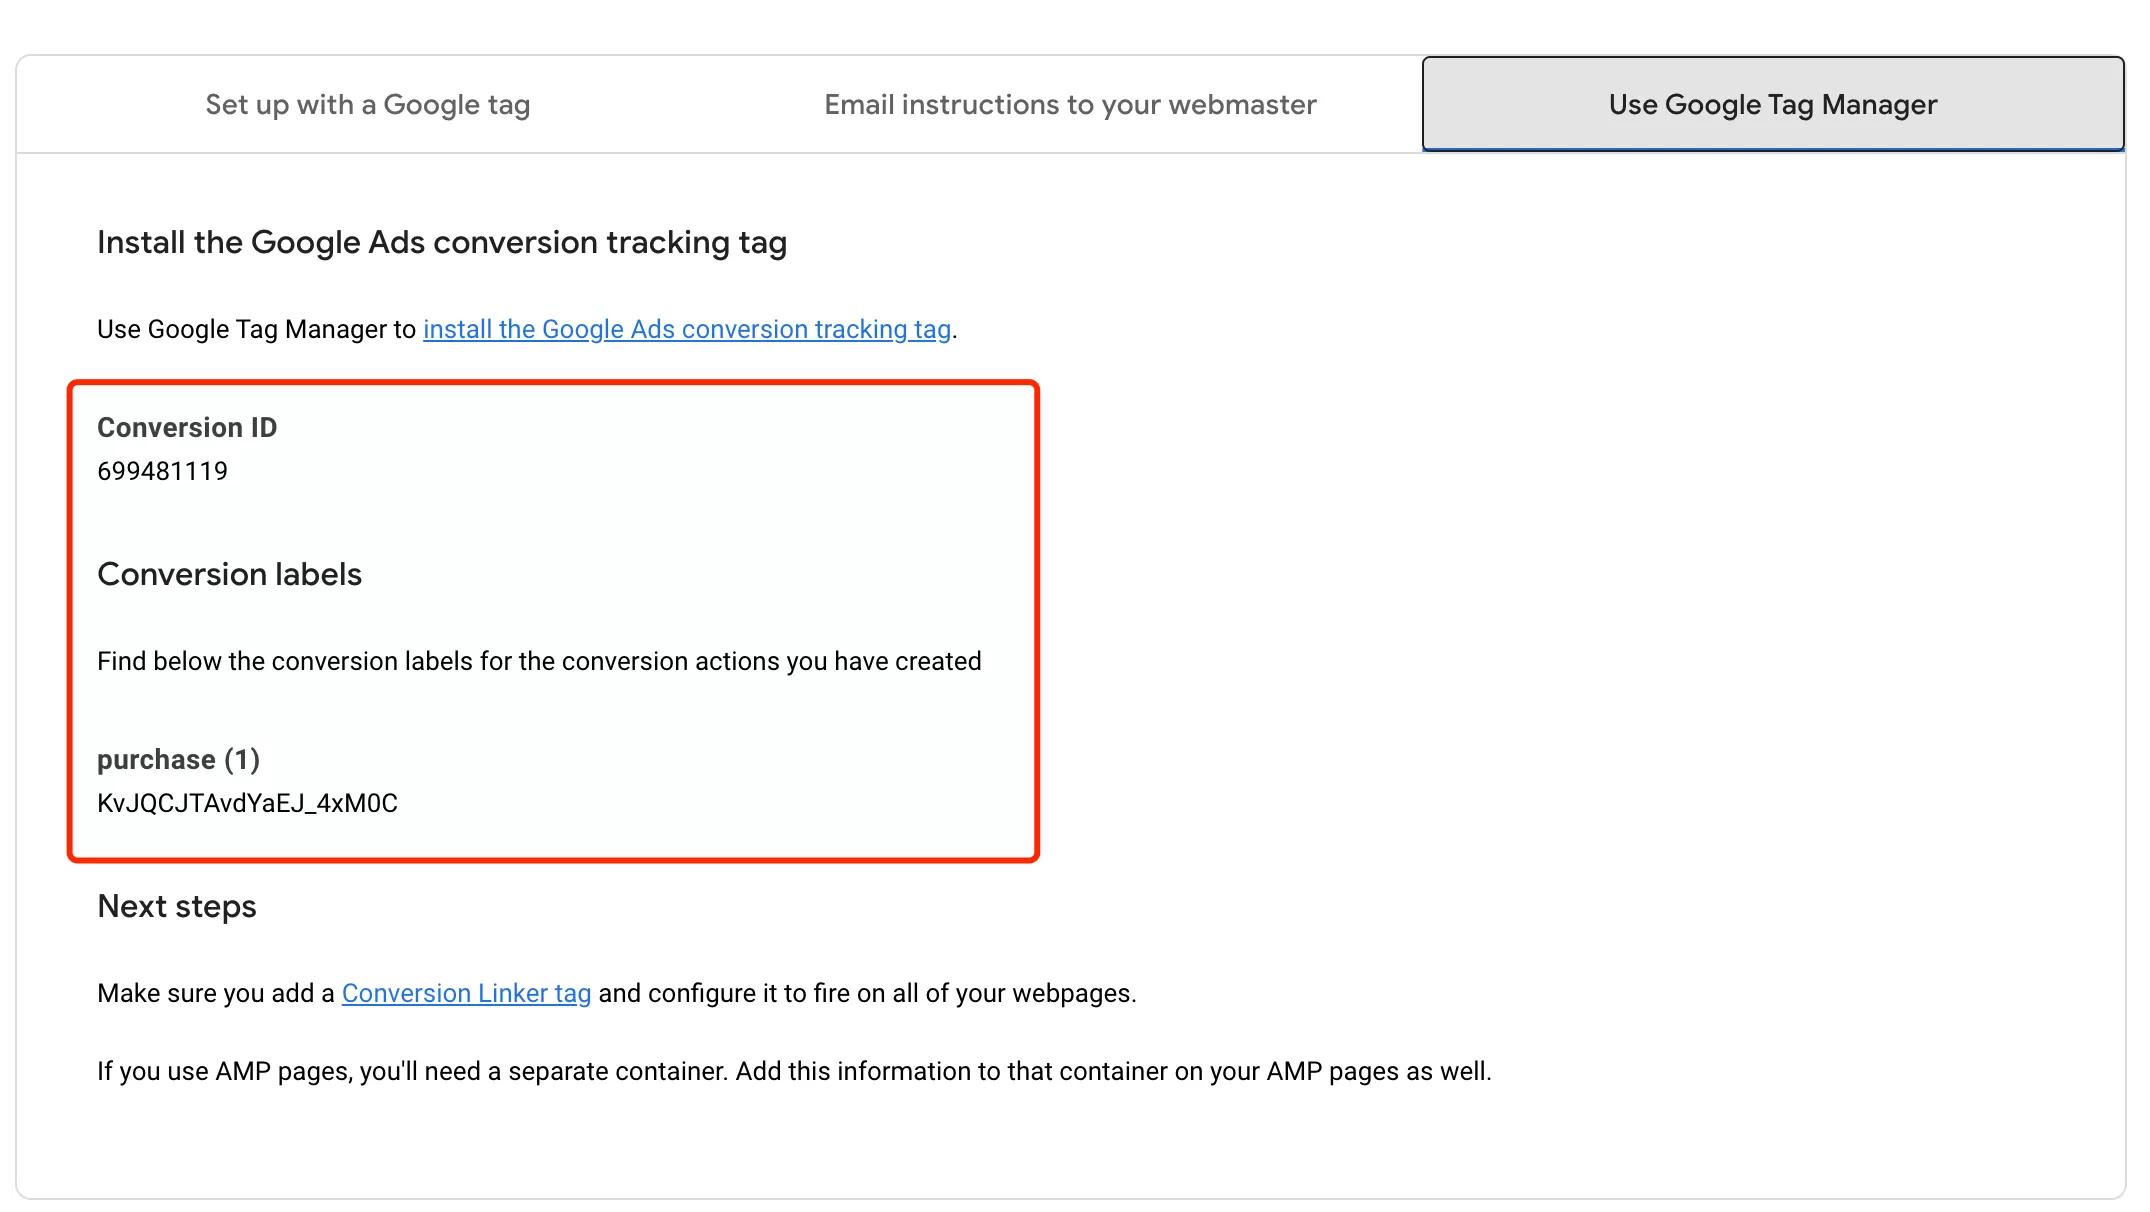
Save these somewhere, because you’ll need them in GTM in a moment.
Step 2: Configure the Conversion Linker Tag in GTM
Here’s something that trips up a lot of people: if the Conversion Linker tag isn’t firing, your conversions won’t be attributed properly. Conversion Linker creates a Google Ads cookie on the user’s browser so Google knows which ad click led to the conversion.
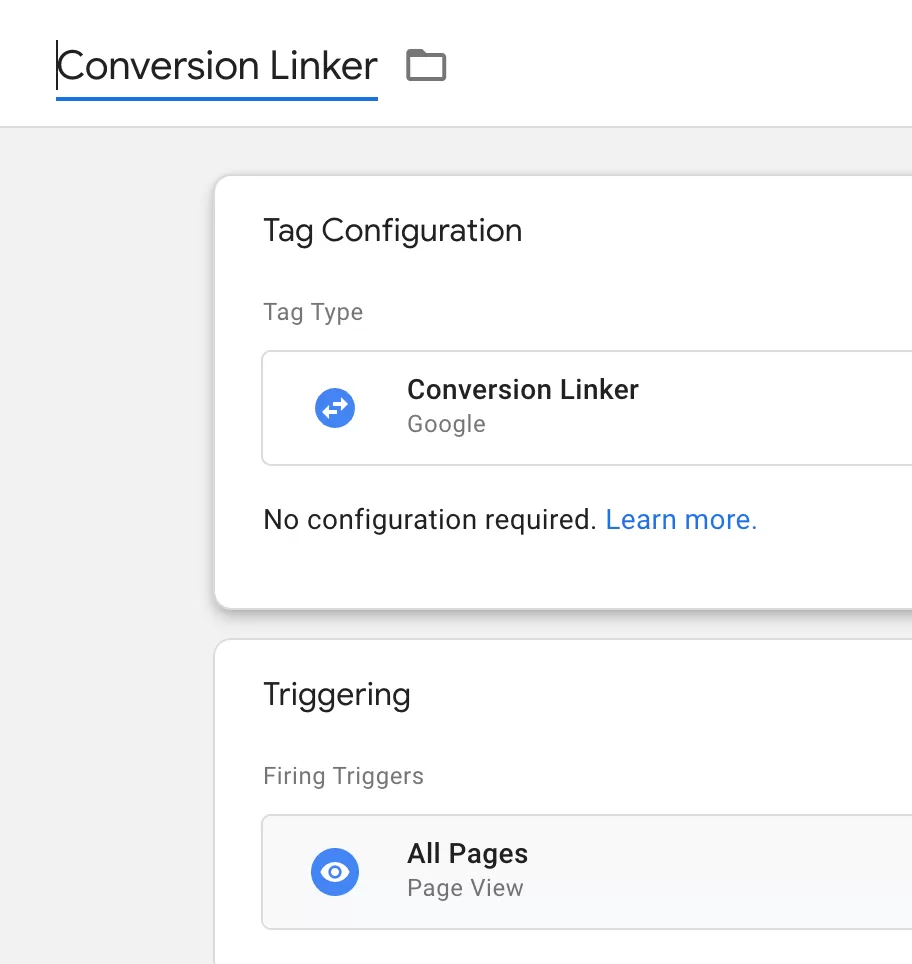
If you already have a Conversion Linker tag running on all pages, skip this step. If you’re not sure, here’s how to set it up:
In GTM,click 「Tags」——「New」——「Choose a tag type to begin setup…」in GTM, and then search for “Conversion Linker”:
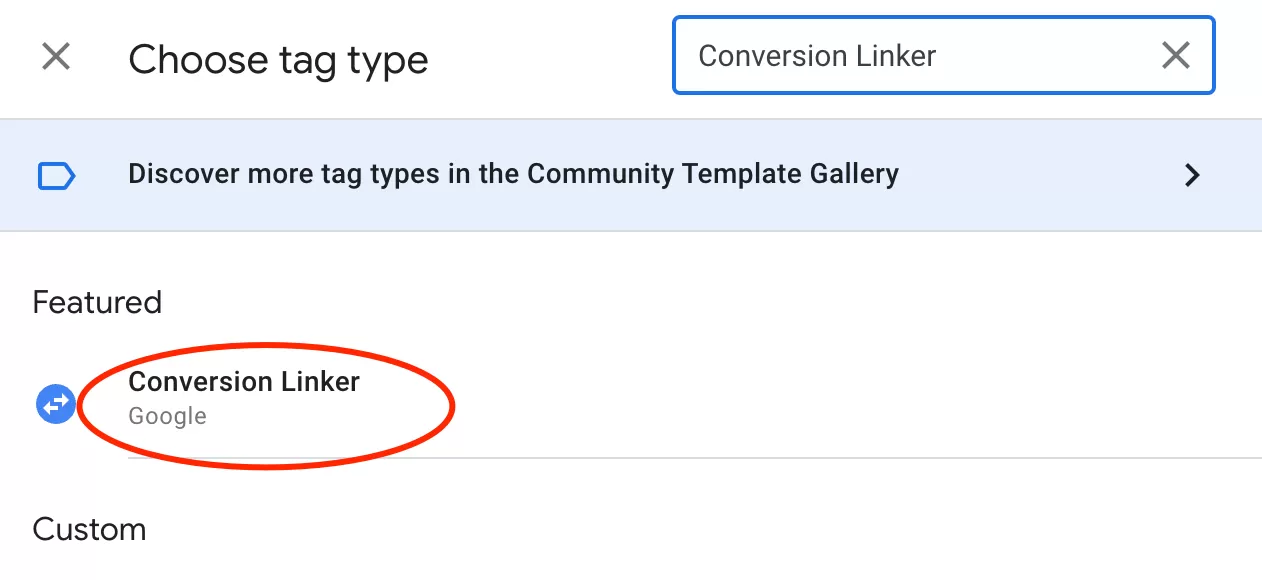
Click to install it and select All Pages as the Triggers:
Step 3: Set Up the Google Ads Conversion Tag
Now the main event. This involves two parts: creating the trigger and creating the tag.
Create the Trigger
In GTM , click「Triggers」——「New」——「Choose a trigger type to begin setup…」——「Custom Event」,Name it “purchase”, and make the following settings:
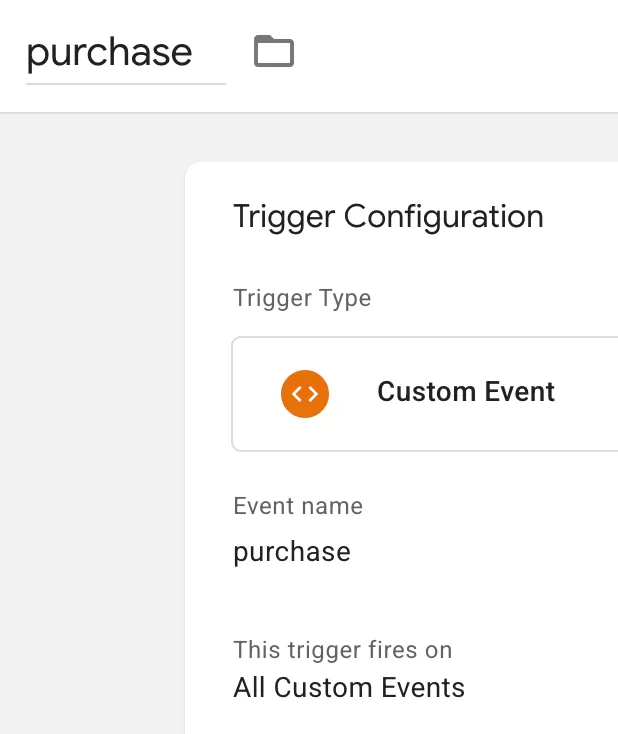
Set the Event name to purchase (must match the event name your data layer pushes).
Create the Tag
In GTM , click「Tags」——「New」——「Choose a tags type to begin setup…」——「Google Ads」——「Google Ads Conversion Tracking」,Name it “Google Ads Conversion-Purchase”, and make the following settings:
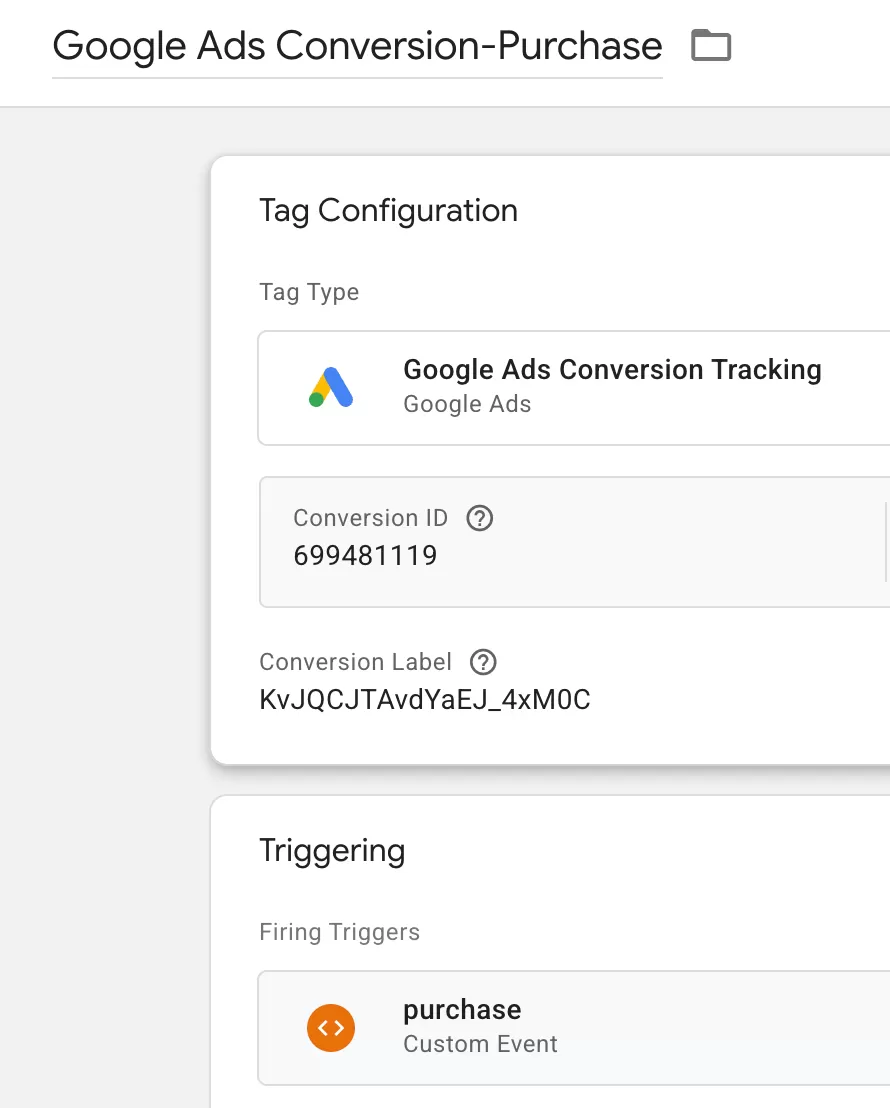
If necessary, you can also pass the order ID and order amount.
Step 4: Preview and Test
Before publishing, always preview. In GTM, click Preview, go to your website, and complete a purchase. You should see the Conversion Linker tag fire on page load and the Google Ads conversion tag fire on the purchase event.
If everything looks good, publish your container.
Final Words
Setting up Google Ads conversion tracking through GTM isn’t complicated, but it’s easy to miss a step — especially the Conversion Linker, which people often forget. I’ve seen setups where every tag is configured perfectly but conversions are underreported just because the linker wasn’t there.
So here’s a quick sanity check before you publish:
- Is your Conversion Linker tag firing on all pages?
- Does your conversion trigger match the exact event name from your data layer?
- Did you paste the right Conversion ID and Conversion Label?
If you answered yes to all three, you’re good.