If you’ve ever tried to track email opens in GA4, you might have run into a frustrating wall. Here’s the thing — an email can load images just fine, but it can’t run JavaScript or send POST requests to the GA4 Measurement Protocol endpoint. So how do you get that data into GA4?
That’s where a lightweight bridge comes in. In this guide, you’ll learn how to build a simple email open tracking system using a 1×1 pixel, Cloudflare Workers, and the GA4 Measurement Protocol.
What You Need to Know First
In this tutorial, I assume you have:
- A Google Analytics 4 property with at least one data stream
- A Cloudflare account (free tier works perfectly)
- Optional: your own domain name if you want a custom Worker URL
How email tracking works in GA4
GA4 Measurement Protocol allows you to send events directly to GA4 from a server, without relying on gtag.js or a browser. That’s great — but email tracking is a different beast altogether.
An email can only load resources such as images. It can’t execute JavaScript or send the POST requests that the GA4 Measurement Protocol endpoint requires. So the old browser-based tracking approaches just don’t work here.
Here’s the solution: use a Cloudflare Worker as a lightweight bridge.
Email Tracking Pixel → Cloudflare Worker → GA4 Measurement Protocol → GA4 Event
When someone opens your email, the email client loads a tiny invisible image. That request hits your Cloudflare Worker, which forwards the event to GA4. Simple, right?
Step 1: Create a GA4 Measurement Protocol API Secret
Before you can send anything, you need an API Secret. Here’s how to create one:
- Step 1:Go to your GA4 property and navigate to 「Data Streams」
- Step 2:Select the data stream you want to send data to
- Step 3:Scroll down to 「Measurement Protocol API Secrets」 and click it
- Step 4:Click 「Create」 in the top-right corner
That’s it. You’ll get something that looks like this:
rMu_1piLSBahnqpSa-ItLw
Along with your Measurement ID (the G-XXXXXXXXXX identifier), this is all you need to authenticate your requests.
A quick note on user identification: if you want the data to be associated with existing users, you’ll also need to pass a Client ID (from the _ga cookie) or a User ID (if your users are logged in). More on that in Step 4.
Step 2: Create a Cloudflare Worker
Now that you have your GA4 Measurement ID and Measurement Protocol API Secret, the next step is to create a Cloudflare Worker that will receive email tracking requests and forward them to GA4.
Here’s how to create one:
- Step 1: Go to your Cloudflare Dashboard and navigate to「Computer」 ——「Workers & Pages」
- Step 2: Click 「Create application」 in the top-right corner
- Step 3: Select 「Create Worker」
- Step 4: Give your Worker a name, for example:
ga4-email-tracking- Step 5: Click 「Deploy」
That’s it. Cloudflare will create a Worker with a default URL that looks like this:
https://ga4-email-tracking.haran-huang.workers.dev/By the way… You can customize this endpoint to your own domain name in the Domains section of Workers & Pages. I’d recommend doing this if you want a cleaner, more professional-looking tracking URL.
Step 3: Add GA4 Credentials as Environment Variables
In Workers & Pages,go to「Settings」——「Variables and Secrets」——「→ Add variable」,Create these two variables:
| Variable Name | Type | Value |
|---|---|---|
GA4_MEASUREMENT_ID |
Environment Variable | G-XXXXXXXXXX |
GA4_API_SECRET |
Secret Variable | Your Measurement Protocol API Secret |
Here’s the final effect:
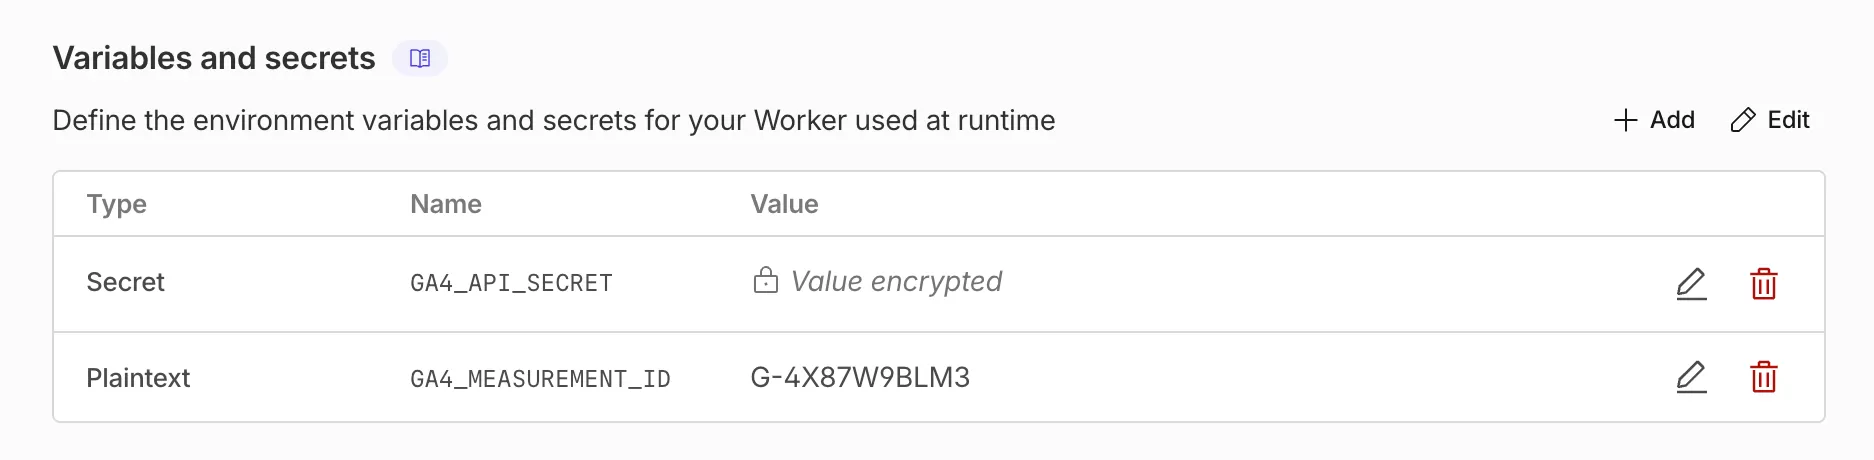
Your Worker will access these values through env.GA4_MEASUREMENT_ID and env.GA4_API_SECRET. Simple and secure.
Step 4: Add Query Parameters to Your Worker URL
Your Cloudflare Worker now has its own URL:
https://ga4-email-tracking.haran-huang.workers.dev/This URL is the endpoint that will receive your email tracking requests.
To send data to GA4, you need to append query parameters to the Worker URL.
The format is:
https://ga4-email-tracking.haran-huang.workers.dev/?cid=633061848.1784083639&en=email_openReplace:
ga4-email-tracking.haran-huang.workers.devwith your actual Worker URLclient_id=12345with the GA4 Client ID you want to associate with the eventevent=email_openwith the GA4 event name you want to send
Step 5: Add the Worker Code
In Workers & Pages,go to「Edit code」,and add the following code:
This code retrieves the necessary parameters from the Worker URL and sends them to GA4 via the Measurement Protocol. Notice that I’m also including some default parameters (source: "email", medium: "email") so you can easily segment this data in your GA4 reports.
Step 6: Use the Worker URL as an Email Tracking Pixel
Now embed your Worker URL into your HTML email as an invisible tracking pixel:
<img
src="https://ga4-email-tracking.haran-huang.workers.dev/?cid=633061848.1784083639&en=email_open"
width="1"
height="1"
style="display:none;"
alt=""
>- The email client loads the image.
- The request is sent to your Cloudflare Worker.
- The Worker sends an
email_openevent to GA4 using Measurement Protocol.
Important note: Some email clients block images by default (looking at you, Outlook and Gmail). This means your tracking won’t fire if images are disabled. That’s an inherent limitation of pixel-based tracking, not something unique to this approach.
Step 7: Verify Email Tracking
Once everything is set up, here’s how to verify it’s working
1、Open the email on a device or client that loads images
2、Check Cloudflare Worker logs — you should see the request being received

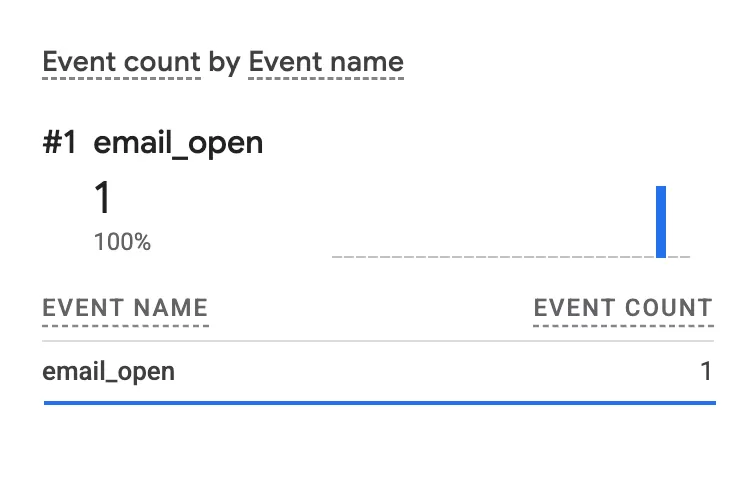
3、Check GA4 Real Time Report — you should see your email_open event pop up
Final Words
The core idea behind email open tracking in GA4 is deceptively simple: embed a collect request in an invisible image, focus on the three fields that actually matter (cid, en), and let GA4 do the rest.
This approach is lightweight, practical, and perfectly suitable for basic email engagement measurement. It won’t replace a dedicated email analytics platform (like Mailchimp or SendGrid’s built-in analytics), and honestly, it shouldn’t. But if you need to track email opens in GA4 and you need it done today — it gets the job done.


